2000 Mustang GT BBF Drag Week Build
+3
dirt_worker
gmsmkr
frank13
7 posters
Page 1 of 1
 2000 Mustang GT BBF Drag Week Build
Building a new car to get ready for this years Drag week. (on the wait list but near the top of it)
Starting with new to me car:


Got the car home and after some more exploration realized it needed some love. a lot of love.
Pulled the carpet and found this happiness:
just some surface rust.

A little wire brush and some paint to clean it up for now:

Some new parts to throw at it
Double adjustable rears:

Single adjust fronts (same as on the car but these haventbeen used.

old brakes

test fit the new ones with the wheels

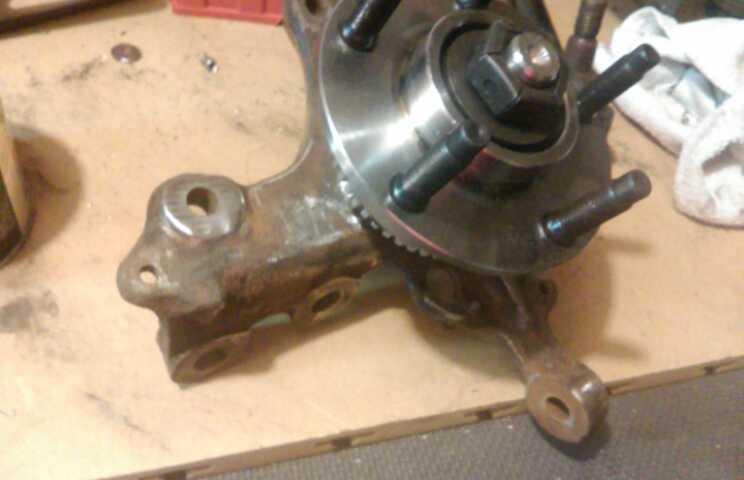
cleaning up the old spindles with new hubs. going to be black powder coat sans backing plate
8.50 cert on the cage

wire harness, old master, all brake lines, and new mounts for radiator needed to go:

bye bye chopped up harness

Jegs seat brackets for kirkey seats test fitting (little filing needed):

they look nicer than the stock cobraseats:

power with go through the powerglide

Yup BBF motor, shortblock being started

Painted the cage (firewall forward) with Hammered paint. Damn blue tarp makes it seem like i missed half the car! LOL


First day of wiring. Taking a little longer than anticipated since the window and door locks were a last minute undertaking. No matter how hard I tried, I could not get the factory system working. Oh well, just going to make it work directly from each component and wire from there to new relays and switches. I think i Have a plan to make it look factory.
So far I have the headlight,front parking, and front turns ran to the dash (not terminated into the relay panel yet). I will be using the Bussman RTMR relay panels for the chassis harness (lights, windows, trunk popper, ect) and an ARC 8000 for engine stuff (fans, water, starter, ignition, fuel, trans cooler fan)
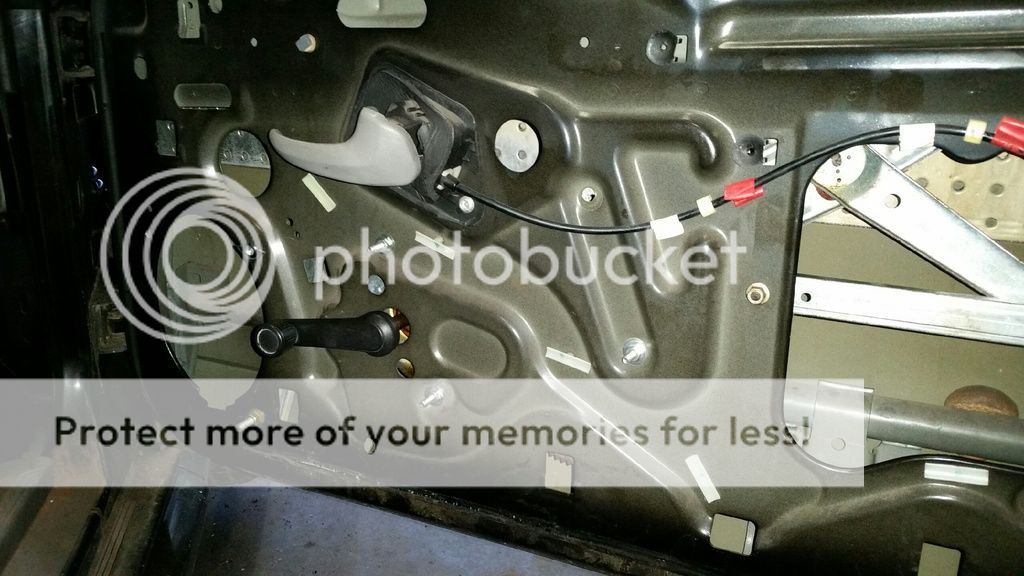
Protective loom even in the door! Got rid of the entire factory harness in the doors, rewires the locks and windows (just cause)

Headlight harness- passenger side. DT connectors, abrasion protection, and dual wall shrink wrap.

Drivers Side - same connectors as passenger side- you can see the grounds- will be fully bolted to a ground lug attached to the frame rails


One window down! One to go!

Using the Bussman Fuse and relay blocks to get everything terminated. I probably could have used a couple less connectors but I wanted things to be able to be serviced or added on to easy.
Bussman relay panel:

Turn signal switch repinned for the DT connector. I am not using the wiper side, nor am I am using the high beam wiring, although I left the ability later on.

The backside of the Bussman panel- the Fuse side is bussed possitive, the relay side is bussed on the negative terminal. Really easy to wire up.

Just the harnesses from the Bussman switch side and the Power/output side. I loomed it all and used shrink wrap on the ends.

Headlight harness from the switch to the front of the car. The red and white wire(inline brake switch wire) will be loomed with the wire from the line lock once they are in place.

The whole kit minus the rear of the harness. I probably have 4 days into this easy (i kept redoing it till I was happy with it) Could probably make another in a day using this as a template.

Little video of bench testing it. Finally getting the lights to work off the factory switch.
https://vid455.photobucket.com/albums...pse7dhis1i.mp4
Starting with new to me car:


Got the car home and after some more exploration realized it needed some love. a lot of love.
Pulled the carpet and found this happiness:
just some surface rust.

A little wire brush and some paint to clean it up for now:

Some new parts to throw at it
Double adjustable rears:

Single adjust fronts (same as on the car but these haventbeen used.

old brakes

test fit the new ones with the wheels

cleaning up the old spindles with new hubs. going to be black powder coat sans backing plate

8.50 cert on the cage

wire harness, old master, all brake lines, and new mounts for radiator needed to go:

bye bye chopped up harness

Jegs seat brackets for kirkey seats test fitting (little filing needed):

they look nicer than the stock cobraseats:

power with go through the powerglide

Yup BBF motor, shortblock being started

Painted the cage (firewall forward) with Hammered paint. Damn blue tarp makes it seem like i missed half the car! LOL


First day of wiring. Taking a little longer than anticipated since the window and door locks were a last minute undertaking. No matter how hard I tried, I could not get the factory system working. Oh well, just going to make it work directly from each component and wire from there to new relays and switches. I think i Have a plan to make it look factory.
So far I have the headlight,front parking, and front turns ran to the dash (not terminated into the relay panel yet). I will be using the Bussman RTMR relay panels for the chassis harness (lights, windows, trunk popper, ect) and an ARC 8000 for engine stuff (fans, water, starter, ignition, fuel, trans cooler fan)
Protective loom even in the door! Got rid of the entire factory harness in the doors, rewires the locks and windows (just cause)

Headlight harness- passenger side. DT connectors, abrasion protection, and dual wall shrink wrap.

Drivers Side - same connectors as passenger side- you can see the grounds- will be fully bolted to a ground lug attached to the frame rails


One window down! One to go!

Using the Bussman Fuse and relay blocks to get everything terminated. I probably could have used a couple less connectors but I wanted things to be able to be serviced or added on to easy.
Bussman relay panel:

Turn signal switch repinned for the DT connector. I am not using the wiper side, nor am I am using the high beam wiring, although I left the ability later on.

The backside of the Bussman panel- the Fuse side is bussed possitive, the relay side is bussed on the negative terminal. Really easy to wire up.

Just the harnesses from the Bussman switch side and the Power/output side. I loomed it all and used shrink wrap on the ends.

Headlight harness from the switch to the front of the car. The red and white wire(inline brake switch wire) will be loomed with the wire from the line lock once they are in place.

The whole kit minus the rear of the harness. I probably have 4 days into this easy (i kept redoing it till I was happy with it) Could probably make another in a day using this as a template.

Little video of bench testing it. Finally getting the lights to work off the factory switch.
https://vid455.photobucket.com/albums...pse7dhis1i.mp4
 Re: 2000 Mustang GT BBF Drag Week Build
I did all this the first go around with mine also. now I have manual windows and blinkers on a toggle switch my head lights on the factory switch I took another 5lbs out of mine with the new wiring almost 25lbs out going to manual windows.
Looking good
Looking good

gmsmkr- Posts : 1364
Join date : 2014-06-22
Location : alabama
 Re: 2000 Mustang GT BBF Drag Week Build
Great lookin project! Cant wait to see the finished product 

dirt_worker- Posts : 535
Join date : 2009-04-03
 Re: 2000 Mustang GT BBF Drag Week Build
gmsmkr wrote:I did all this the first go around with mine also. now I have manual windows and blinkers on a toggle switch my head lights on the factory switch I took another 5lbs out of mine with the new wiring almost 25lbs out going to manual windows.
Looking good
what year car?
 Re: 2000 Mustang GT BBF Drag Week Build
Same Gen as yours, looking good nice to see more BBF's representing at Drag Week!
FalconEh- Posts : 1448
Join date : 2014-08-21
Location : on the blacktop or in the mountains ????
 Re: 2000 Mustang GT BBF Drag Week Build
frank13 wrote:gmsmkr wrote:I did all this the first go around with mine also. now I have manual windows and blinkers on a toggle switch my head lights on the factory switch I took another 5lbs out of mine with the new wiring almost 25lbs out going to manual windows.
Looking good
what year car?
2000

gmsmkr- Posts : 1364
Join date : 2014-06-22
Location : alabama
 Re: 2000 Mustang GT BBF Drag Week Build
My build is on here under mustang picsfrank13 wrote:got any pics?

gmsmkr- Posts : 1364
Join date : 2014-06-22
Location : alabama
 Re: 2000 Mustang GT BBF Drag Week Build
Out of curiosity. Where did you get the manual stuff????
Only place I saw it was over 300 bucks.
Only place I saw it was over 300 bucks.
 Re: 2000 Mustang GT BBF Drag Week Build
From 94-98 mustang v6 from junk yard it was 10$ ea for the internals.....
What we have are called new edge chassis but they are known as a sn chassis if that makes sense so any part from 79-04 will work with out alot of mods
My car has a fox rear width and all with the all fox internals which narrowed it by 2"s I have post on regarding all the mods for our chassis if you need any help just ask I will post more

gmsmkr- Posts : 1364
Join date : 2014-06-22
Location : alabama
 Re: 2000 Mustang GT BBF Drag Week Build
Have done DW a couple times with a 460 Ford had a blast... I'm on the waiting list also see you at DW
quick 52- Posts : 612
Join date : 2011-01-14
Age : 73
Location : leonard mi.
 Re: 2000 Mustang GT BBF Drag Week Build
looking good Frank did you sale your other car
69F100- BBF CONTRIBUTOR

- Posts : 5386
Join date : 2009-01-04
Age : 57
Location : Irwinville Ga.
 Re: 2000 Mustang GT BBF Drag Week Build
Ok, so to leave well enough alone is not my thing. I have looked through every wiring thread known to man and decided to make a cosmetic change. Along with that change was an order to DelCity for some finishing touches on the panel and the power distribution. Now once the panel is bolted in I can leave it in and keep the battery hooked up so I can open the windows and pop the trunk (putting the windows down makes moving the car easier by myself)
FIrst off some supplies. 4 gauge power wire for the starter and to the panel. Some 6gauge for floating grounds for. Along with some different sized lugs and boots for safety. Picked up a couple pass through for the firewall.

Nice and flexible wires!


Now for some small changes. I used two plugs for the input and outputs of the panel. Well, I was not always happy with them floating around, even when tied to the panel. SO I decided to step up to the Duestche HDP-20 panel mount connectors. Simple change but i think it will be worth it in the end as I will be happier. Even got some boots to make it all pretty. I didn't use Raychem for this stuff as I think I may add nitrous in the near future and wanted to be able to make a simple change to the harness.

Connectors and more connectors. AND boots!!!!

Little close up!

I just think this works better and looks better, and we all know if you can not be fast, you better look good!

SO the goal is to have this permanently mounted this week. Get the engine in and then run the wire and stuff for that!
FIrst off some supplies. 4 gauge power wire for the starter and to the panel. Some 6gauge for floating grounds for. Along with some different sized lugs and boots for safety. Picked up a couple pass through for the firewall.

Nice and flexible wires!


Now for some small changes. I used two plugs for the input and outputs of the panel. Well, I was not always happy with them floating around, even when tied to the panel. SO I decided to step up to the Duestche HDP-20 panel mount connectors. Simple change but i think it will be worth it in the end as I will be happier. Even got some boots to make it all pretty. I didn't use Raychem for this stuff as I think I may add nitrous in the near future and wanted to be able to make a simple change to the harness.

Connectors and more connectors. AND boots!!!!

Little close up!

I just think this works better and looks better, and we all know if you can not be fast, you better look good!

SO the goal is to have this permanently mounted this week. Get the engine in and then run the wire and stuff for that!
 Re: 2000 Mustang GT BBF Drag Week Build
[quote=MrScharfenberger;1543218]Very Nice!! Doing Drag Week would be awesome.
I'm not sure if you got the windows done or not yet but the below info was a post on my build thread. It is a 1993 but perhaps the connectors & wiring stayted the same.[/quote]
Oooooooooooooooh I almost forgot.....Power windows are a go! With the help of a couple YB'ers we finally have success!
Let me leave this video here!
https://www.youtube.com/watch?v=wqLFdmcHkmg
 Re: 2000 Mustang GT BBF Drag Week Build
69F100 wrote:looking good Frank did you sale your other car
Currently its a parts car.
 Re: 2000 Mustang GT BBF Drag Week Build
Nice work it should look clean when completed

gmsmkr- Posts : 1364
Join date : 2014-06-22
Location : alabama
 Re: 2000 Mustang GT BBF Drag Week Build
[quote="frank13"]
Currently its a parts car. [/quot
I see you still got your helper helping you or she into boys and no time to help you any more
69F100 wrote:looking good Frank did you sale your other car
Currently its a parts car. [/quot
I see you still got your helper helping you or she into boys and no time to help you any more

69F100- BBF CONTRIBUTOR

- Posts : 5386
Join date : 2009-01-04
Age : 57
Location : Irwinville Ga.
 Re: 2000 Mustang GT BBF Drag Week Build
So a little change of pace from the wiring. I have decided that to get things finalized with wires and such, I need the shortblock, converter and trans in the car. Sooooooooo down to the tiny tiny space I call the basement.
So I already had the shortblock together, but a change in direction (a 150-250 shot of nitrous) I had to pull it apart and open the ring gap a tad)
The machine shop did all the clearances for me when they fixed the crank and honed the block, but I wanted to double check so out came the plastigage.

dead on at .003

So the crank is spinning nice and smooth!!!!!!!
https://www.youtube.com/watch?v=Ec_TcbZKTOs&feature=youtu.be
Here are some pics of the parts going into the shortblock:


Starting to check the ring gap:


Oh, are you wondering why I dont have video of the shortblock being spun nice and smooth? Well. Here goes:

Oops......Gotta order a set of damn rings now. (yes a set......one ring pack is 32 bucks, a complete set can be had online on sale for 82 bucks. I will just have some spares)
So I already had the shortblock together, but a change in direction (a 150-250 shot of nitrous) I had to pull it apart and open the ring gap a tad)
The machine shop did all the clearances for me when they fixed the crank and honed the block, but I wanted to double check so out came the plastigage.

dead on at .003

So the crank is spinning nice and smooth!!!!!!!
https://www.youtube.com/watch?v=Ec_TcbZKTOs&feature=youtu.be
Here are some pics of the parts going into the shortblock:


Starting to check the ring gap:


Oh, are you wondering why I dont have video of the shortblock being spun nice and smooth? Well. Here goes:

Oops......Gotta order a set of damn rings now. (yes a set......one ring pack is 32 bucks, a complete set can be had online on sale for 82 bucks. I will just have some spares)
 Re: 2000 Mustang GT BBF Drag Week Build
Ok so back to building the shortblock! So I was able to get a set of rings the same day from my engine guy. Crisis averted.
Got everything together and poof I have a complete rotating assembly installed. Or so I thought! I am new to all this stuff so the gents who give me tech advice and talk me through stuff asked about end play and rod clearances.
So feeler gauges come out and viola- we have the correct rod clearnaces! Sweet! Then crank end play. I was at the shop when they redid my crank and installed it in the block and we had the .006 end play, BUT , I do not have it now. No big deal, pull the rods off and check again. Nope. less than .004. Give it a whack after loosening the main caps. Nope. Same. Fast forward to today, and I have an actual dial indicator, some 1000 grit paper, some glass, and hopefully a lot of patience waiting for amazon same day shipping to show up!
I think after 4 hours I have it right.
Just at 6 at full 110ftlbs
That was not fun at all!
https://www.youtube.com/watch?v=SzwbVSVsZ50&feature=youtu.be
Piston and rod reinstall next! For the 103984 time!
Well once I figure out the ARP stud, canton pan, canton windage tray issues.
 Re: 2000 Mustang GT BBF Drag Week Build
And we have a rotating assembly!
Clean bore is a happy bore

Cleaned painted and ready to go!


Cam plate from Lem

Every nut and bolts gets chased! Every thing
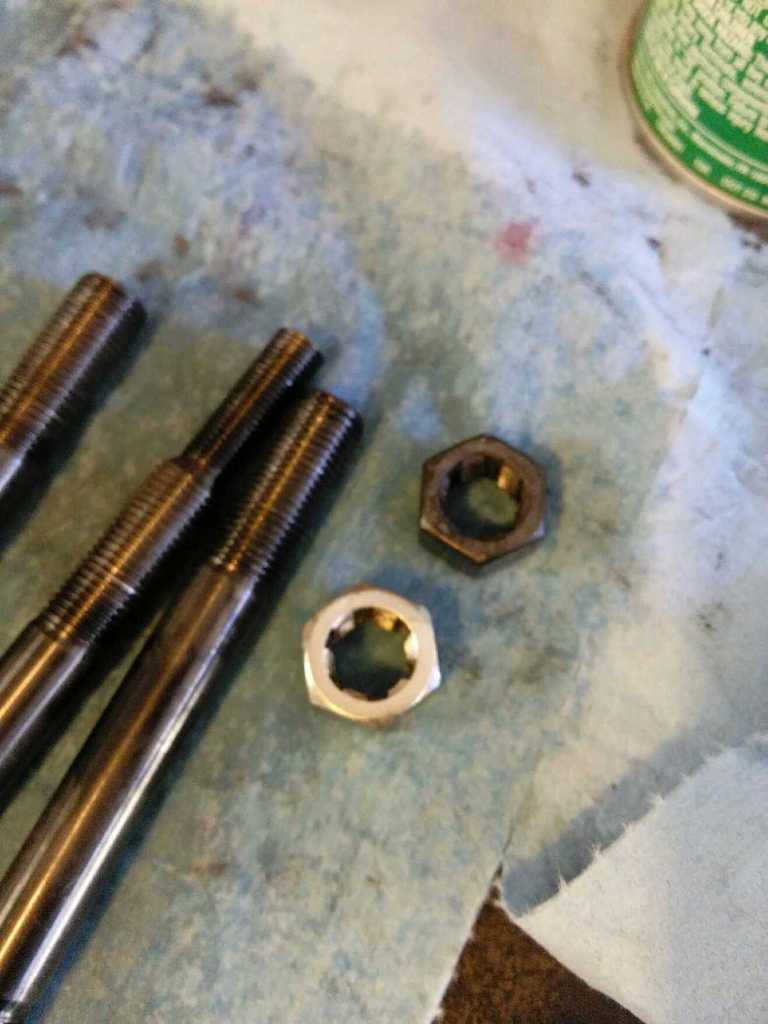
Cleaned, cut, cleaned again.

Clean oil on the threads going into the block

Crank bearings are in

And now have some "blood" on them
 Beep beep beep. We have studs!
Crank is in for the last time I hope


Feeling cappy?

ARP ultra torque. Nice and heavy!

Went through A LOT of lube!

And we are done for tonight. Cant find the damn crank bolt. So i am done for tonight.

Clean bore is a happy bore

Cleaned painted and ready to go!


Cam plate from Lem

Every nut and bolts gets chased! Every thing

Cleaned, cut, cleaned again.

Clean oil on the threads going into the block

Crank bearings are in

And now have some "blood" on them
 Beep beep beep. We have studs!
Crank is in for the last time I hope


Feeling cappy?

ARP ultra torque. Nice and heavy!

Went through A LOT of lube!

And we are done for tonight. Cant find the damn crank bolt. So i am done for tonight.

 Re: 2000 Mustang GT BBF Drag Week Build
Sweet Build!
I assume 466 cubic inches?
SCJ or P51 heads being used?
Looks like a comp solid roller - nitrous grind?
Cheers
I assume 466 cubic inches?
SCJ or P51 heads being used?
Looks like a comp solid roller - nitrous grind?
Cheers

68galaxie- Posts : 351
Join date : 2010-04-13
Location : Edmonton AB
 Re: 2000 Mustang GT BBF Drag Week Build
68galaxie wrote:Sweet Build!
I assume 466 cubic inches? Yup
SCJ or P51 heads being used? Heavily ported SCJ heads.
Looks like a comp solid roller - nitrous grind? Lunati cam. Here is a pic of the cam card:
Cheers
 Re: 2000 Mustang GT BBF Drag Week Build
Windage tray and oi pump final install

Little primer to get rid of the ugly gold canton color

Better!

Timing cover with the same black as the block

Black and SS look great

Black and SS look great

Tomorrow morning it comes off the stand and gets mated to the trans and converter then into the car!

The trans its getting mated to!

Converter installed on the trans


Little primer to get rid of the ugly gold canton color

Better!

Timing cover with the same black as the block

Black and SS look great

Black and SS look great

Tomorrow morning it comes off the stand and gets mated to the trans and converter then into the car!

The trans its getting mated to!

Converter installed on the trans

 Re: 2000 Mustang GT BBF Drag Week Build
Ok, so pushrods are measured up and get ordered on Monday,


Ended up with a 9.250 exhaust and a 9.1 intake.......................


Ended up with a 9.250 exhaust and a 9.1 intake.......................
 Similar topics
» Drag Week Big Block Mustang
» Drag Week Turbo 460 Comet Build
» 1979 Ford F150 Drag Week Build
» drag week
» Anyone going to Drag Week?
» Drag Week Turbo 460 Comet Build
» 1979 Ford F150 Drag Week Build
» drag week
» Anyone going to Drag Week?
Page 1 of 1
Permissions in this forum:
You cannot reply to topics in this forum
