1932 Ford Coupe Project
+27
DFI429
Dark Horse of Apocalypse
Dave C.
jbozzelle
Mike R
whatbumper
STHAZLET
61coon
darren
cletus66
Tommyj466
John Myrick
goinpostal
Bigshank
KY JELLY
665 falcon
512Fairlane
dfree383
bbf-falcon
Barney
342g
bruno
cool40
billandlori
GT300TD
56Tbird
patfromjersey
31 posters
Page 3 of 5
Page 3 of 5 •  1, 2, 3, 4, 5
 Re: 1932 Ford Coupe Project
Big n littles.......  THAS WUT AM TALKIN BOUT !!!

cletus66- Posts : 865
Join date : 2009-08-08
Age : 58
Location : Charles City, Virginia
 Re: 1932 Ford Coupe Project
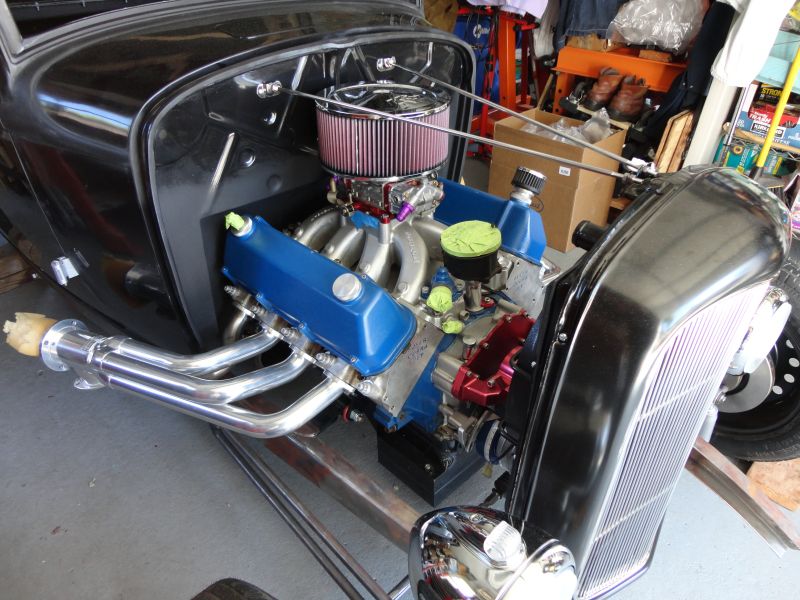
The Coupe finally has eyes...

Here's some pics with the new K&N 11x5 air cleaner....


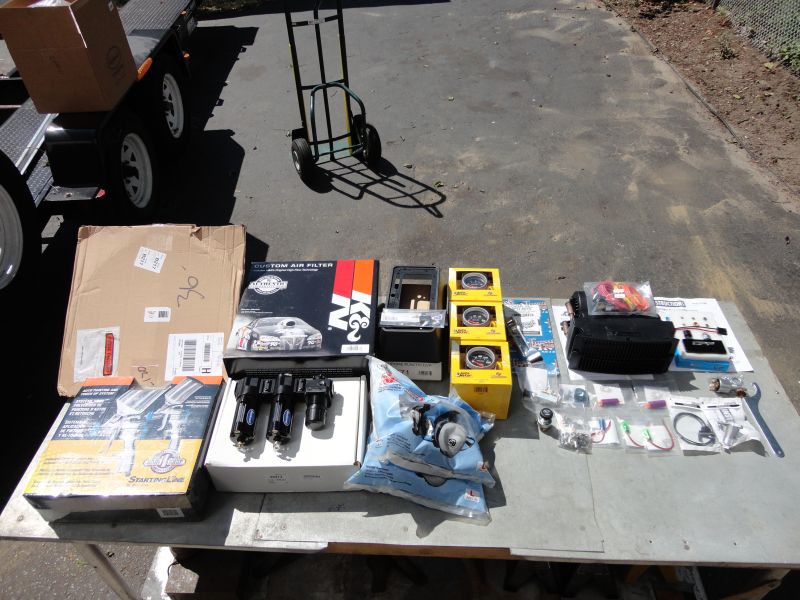
Here's all the parts that came in...
Making holes for the 5" Auto Meter Speedometer and Tach. I forgot my Dremel to finish it off, so I will post again tomorrow when I'm all done. I have a hole saw for the 2 5/8 gauges, and a unibit for the other switches and bulbs for the dash.

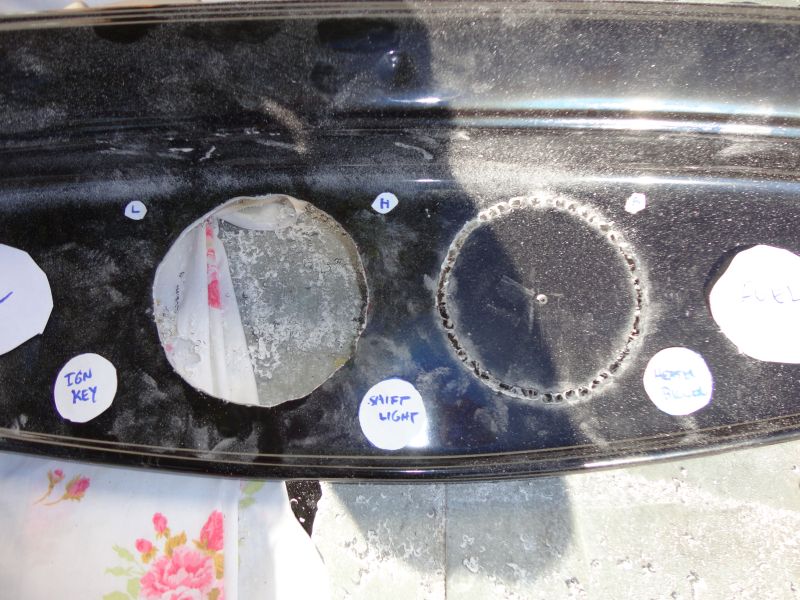
After I make all the holes, I'm going to paint it, and than re-install everything and wire it. I'm going to have a plug in harness for all of it, so I can unplug and remove the dash when I have to. What a beautiful day to be working on the car today.

Here's some pics with the new K&N 11x5 air cleaner....


Here's all the parts that came in...

Making holes for the 5" Auto Meter Speedometer and Tach. I forgot my Dremel to finish it off, so I will post again tomorrow when I'm all done. I have a hole saw for the 2 5/8 gauges, and a unibit for the other switches and bulbs for the dash.


After I make all the holes, I'm going to paint it, and than re-install everything and wire it. I'm going to have a plug in harness for all of it, so I can unplug and remove the dash when I have to. What a beautiful day to be working on the car today.
patfromjersey- BBF CONTRIBUTOR

- Posts : 408
Join date : 2009-08-11
Age : 58
Location : Glen Burnie, MD
 Re: 1932 Ford Coupe Project
I have a set of the start-line spray guns and for the price of them , they work well

darren- Posts : 64
Join date : 2011-09-14
 Re: 1932 Ford Coupe Project
Thanks guys! Darren, you're the second guy to tell me that these guns are pretty good. I'm not a painter by any means, but I want to learn on all our chassis and small parts. I'm having someone that knows what they're doing paint the body. 
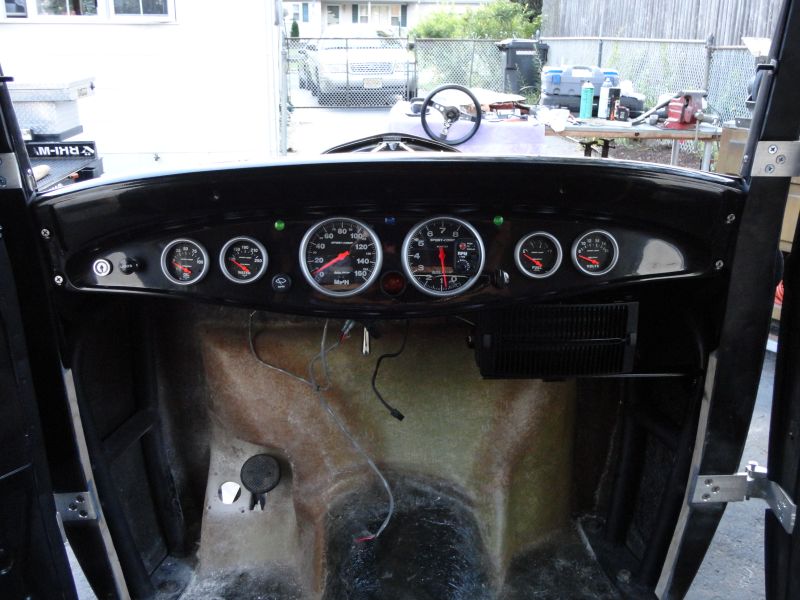
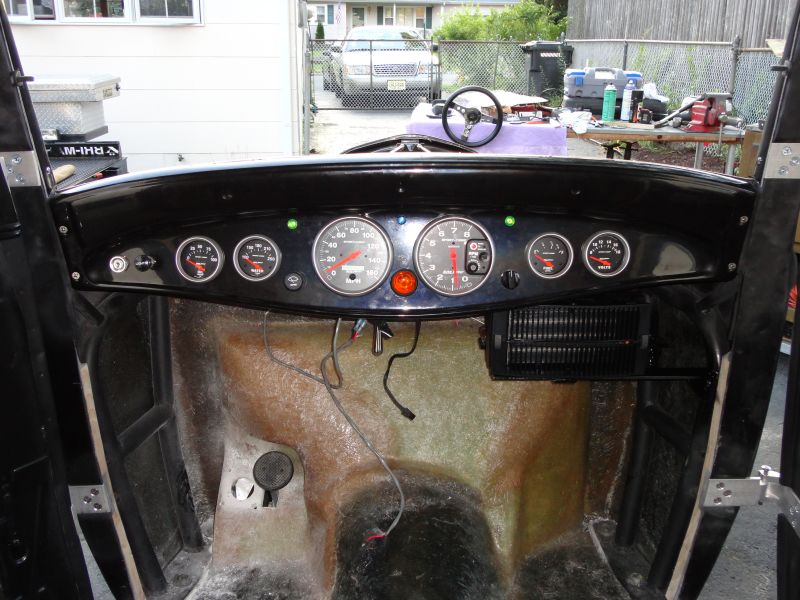
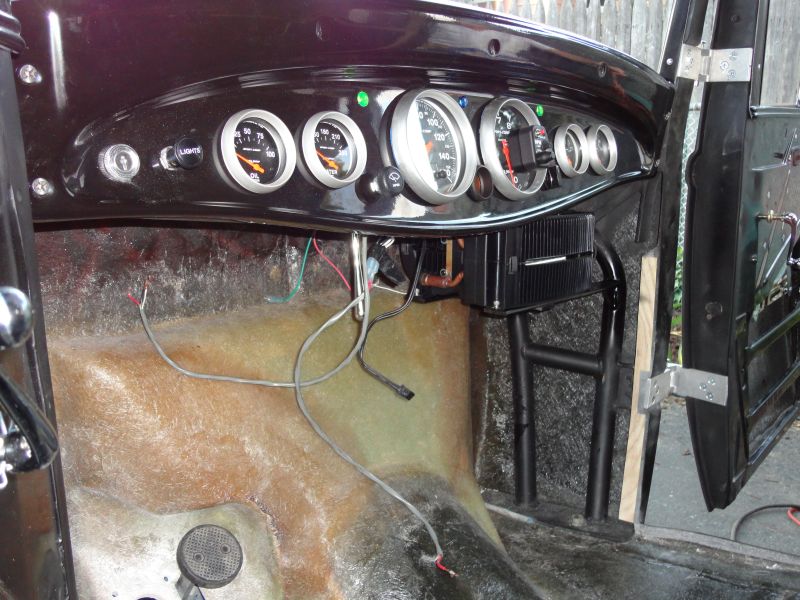
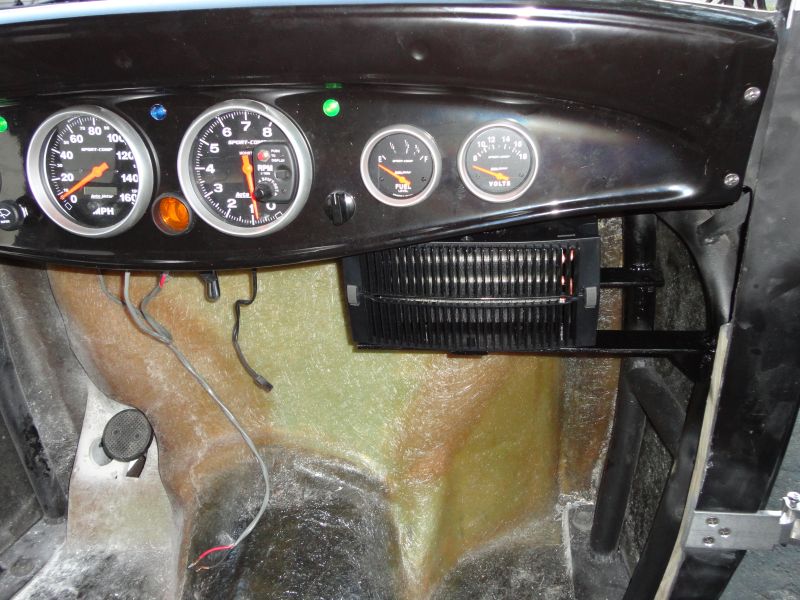
Today I smoothed the holes for the speedo and tach with a Dremel and little sanding rolls. The other gauges I used a 2 5/8 holesaw (much easier ). I must say, it came out pretty good. I love this instrument panel! I reused the 5" speedometer and tach from my Fairlane, and I have 2 5/8" gauges for the rest. I'm so glad they all fit, and they just made the "smiley" bar behind the panel. The switches left to right are; ignition, headlights, wiper, blower. I added two green LED lights for the turn signals, and a blue LED light for the high beam. The shift light for the tack fit perfect in between the speedo and tach. I'm going to install a bracket off the "smiley" bar to the shift light bracket. I also installed the Pontiac 50's style LED tail lights and license plate bracket, with LED light too. I bought it for my trailer awhile ago, but it didn't fit. I'm glad it didn't go to waste.
  Thanks guys for the good words.
  It felt so good to get working on it the past two days. I can't wait until next weekend.
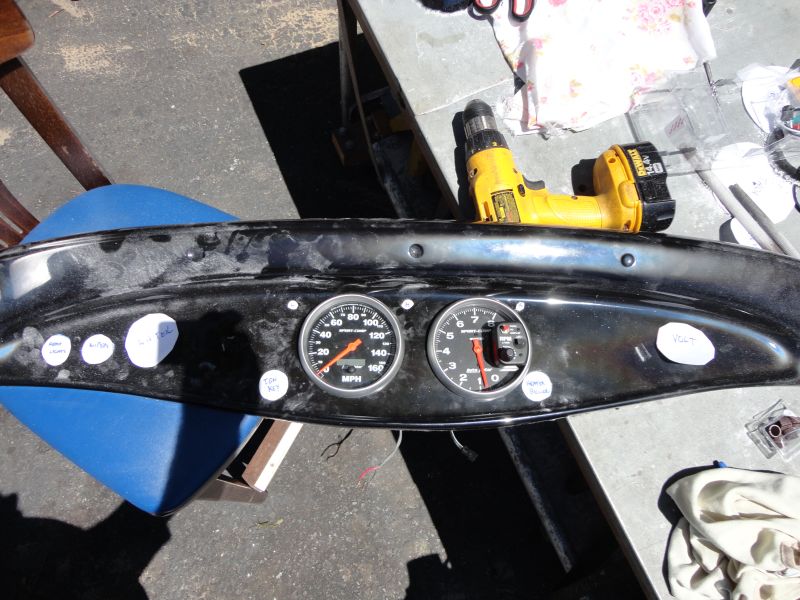
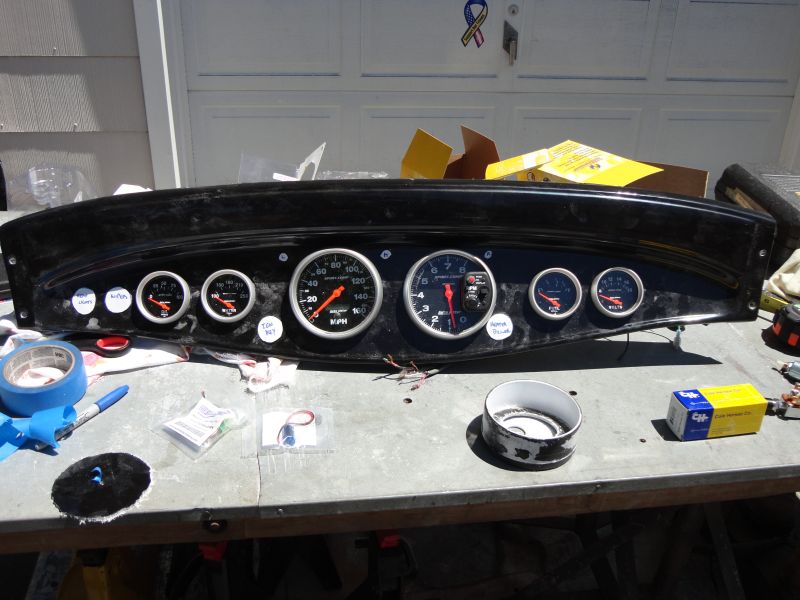
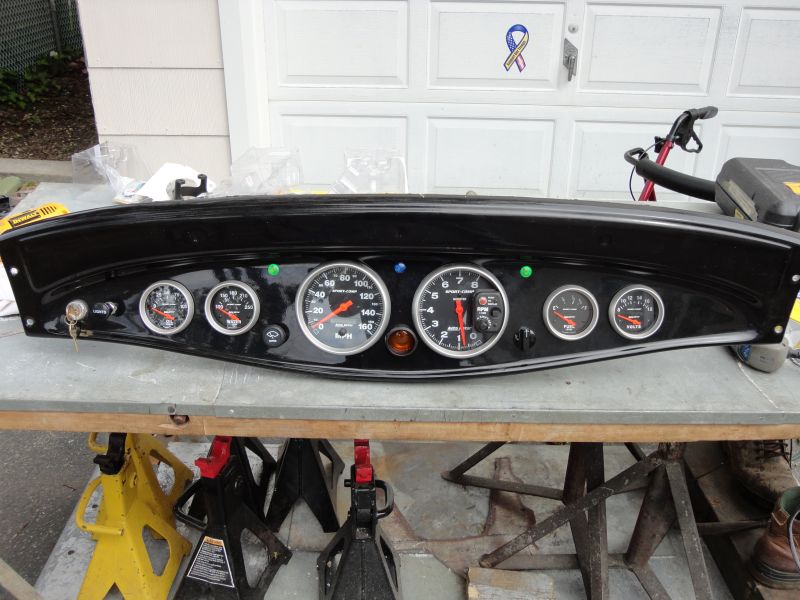

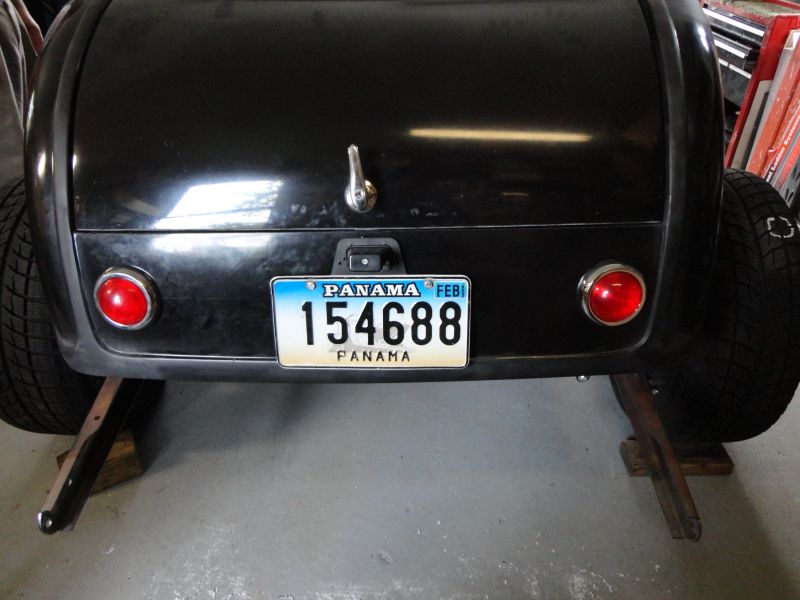
Today I smoothed the holes for the speedo and tach with a Dremel and little sanding rolls. The other gauges I used a 2 5/8 holesaw (much easier


patfromjersey- BBF CONTRIBUTOR

- Posts : 408
Join date : 2009-08-11
Age : 58
Location : Glen Burnie, MD
 Re: 1932 Ford Coupe Project
Pat, this is an awesome project man... I wish I was gonna be there when you and pops blast off down the road in it for the first time. That will be a sight to see  . The gauges look right at home in the dash....Nice work bro. ---RED
61coon- Posts : 1824
Join date : 2009-08-07
Age : 47
Location : Hillsboro,TN
 Re: 1932 Ford Coupe Project
Thanks Red! Pops will have that first ride, and I'll be filming him. I'm going to get Mom in there too. LOL

patfromjersey- BBF CONTRIBUTOR

- Posts : 408
Join date : 2009-08-11
Age : 58
Location : Glen Burnie, MD
 Re: 1932 Ford Coupe Project

cool40- BBF CONTRIBUTOR

- Posts : 7313
Join date : 2009-08-31
Age : 53
Location : on the 1/8 mile dyno
 Re: 1932 Ford Coupe Project
patfromjersey wrote:Thanks Red! Pops will have that first ride, and I'll be filming him. I'm going to get Mom in there too. LOL
Thats so cool Pat. We want to see all your faces for sure.
bbf-falcon- Posts : 8995
Join date : 2008-12-03
Location : Jackson, Ohio
 Re: 1932 Ford Coupe Project
You are doing a great job Pat, and what you are doing for your pops, is a great thing, my hat is off to you. 

342g- BBF CONTRIBUTOR

- Posts : 3237
Join date : 2009-08-06
Age : 81
Location : Lawrenceburg, In.
 Re: 1932 Ford Coupe Project
I have a starting line kit, and a finish line set. The starting line set is ok and I use it a lot for priming, and non metallic or pearl base coats. I use the finishline set for clearing, and pearle or candies.
 Re: 1932 Ford Coupe Project
Thanks Rick and Harold...here's some updates..
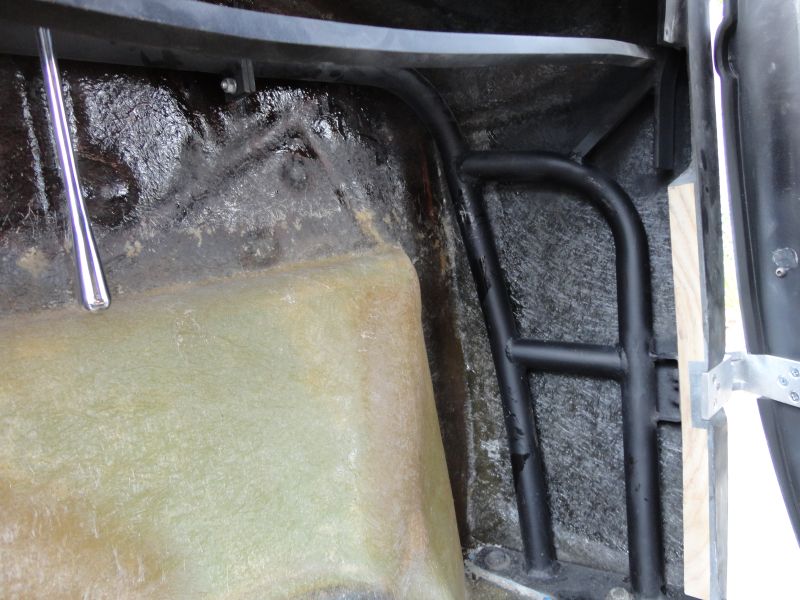
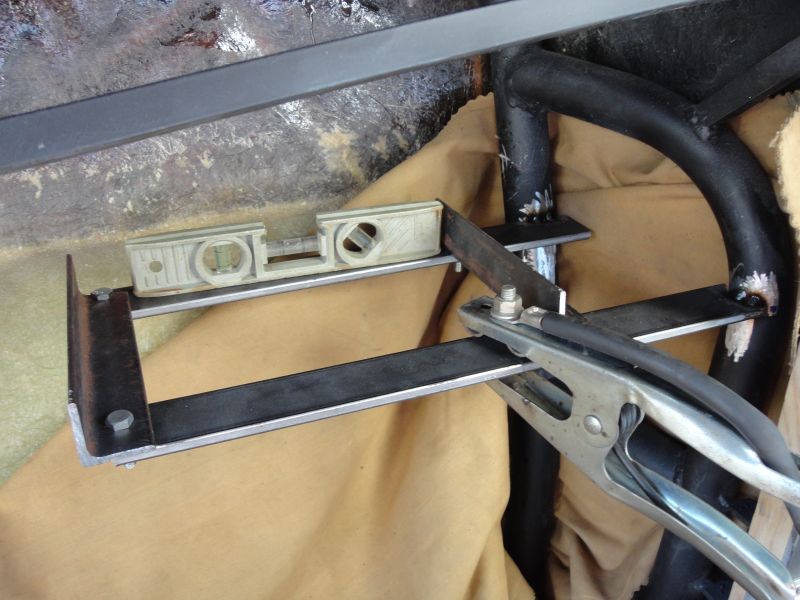
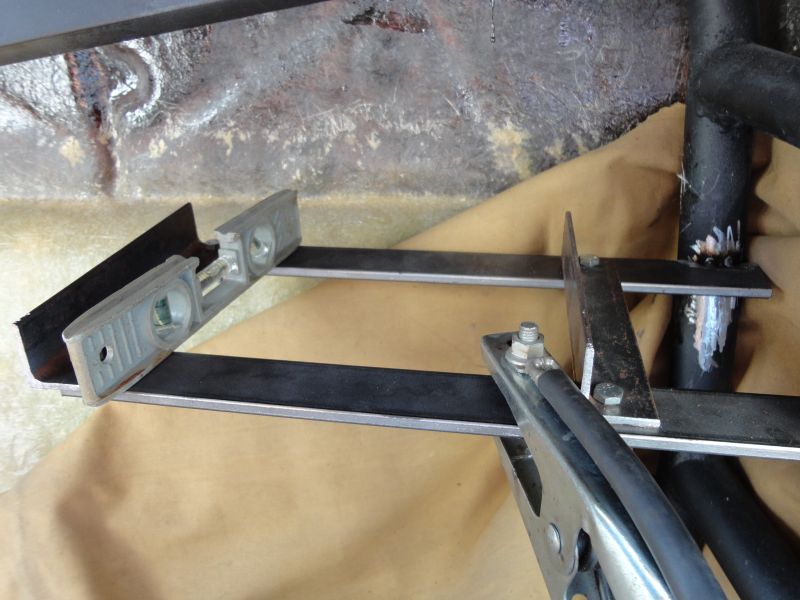
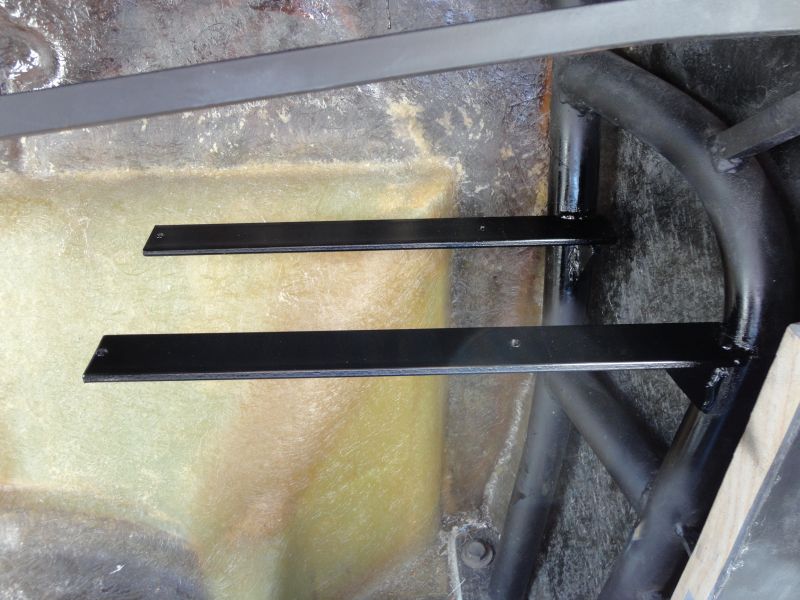
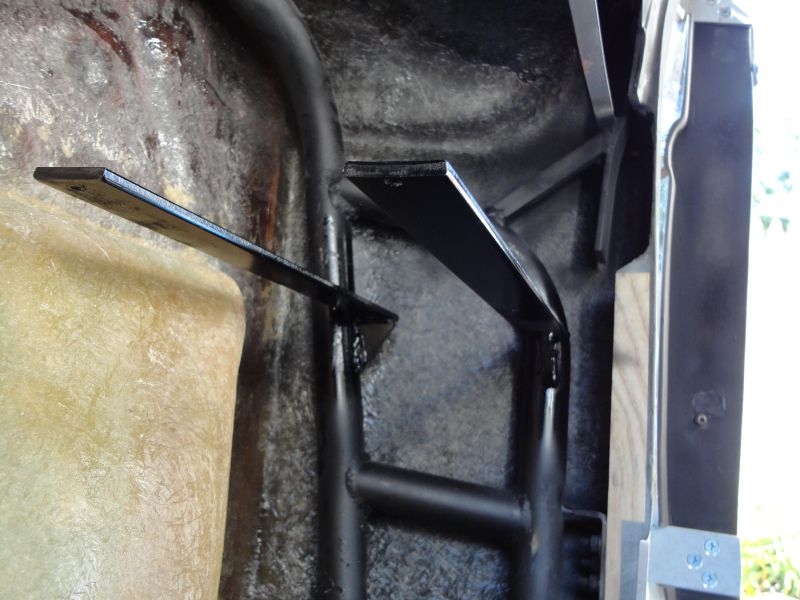
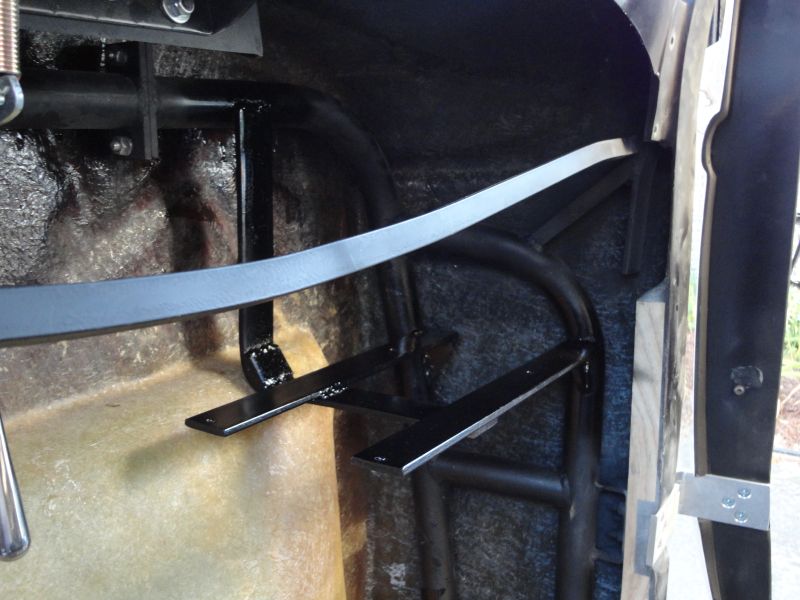
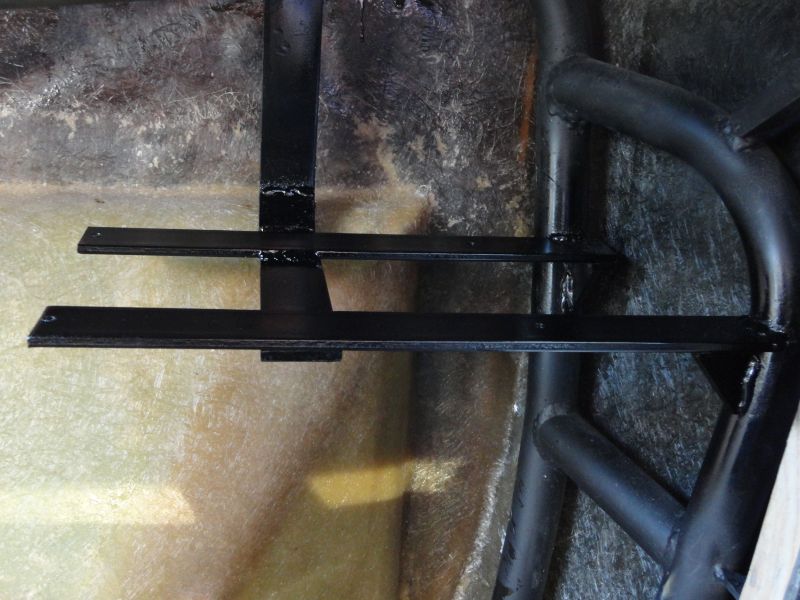
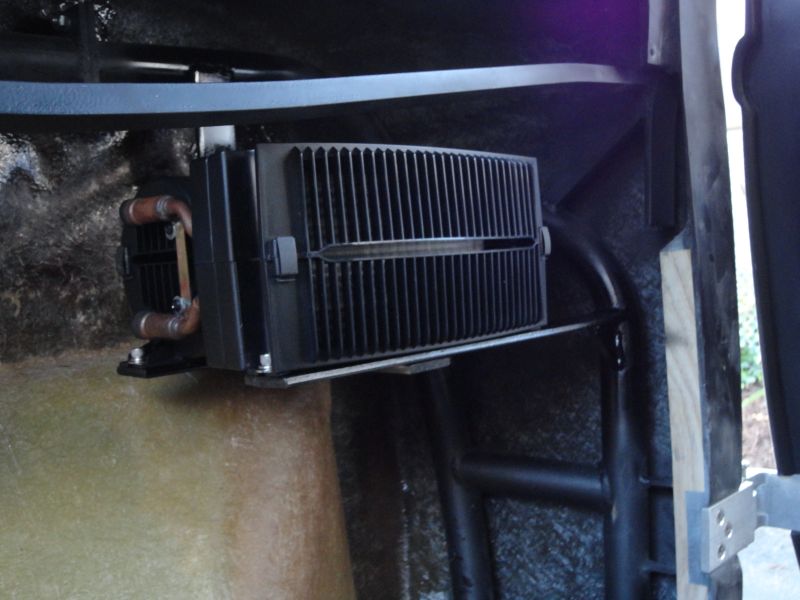
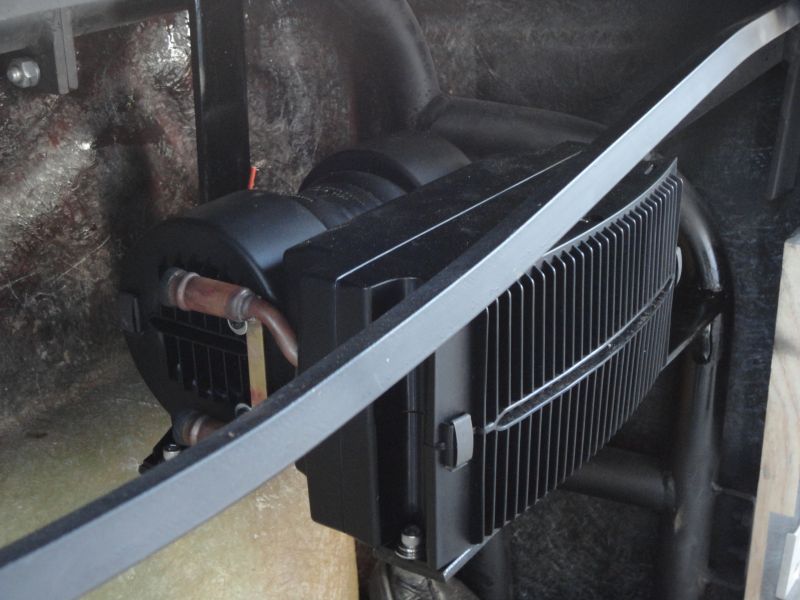
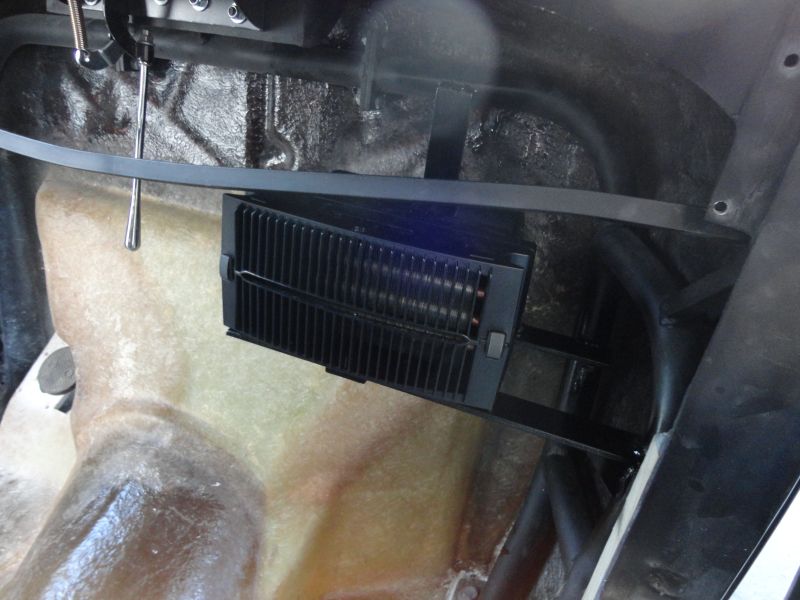
It's been awhile since I posted some pictures, but I installed the Glide Engineering bench seat, drilled out and ordered the drop for the Flaming River column, and installed the Mohave heater today. I didn't have my good camera for the seat, but I will post some pictures of the heater install. I will also take a bunch of pics when I finally have the column in. The column took alot of figuring out, since we only had a small area to work with, but we were able to come up with a clean and simple arrangement. I can't wait to show you what we have when the drop comes, and then we will order the shaft length to finish it up. For now, I have just the heater pics. I had to fab something off the New Age roll bar, and came up with pretty good ideas during my long commute to work. Today, I finally welded it all in and it's solid! This will be a year around car, so Pops and I need some heat! We will drive to Cape May NJ for a cup of coffee in January, when it's 0 degrees. I ordered the fittings and heater hose from Summit, so I will post more when it's finished. Here's today.....
I came off the New Age rollbar, with 1/4" flat stock, 1 1/2" wide, and I grinded it down to a curve to weld around the rollbar. I also made gussets for both pieces, and welded them in. I was hoping I didn't need anything else, but after installing the heater with that setup, the unit would "vibrate" after a tap. I knew I had to go one step further, and add another support. I tapped the bottom flat stock so I wouldn't need any nuts, and 1/4 - 20, 1/2" long socket head screws (with lock/flat washers), were long enough to "hide" under the flat stock, with no threads showing. When I lined the heater up, I went to the lowest point of the "smiley" bar, and just be under it. The radio is going in the center under the dash, and my Dad is always cold, so the heater is friendly to the drivers side. That cubby hole to the left of the heater, may be the left front speaker, or maybe a small locking glove box; not sure yet.
The rims finally came in too this past Friday, so we have to prep them and paint them to mount the tires we ordered. I can't wait to see the Coupe with anything other than those reversed Crown Vic snow tires on the rear, and spare tires on the front. LOL :3dSMILE:


patfromjersey- BBF CONTRIBUTOR

- Posts : 408
Join date : 2009-08-11
Age : 58
Location : Glen Burnie, MD
 Re: 1932 Ford Coupe Project
It was 100* the past two days, but it didn't stop me.  After fixing the AC on my Dad's '05 Vic, and fixing the defrost only mode on my Vic, I went to work on the Coupe. I made a bracket to get the column drop to the smiley bar, and my parts came in to get the rest in line. I had to use a heim joint for support and another u-joint. I only had one small area for my column, and it's very low to the floorboard, so the column drop is actually behind the smiley bar. A picture speaks a thousand words, so you will see what I had to do. This actually worked out nice, because I was able to weld the flat stock at the exact angle of the smiley bar, and keep the column drop straight up and down. This also helped me correct a boo boo. When I thought I would be able to mount the column drop right to the smiley, I had two sets of marks. I drilled the two holes to the wrong set up marks, and that tilted the column to the right a tad. I was so mad at myself.
  With this setup up I had to do now, I was able to cover my mistake, and make it right.
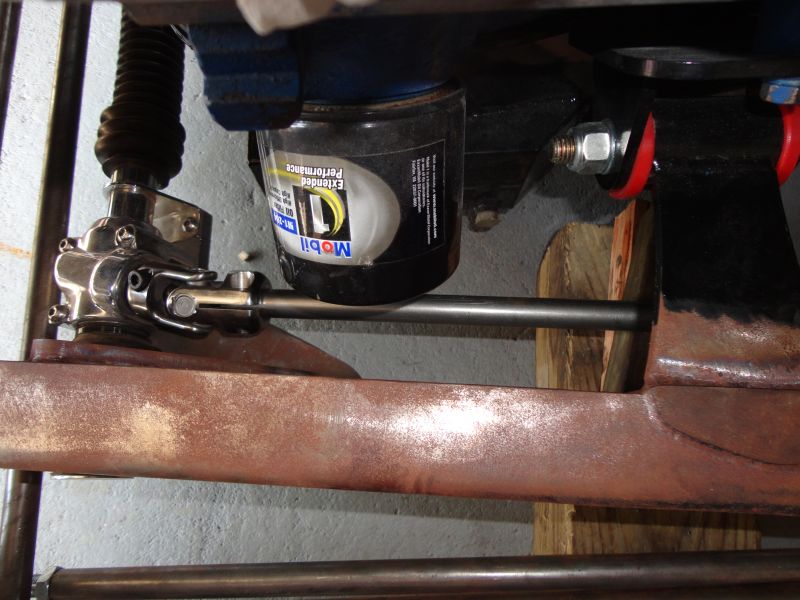

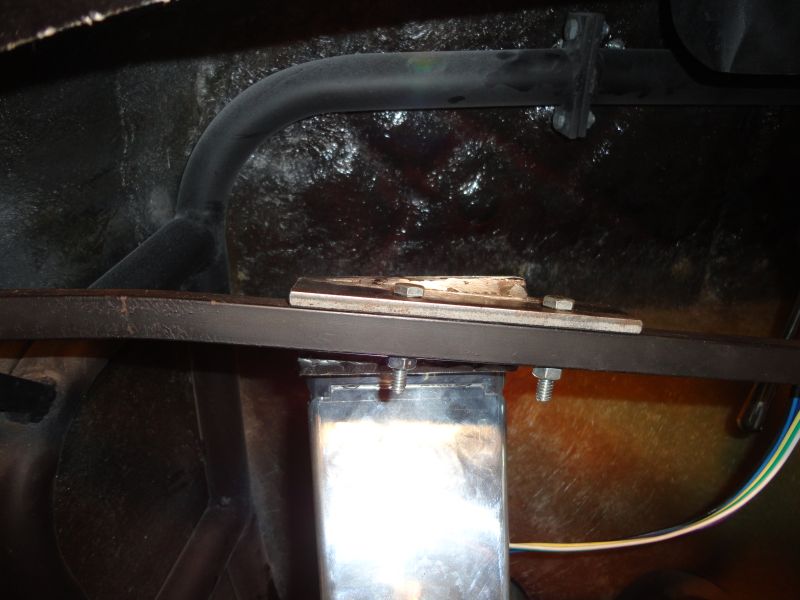
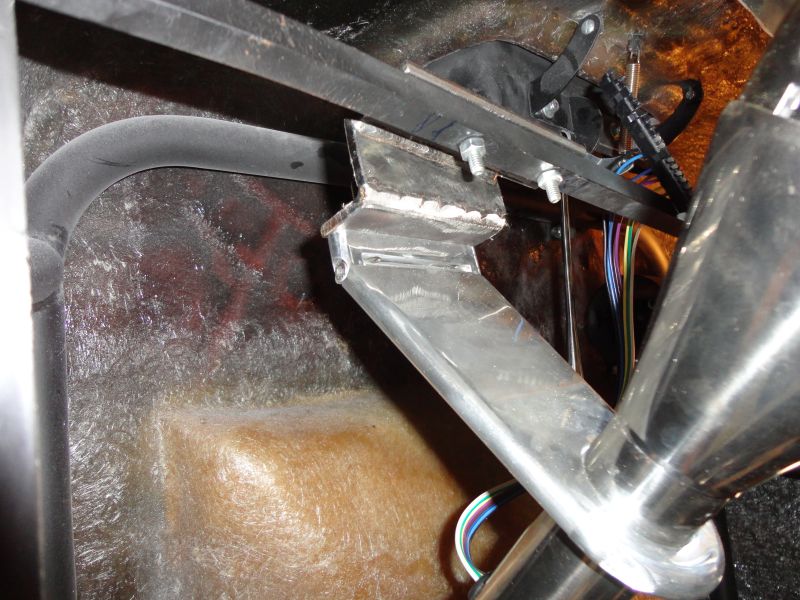
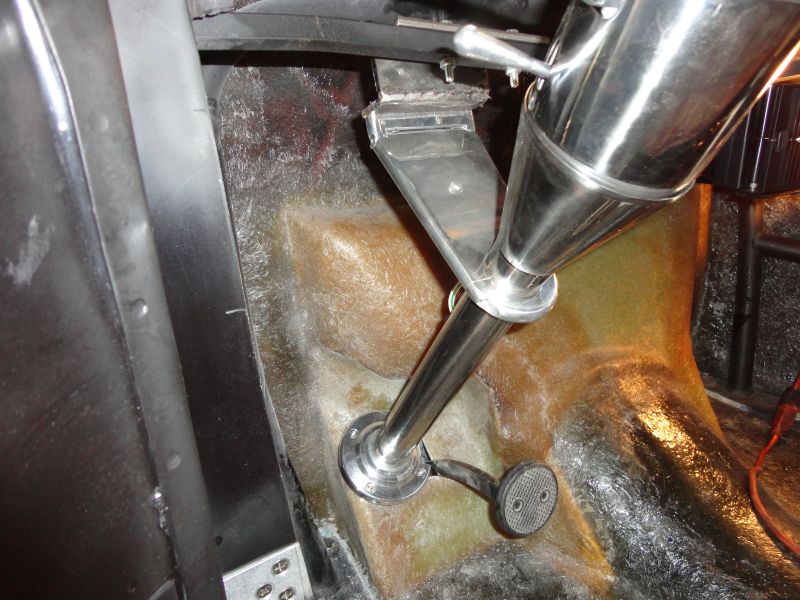

Here's what I had to do to the steering system. I just have some final welding on my heim joint bracket when I have everything down to the frame. I welded it from the bottom, so it's good for now. It steers real easy, and it's so smooth. Here's some more pics. I didn't have all the set screws in, but I will mark where I need to dimple the DD shaft, for the u-joint set screws, and uni-steer u-joint bolt. I welded in a bracket on the engine mount/side rail, for the heim joint. There's a locknut on the underside, and I'll have a lockwasher in there too. I'm so glad this part of the build is done. This has been such a fun project with my Dad. I have to get the next big item; the fuel tank. I'd like to figure out where I have to mount that monster ProStar 500 fuel pump, before we pull the body off to do the brakes and exhaust. I also have to figure out where I'm going to mount the huge transmission cooler from the Fairlane, underneath the car with an external fan. I have a cooler in the radiator, but that won't be enough.


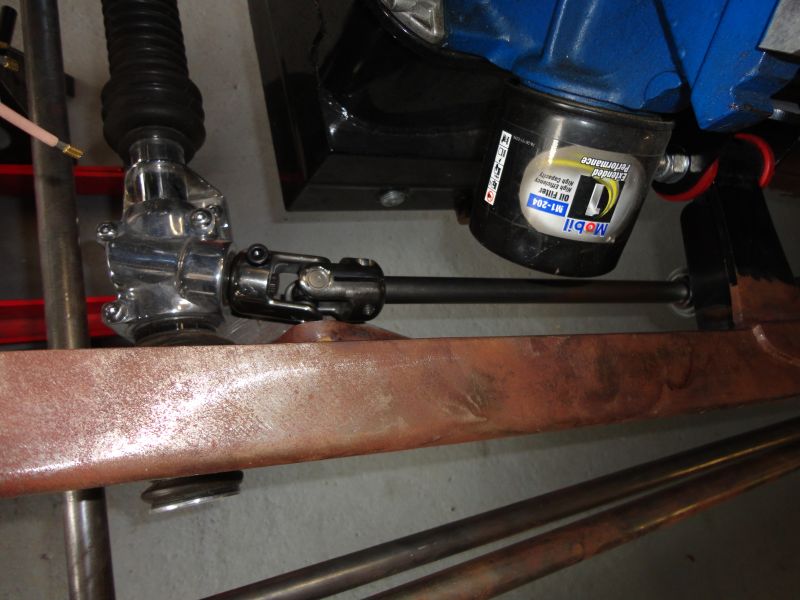
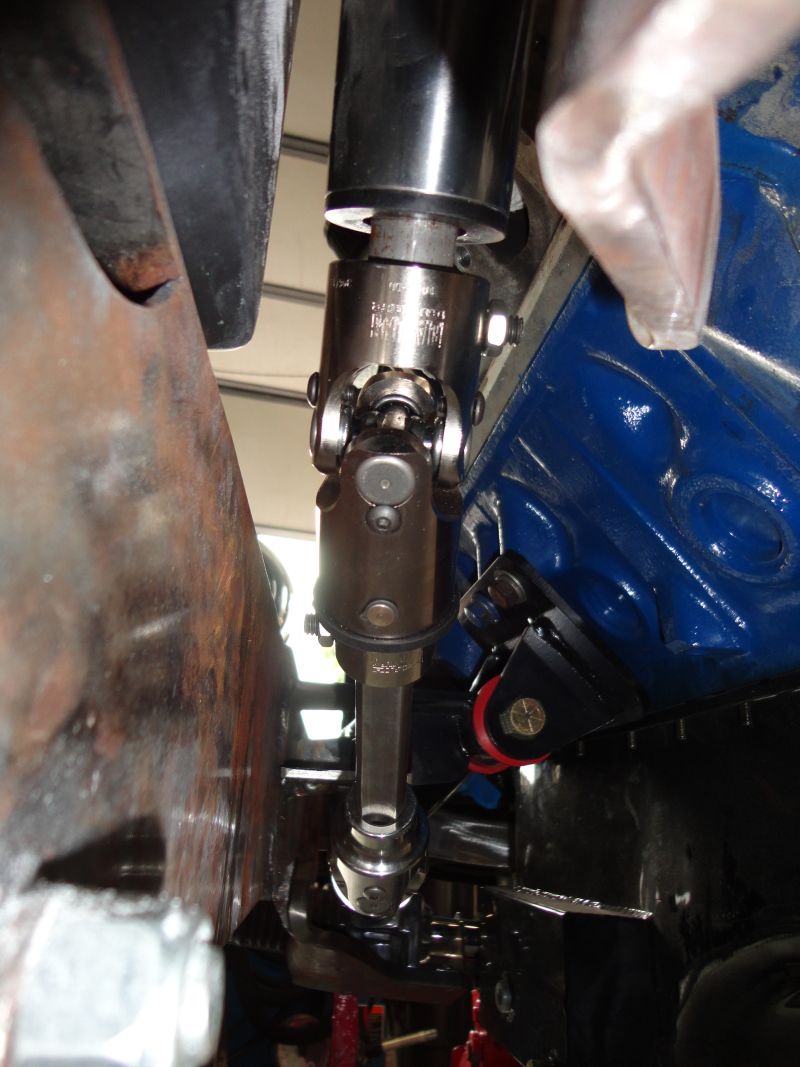


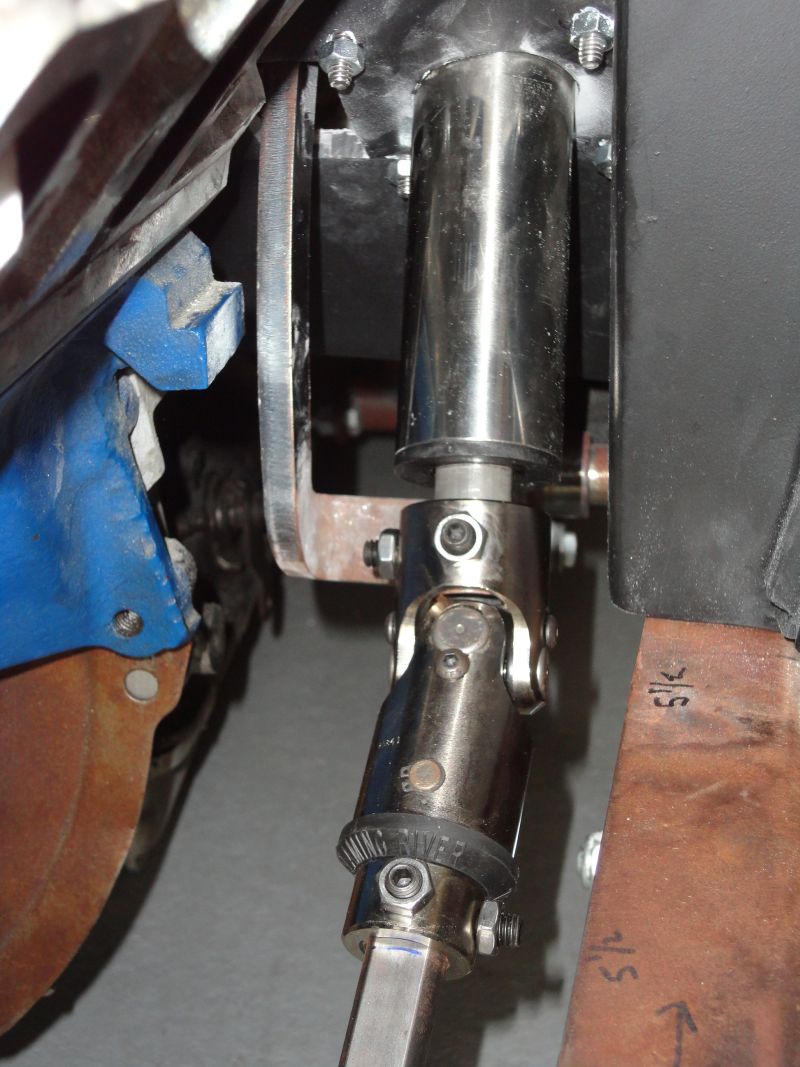


Here's what I had to do to the steering system. I just have some final welding on my heim joint bracket when I have everything down to the frame. I welded it from the bottom, so it's good for now. It steers real easy, and it's so smooth. Here's some more pics. I didn't have all the set screws in, but I will mark where I need to dimple the DD shaft, for the u-joint set screws, and uni-steer u-joint bolt. I welded in a bracket on the engine mount/side rail, for the heim joint. There's a locknut on the underside, and I'll have a lockwasher in there too. I'm so glad this part of the build is done.


patfromjersey- BBF CONTRIBUTOR

- Posts : 408
Join date : 2009-08-11
Age : 58
Location : Glen Burnie, MD
 Re: 1932 Ford Coupe Project
That car is Sweet Pat!1 Stay on it and it'll be going down the road before you know!!

56Tbird- BBF CONTRIBUTOR

- Posts : 5260
Join date : 2008-12-02
Age : 65
Location : Hawesville,Ky.
 Re: 1932 Ford Coupe Project
look'n good! 

cool40- BBF CONTRIBUTOR

- Posts : 7313
Join date : 2009-08-31
Age : 53
Location : on the 1/8 mile dyno
 Re: 1932 Ford Coupe Project
You are doing beautiful work Pat, didn't know you were such a good fabricator . 

342g- BBF CONTRIBUTOR

- Posts : 3237
Join date : 2009-08-06
Age : 81
Location : Lawrenceburg, In.
 Re: 1932 Ford Coupe Project
Hey guys, I'm so sorry I haven't posted here in awhile. I had a big change in life with a promotion from my job to move down to Baltimore, MD. It took me a long time to get my garage down here all ready for work, but I brought the '32 from Jersey about a month ago and I finally have some pics and updates to post. I love it down here in Maryland. I miss my Dad so much, but I'm only 3 hours away and I visit him often. I finally have made some progress on the Coupe since my last post back in July. I was busy with my job in Jersey, and was shocked with my new promotion. I'm going to try and get everything up to date here, so I can be in contact with you all again. I miss the Big Block Bashes and all of your friendship. I will be posting more often with my updates and I hope to see you all again soon! This 32 is going to be crazy!  I will bring you up to speed now.
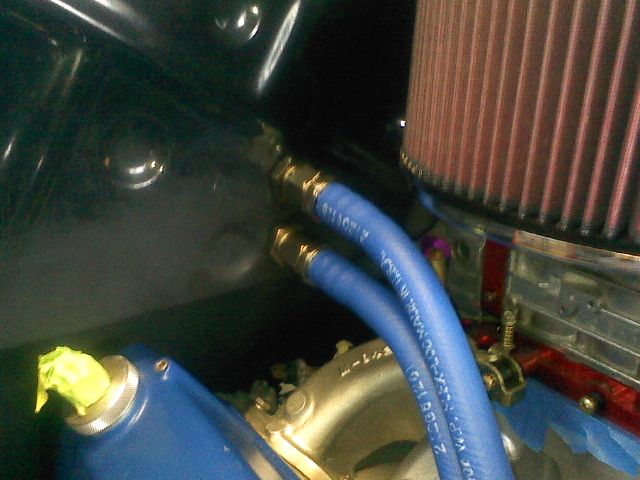
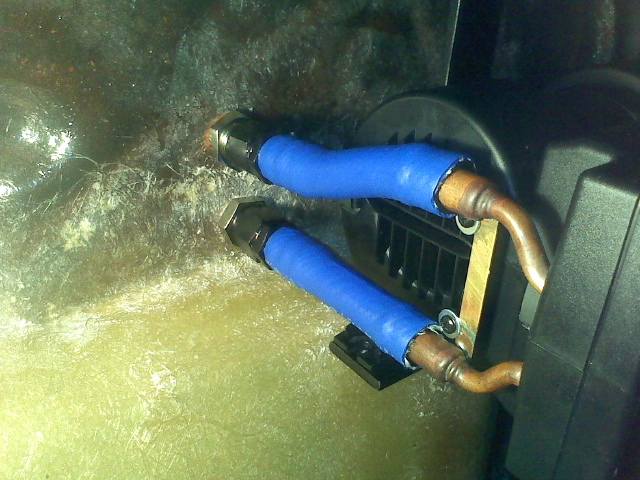
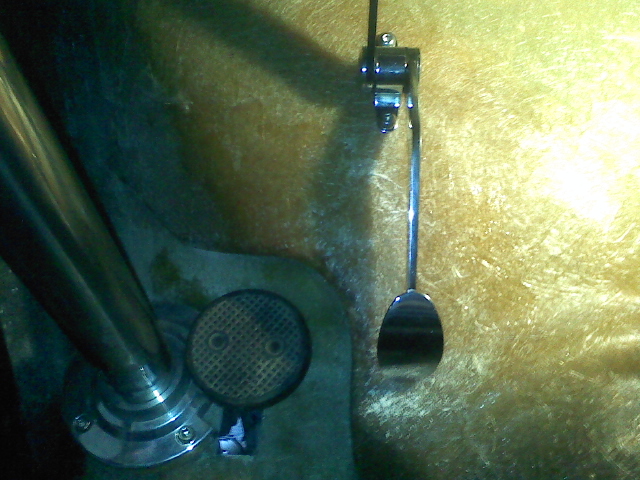
I installed the heater hoses to the heater/water pump, and I have some pictures of the seat I put in before that. I had to weld up some mounts to overcome the rise in the floorboard. I also made steel plates on the top and bottoms of where the mounts bolted, so I spread the load of the seat mount. I really didn't want the bulkhead fittings for the hoses to be vertical, but it was the only way to go with what I had. I wanted them horizontal, but the inside connections would have be tough. Overall, I like how it turned out, because it's so easy to take everything out again. I also mounted the spoon gas pedal, and that was the only spot it could be. I wish I had more time over Dad's at the time.
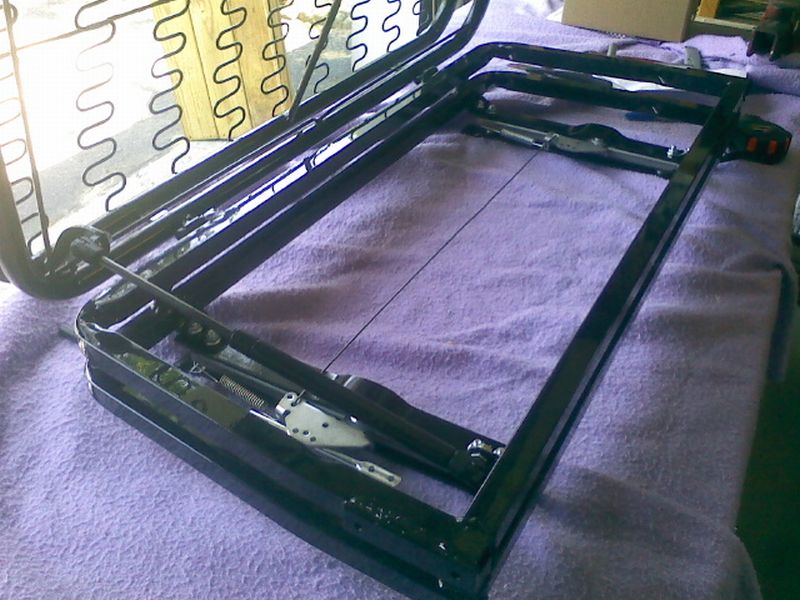
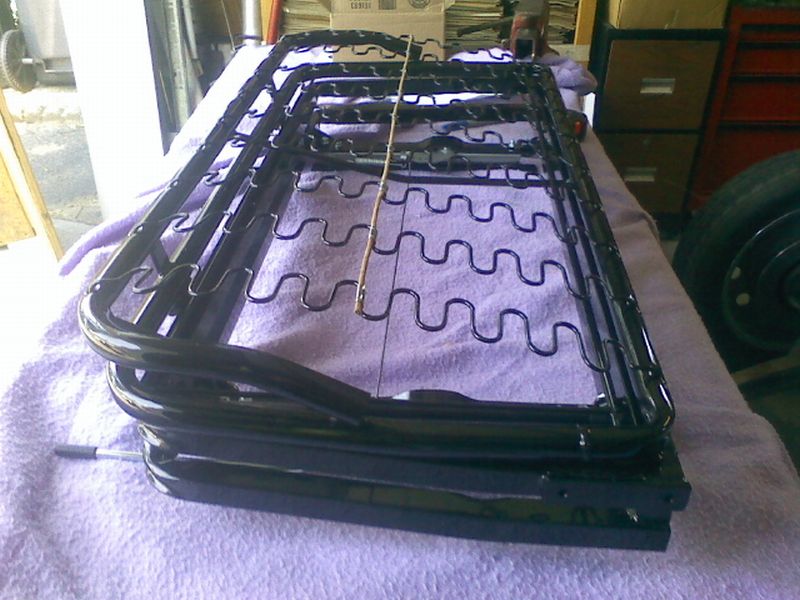

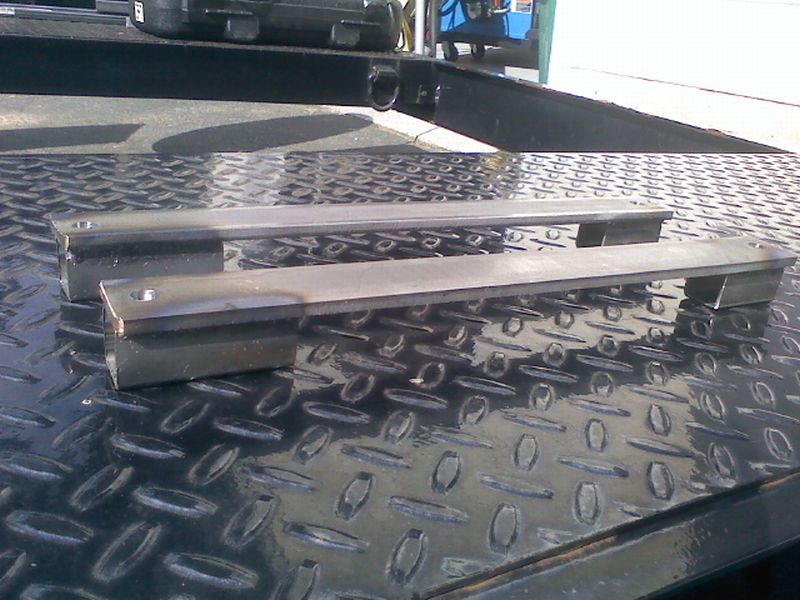

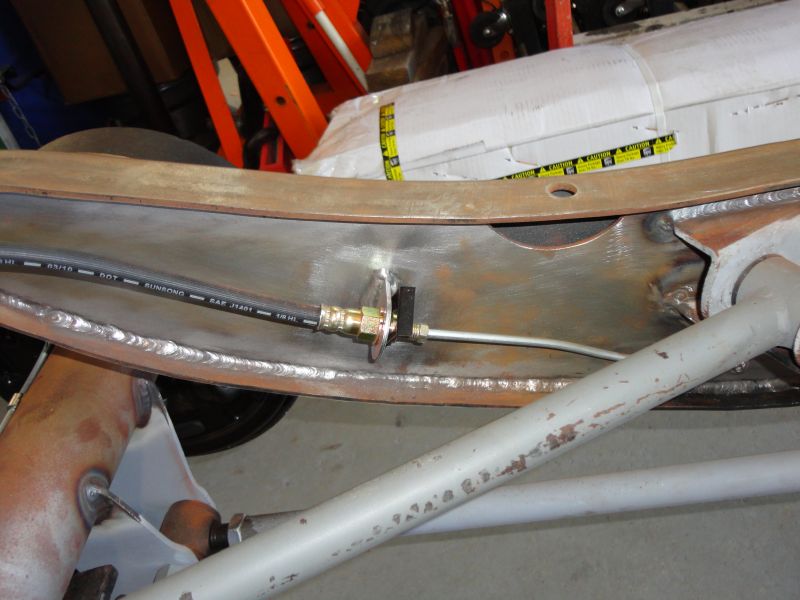
Due to a busy August at work before I left NJ, and packing up and moving to Maryland for my job, I've barely spent time at Dad's garage. Dad did the brake lines since I was gone, and I came back to test fit the fuel tank, fuel pump, and install the 3" exhaust. The mufflers were off my old Fairlane, so I'll clean them up and paint with the exhaust or I may hot coat the whole system.

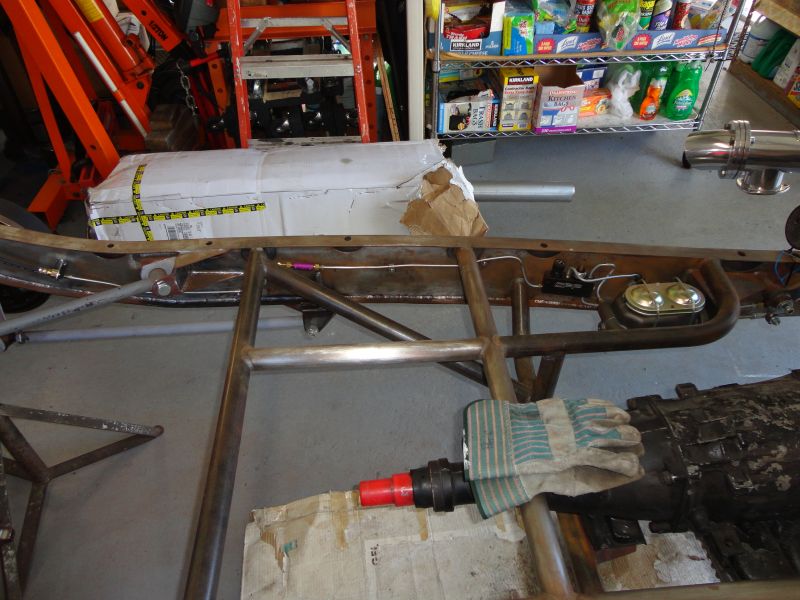


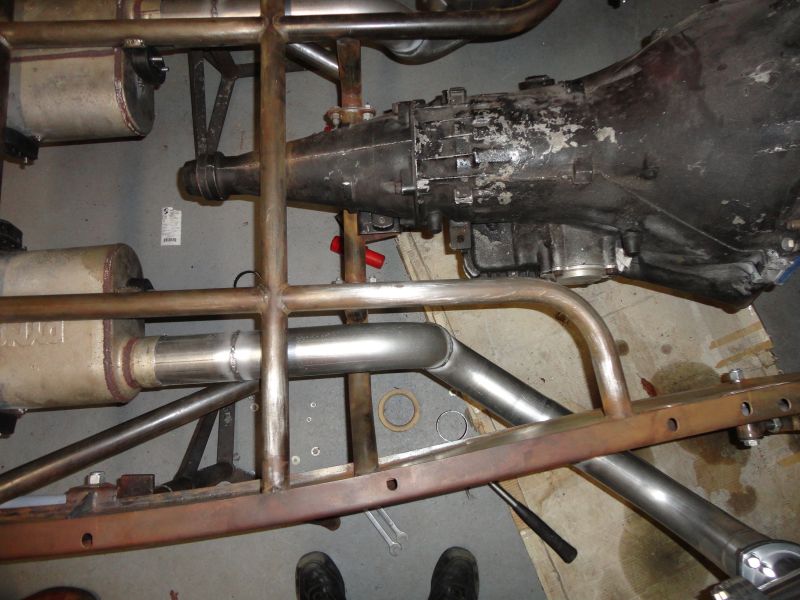


I finally shrunk all the pics I took while working on the Coupe at my Dad's when I was back again. We did alot of work on it, and it's looking nice! I think after my next trip back to NJ, I can tow the rolling chassis back to my house in Maryland and start taking it apart to sandblast and paint. Here's some pics of the progress.
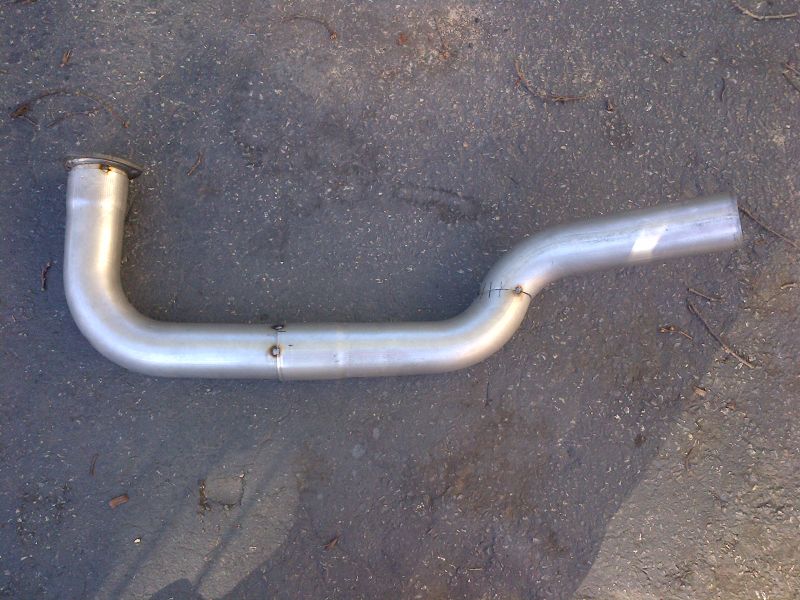
I posted pics of my exhaust, but here's how I indexed each piece to take off and weld while on the garage floor. I only had a day home to do the whole exhaust, so I wish I could have spent more time during daylight hours welding this. It was dark in the garage and sitting on the floor with this wrapped around my legs stooped over. LOL I will clean everything up when before I send it to get hot coated.

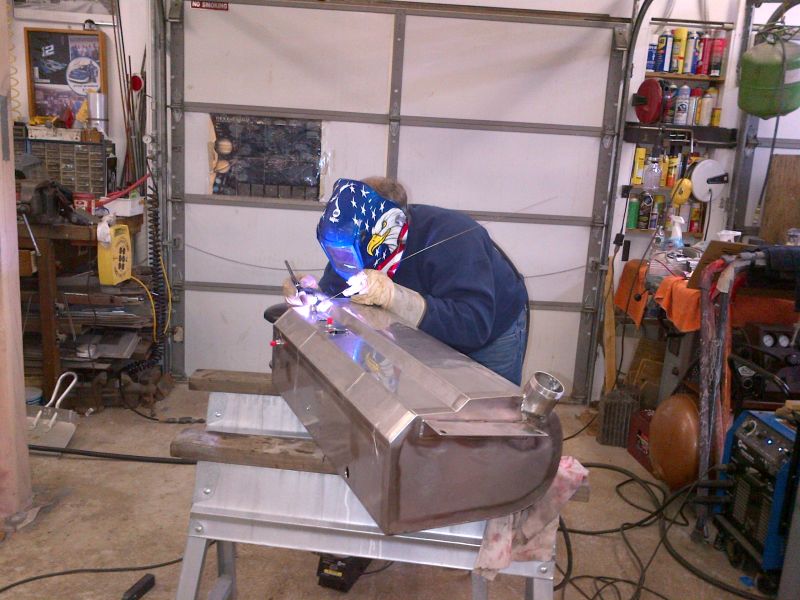
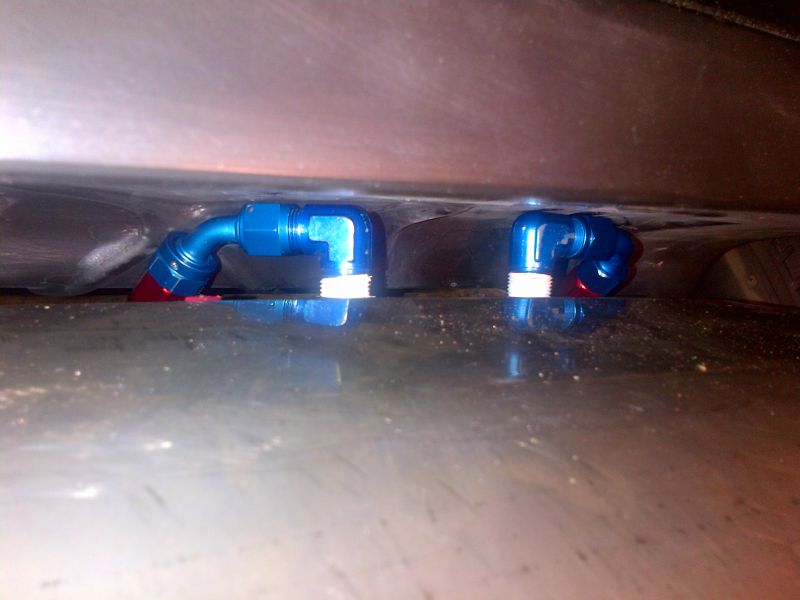
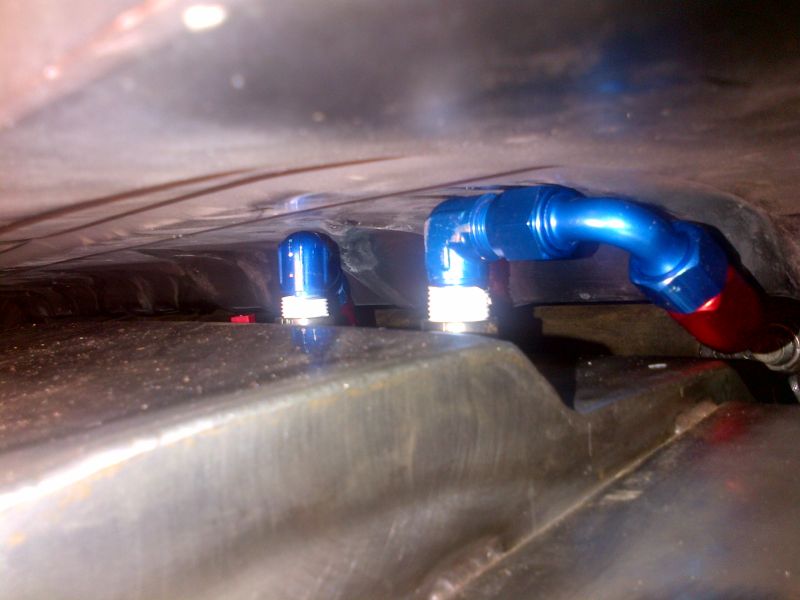
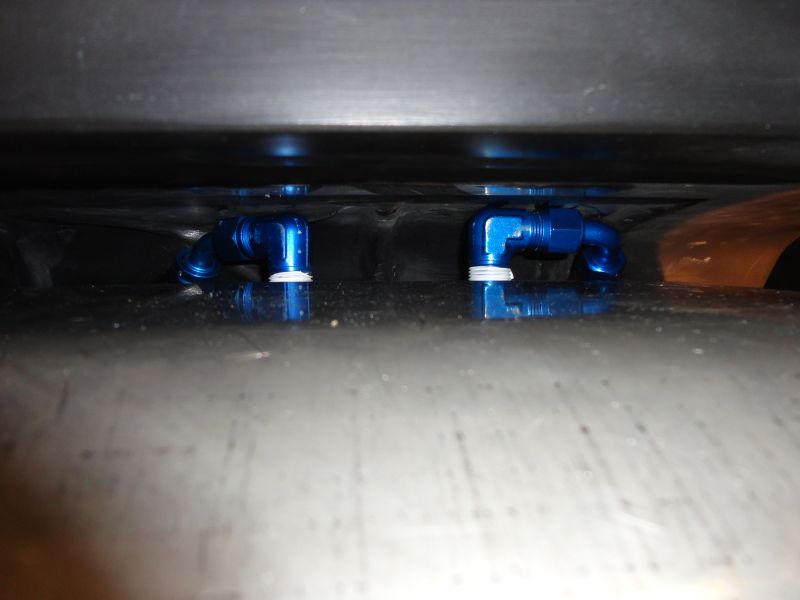
I finished up the fuel tank and fittings. My cousin Dan TIG welded the stainless steel bungs, and then I installed the fittings. I had a huge boo boo. I thought I had 4 inches of clearance between the body and tank, but it was only 2 inches. If I only had Dan weld those bungs in flush, I would have had plenty of room. Luckily it will work with the short one piece 90's, but I will put the Dremel round sandpaper fitting on these spots to add a little more clearance once the webbing for the body is on, and I put an insulator for the tank to to chassis.
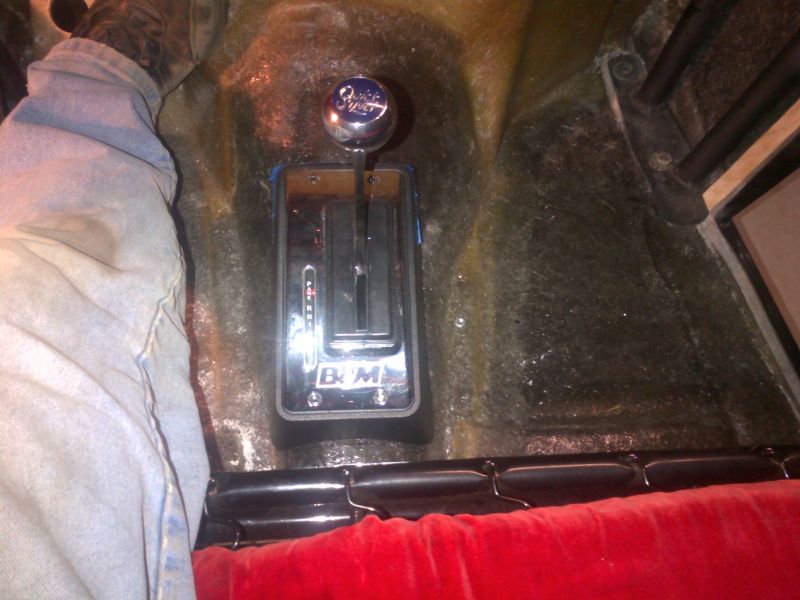
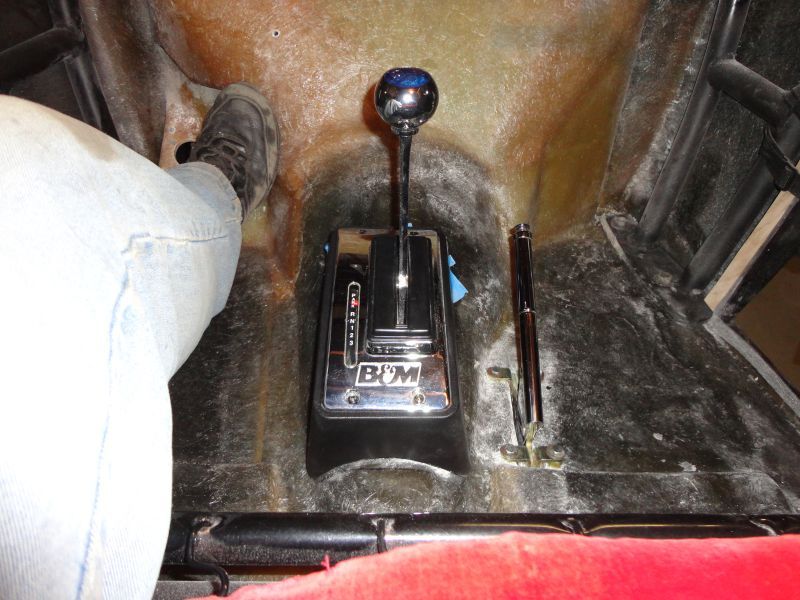
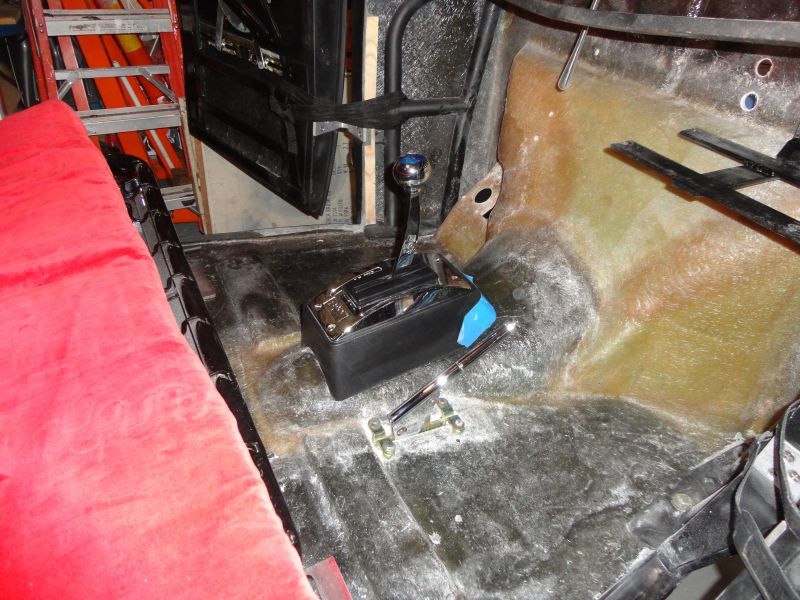
I installed my old B&M Quick Silver Shifter from my 66 Fairlane in the Coupe too. I have a new black plastic housing to form for the Coupe, but the old one from the Fairlane is pictured. I used tape to help mark out where I need to trim the new one. I have it mounted so the seat doesn't hit it when we pull it all the way up, but it's set at the half way point for my Dad and I to shift comfortable.


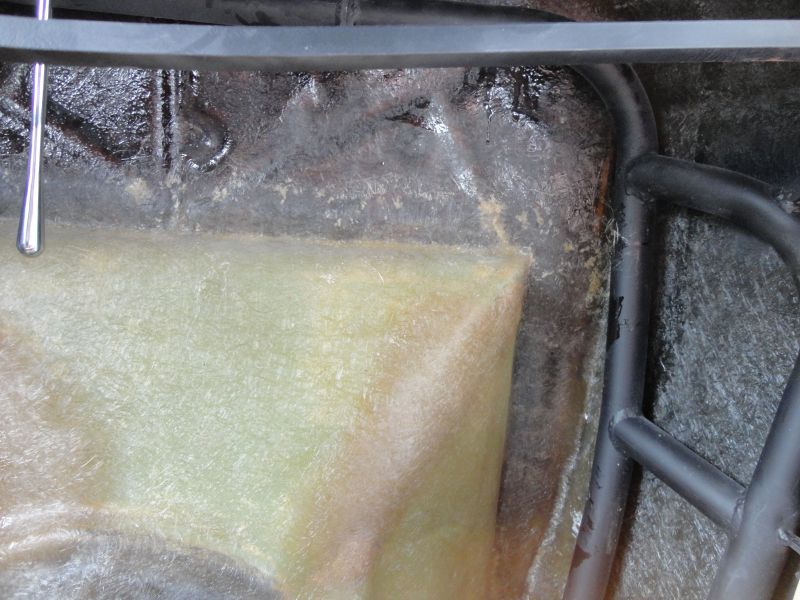
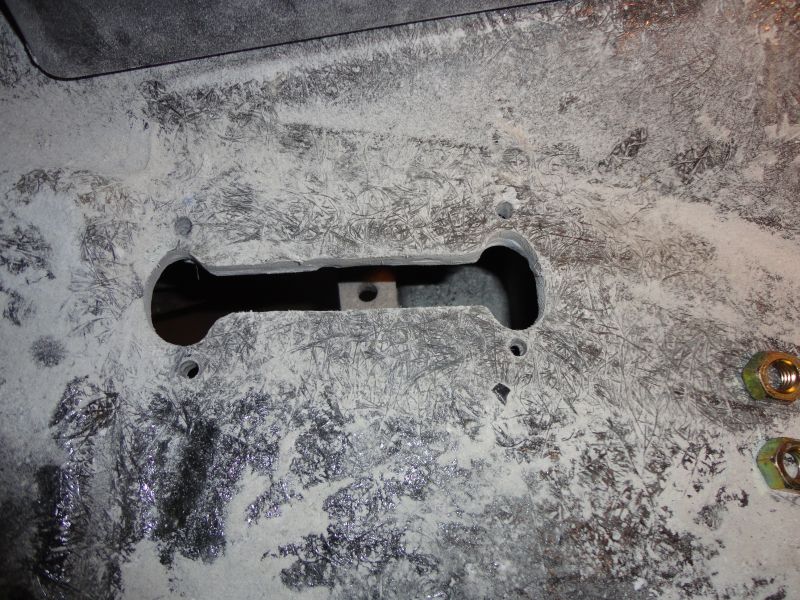
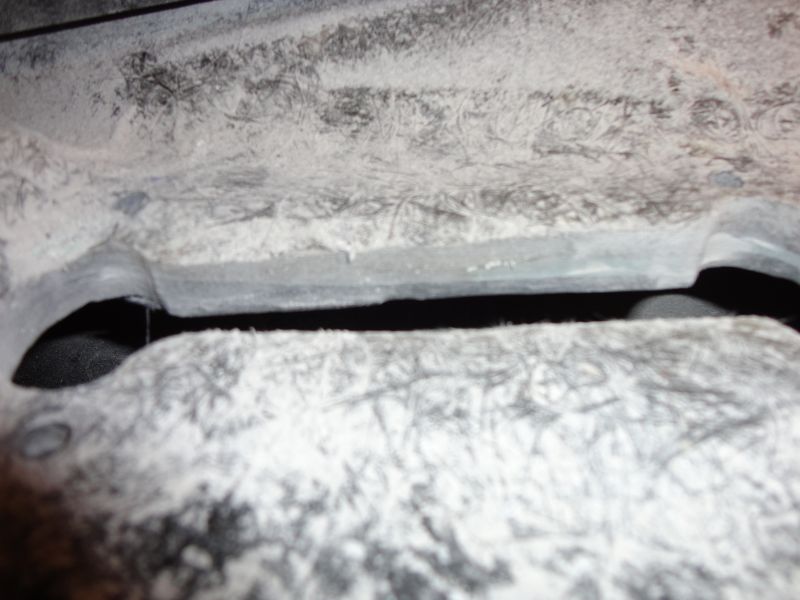
I also installed the Lokar parking brake. This works great as well, and on the second "click" it locks up the rear wheels. Note to self, make sure you adjust the drums brakes before adjusting the parking brake. LOL The fiberglass body floor was a 1/2 inch thick, and I could only put it in one spot on our Coupe, due to the roll bar chassis underneath. With our 521/C6 combo, the trans tunnel had some different curves that we had to work around. This was the only spot we could mount the parking brake, and I had to make a "dog bone" cut out to even get it to fit right. The carpet and sound deadner will make it look flush. I had to shim the right side of the handle to make it look even. I will use spacers on the final build instead of the hex nuts.

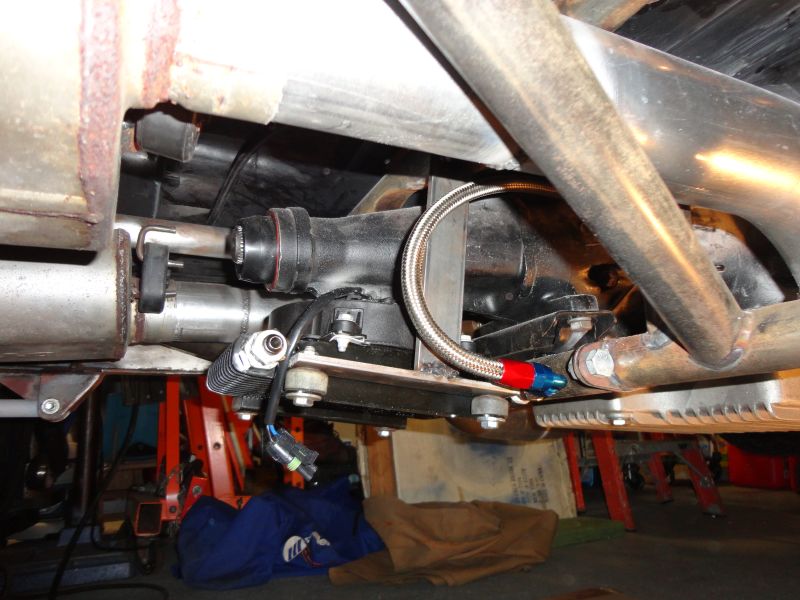
I have a transmission cooler on the radiator, but with a 521/C6 3500 stall converter, I wanted to add an additional trans cooler with a fan. Room is tight on the 32 as you know, so I found a little cubby hole under the tailshaft of the transmission. This is a B & M deal with a fan that pulls air through the cooler and it has a sending unit to turn the relay on/off for the fan at 170 degrees. I made a mount that I welded to the tubular chassis support above the trans, and made a round cutout to weld to that and welded it to two pieces of 1/4" steel that I bolted to the cooler mounts with rubber insulating bushings from old shocks. I think this will work okay. I put the driveshaft in there (which will only be 23 inches long), and it had 3" of clearance. I will come out of the trans to the trans cooler in the radiator, into this auxilary cooler, back into the trans. I will let you know how cool things are.



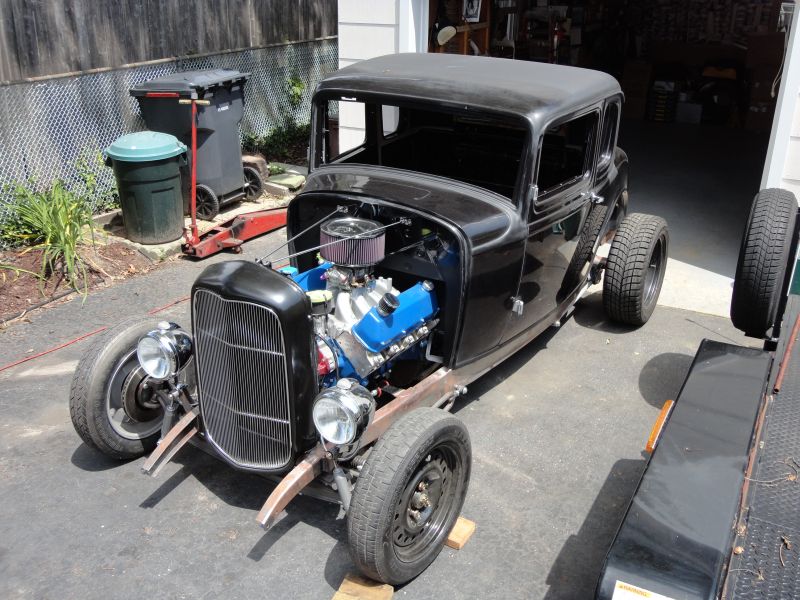
Here's some final pics of my Coupe outside, and my cousin Dan came with his original steel body 32 Coupe.
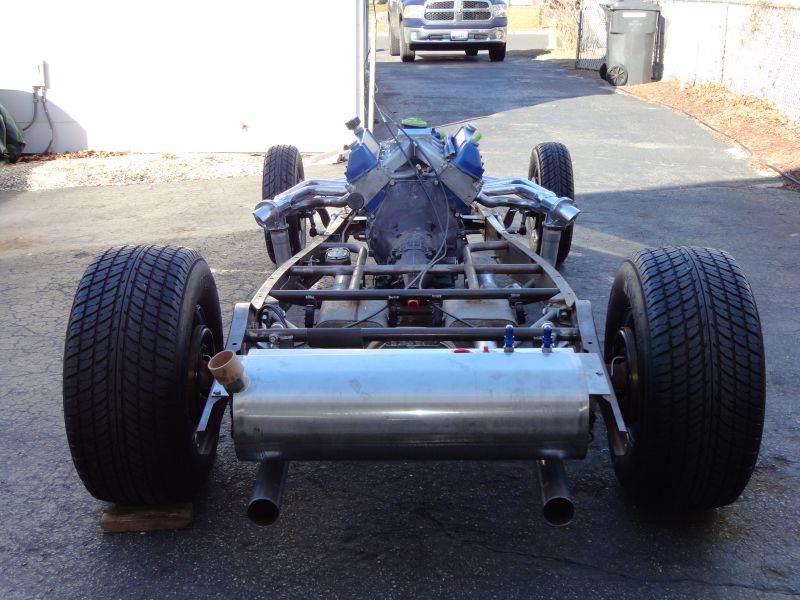
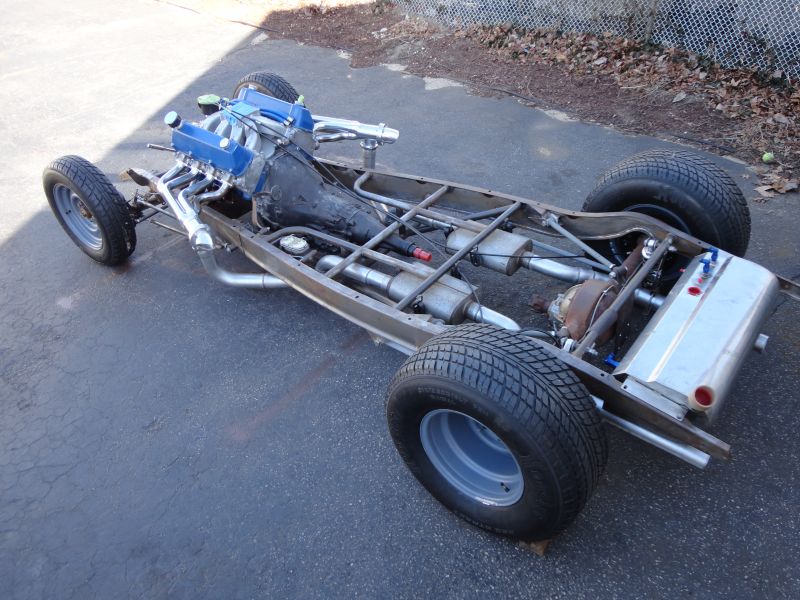

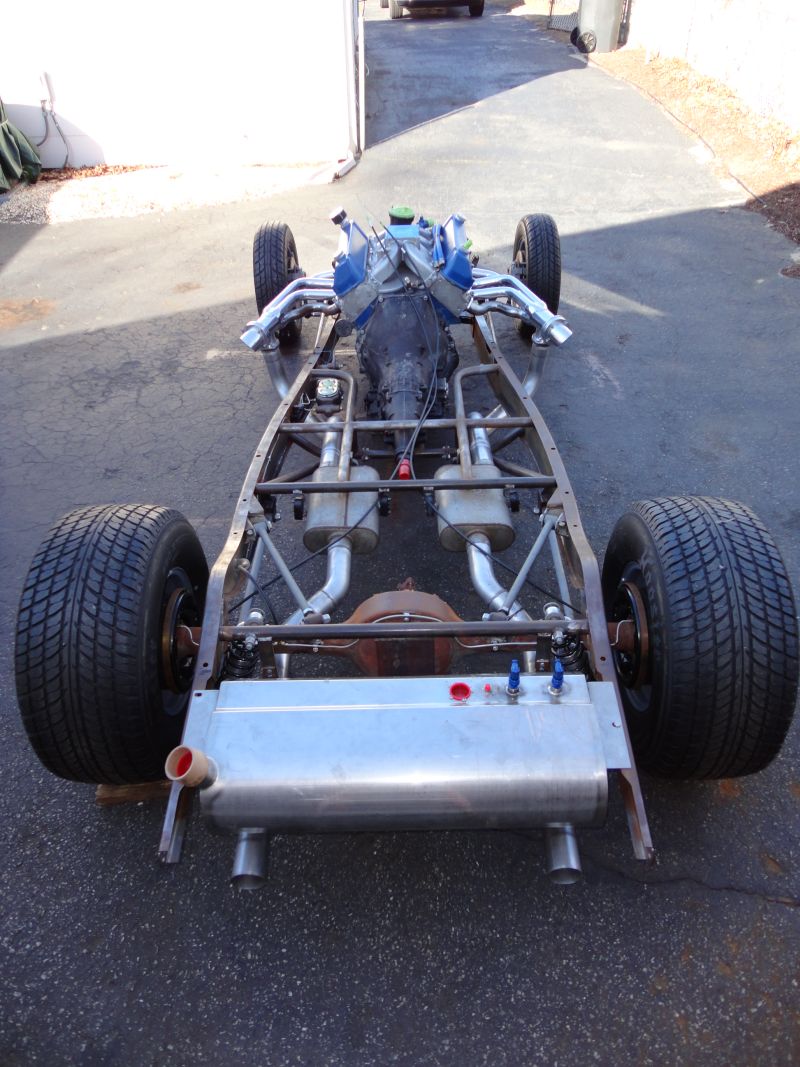


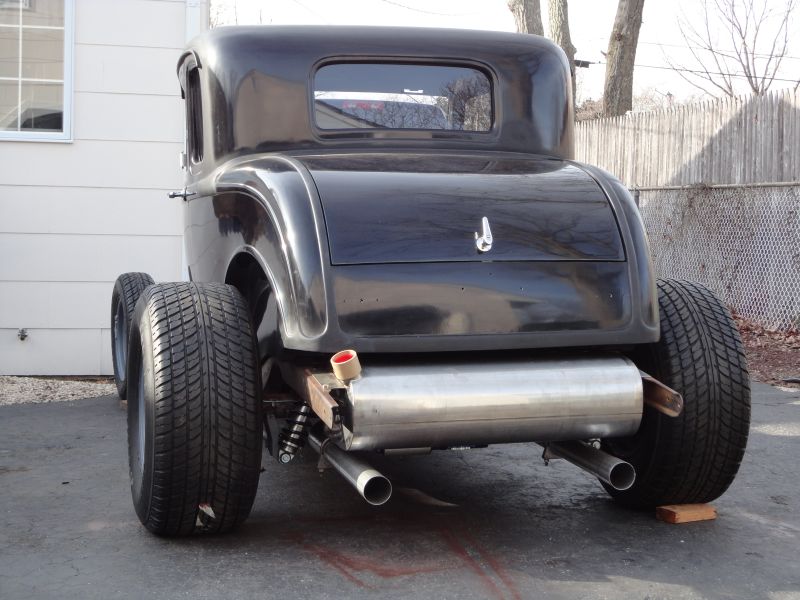


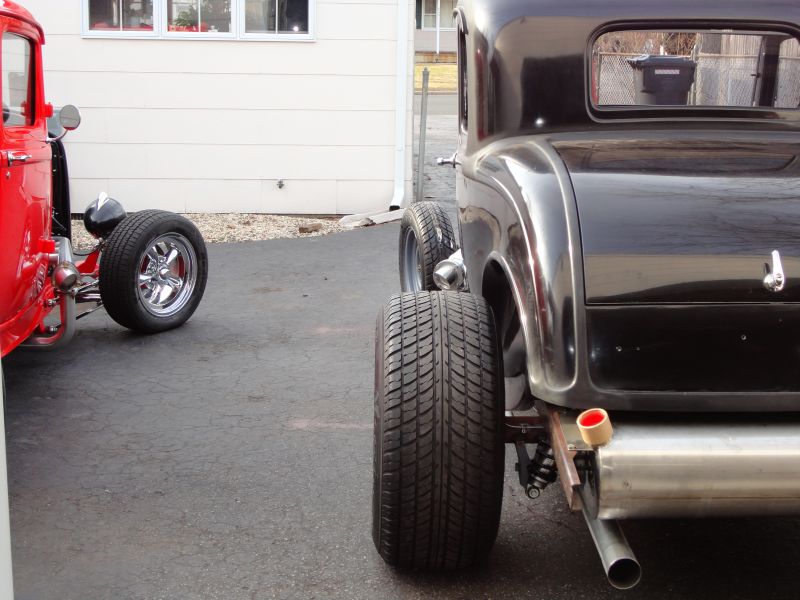

This is the first time we had the body on with the wheel/tire combo and we just love it!!! I can't wait until it's all done.
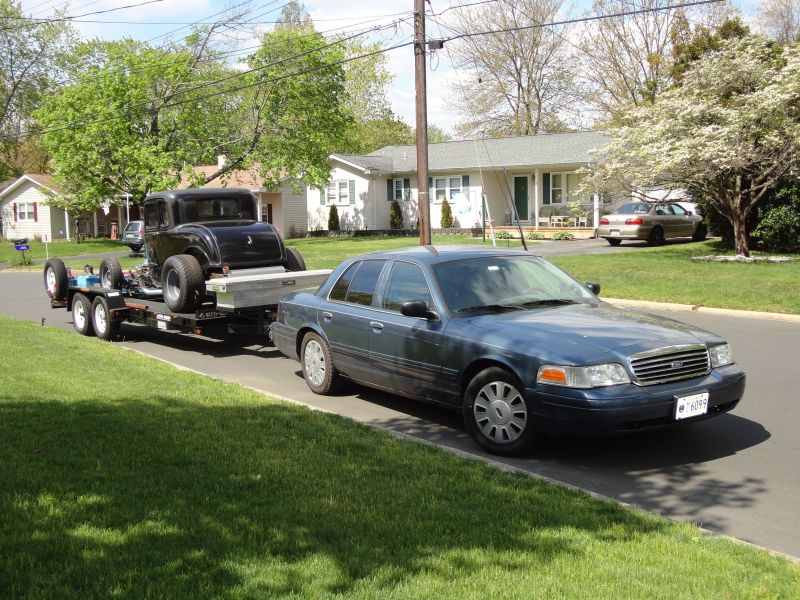
I trailered the Coupe to my garage in Maryland, so I can finally finish this thing each night when I come home from work. She sure looks great sitting in my workshop! Here's some pics from Dad's house before I trailered it down.
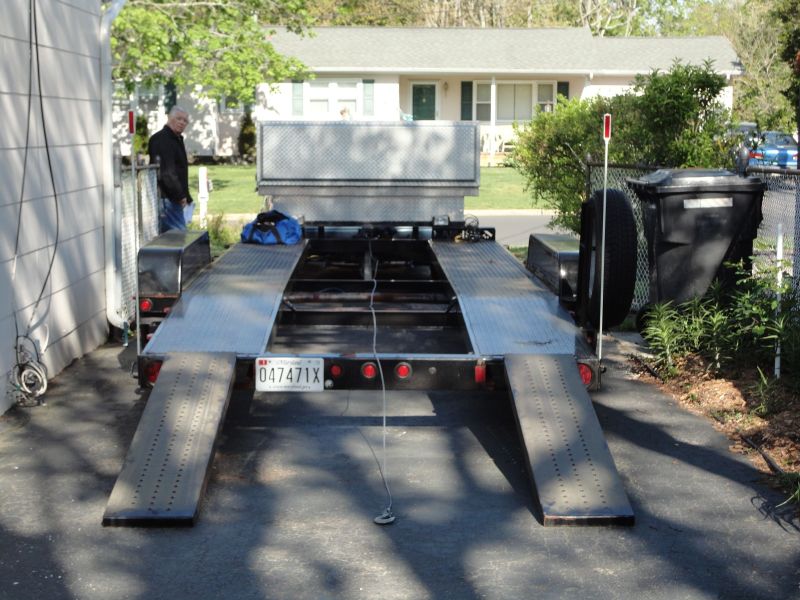

Moving dollies make great tools for spinning cars around.

Just use them in this orientation to prevent the dollies from shooting out from under the tires. LOL
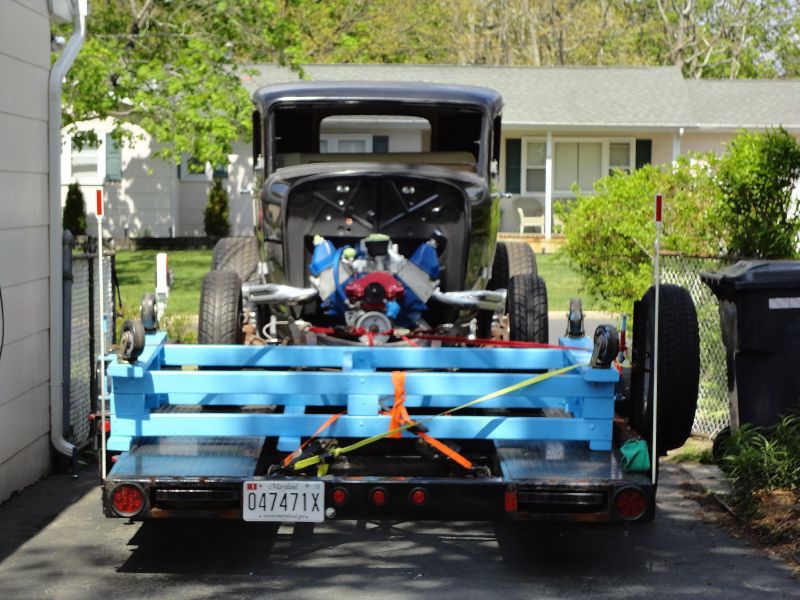
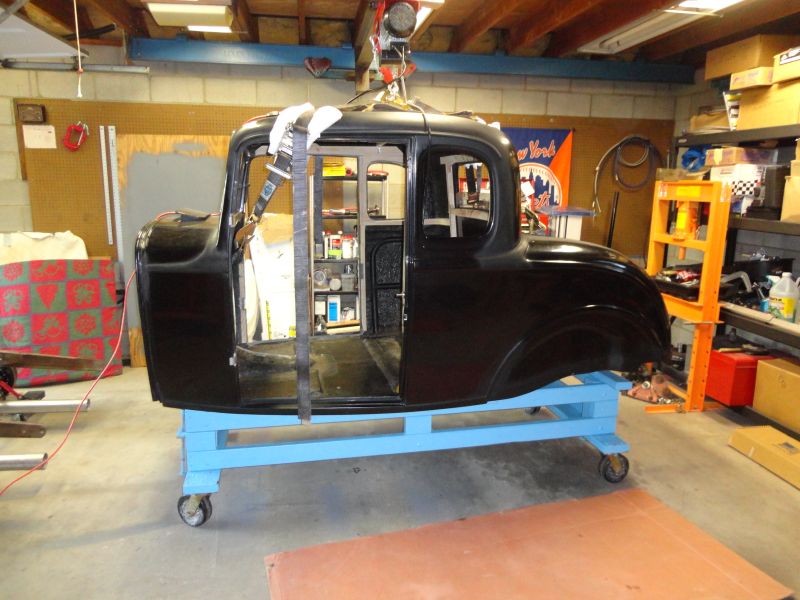
That blue piece is where I will place the body when I need to finish the chassis welding and painting.
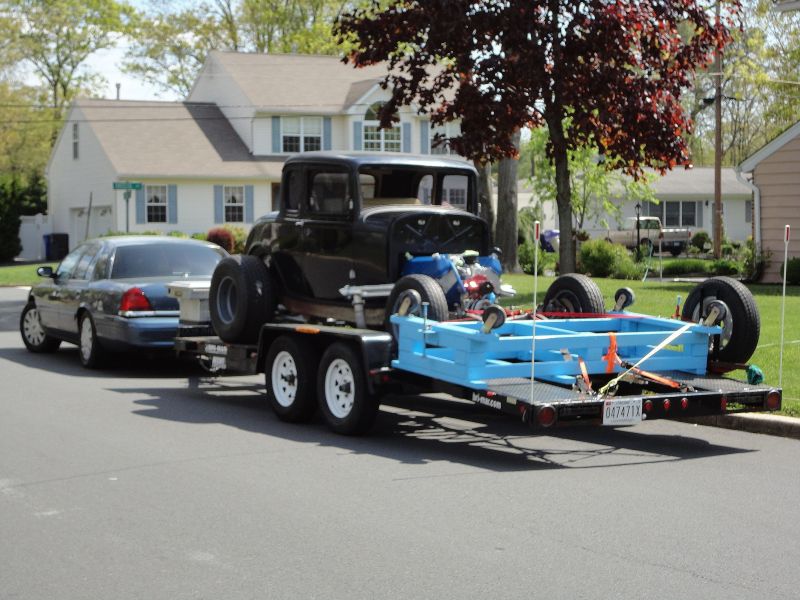
The Crown Vic towed this thing like it wasn't even there.
Here she is in my garage, safe and sound. I took a week's vacation next week to spend some time getting it done.
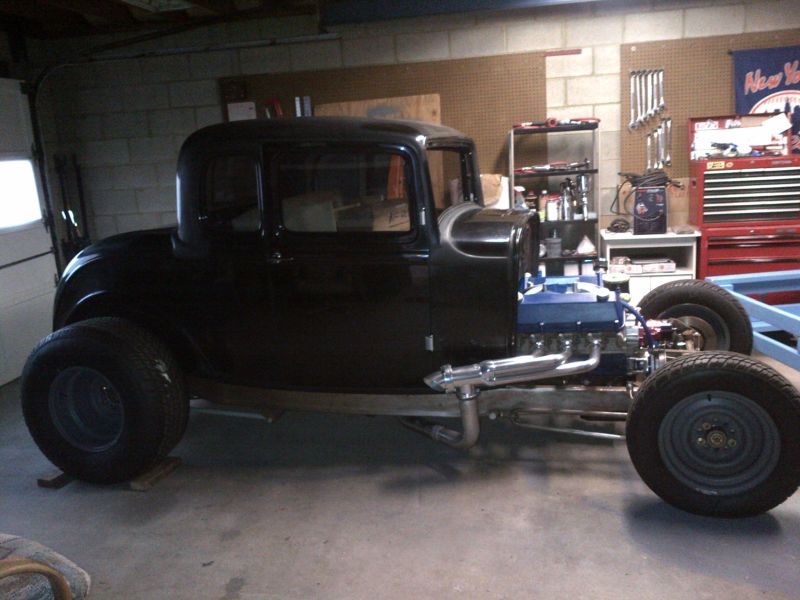
I have the body off the chassis!!! The Coupe spins around nice on those moving dollies!


A quick hello from me with the timer function on the camera.


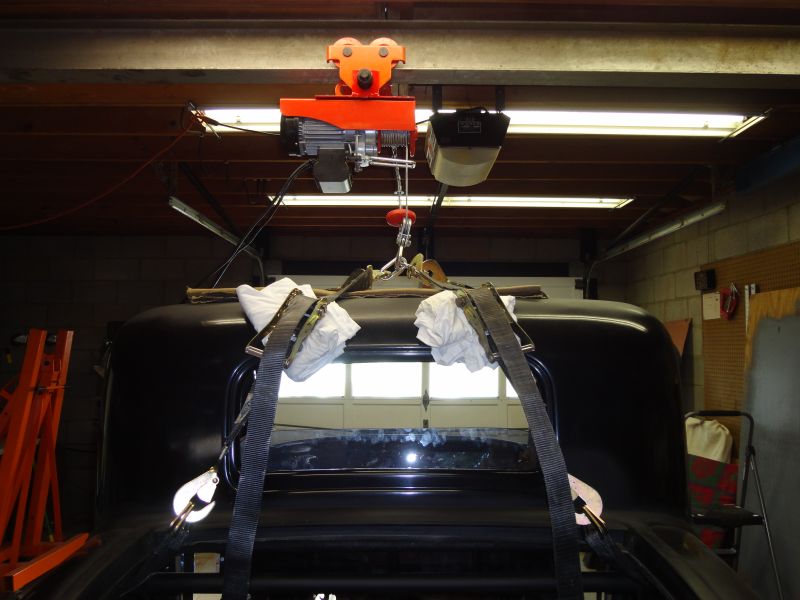
If anyone has a New Age Motorsports Coupe, here's the locations I put my straps.
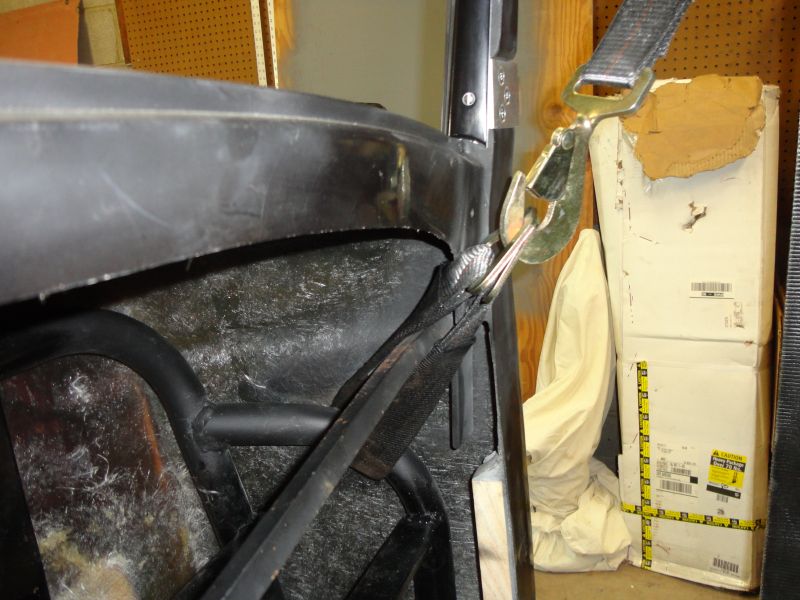

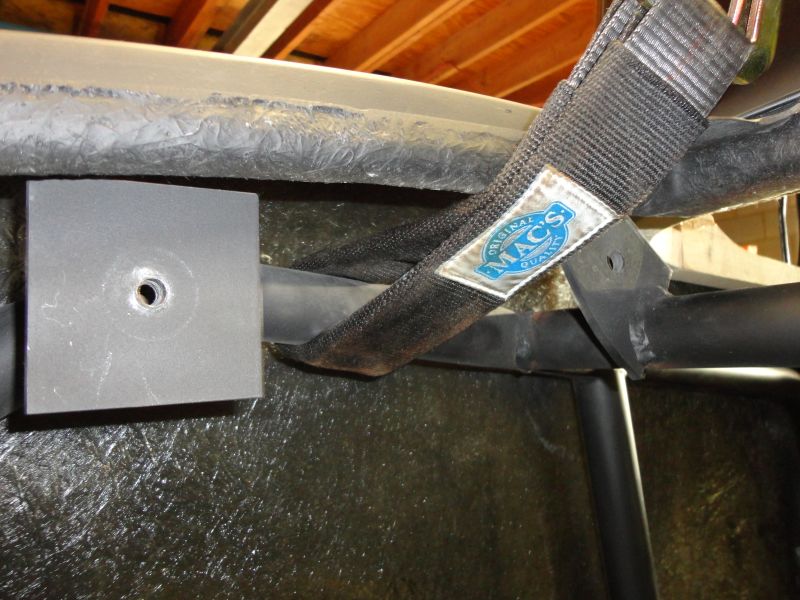
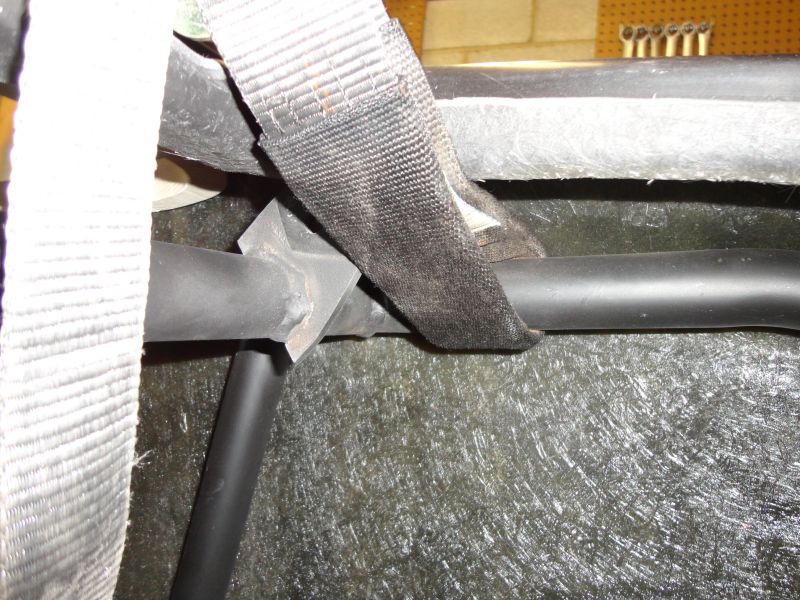
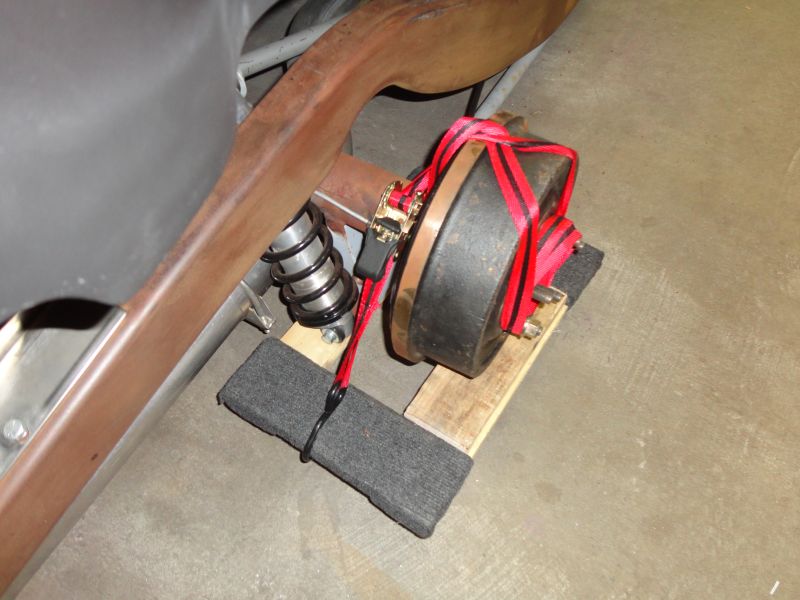
I had to remove the rear wheels and set the drums and rear shock bottom mounts on moving dollies to clear the body. I had to strap it down because it started to move when I pushed it forward.



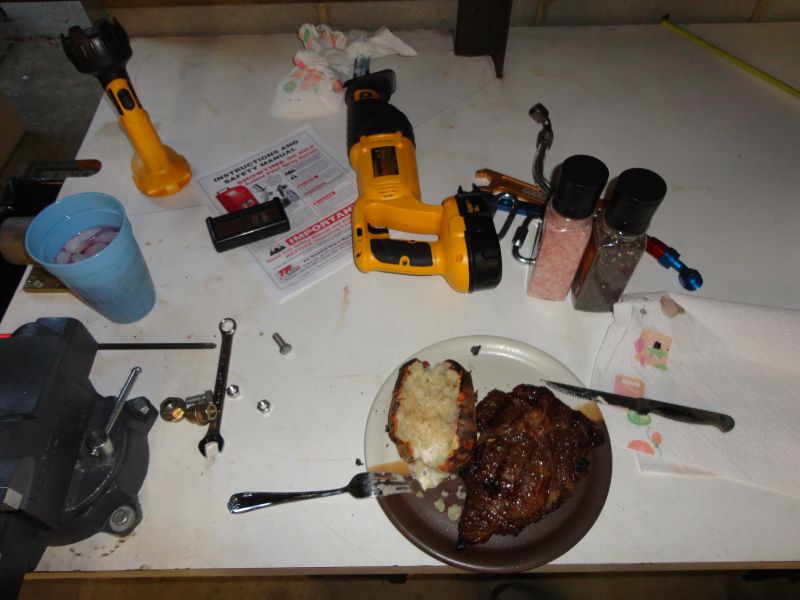
After all that, I finally cooked a rib eye steak that I've been marinating for 4 days. It was so tender and delicious!
I'm taking everything off now.

Garage looks great with everything back inside now. The neighbors loved this thing and kept coming over asking about it.


I can't wait until I start taking everything off the chassis to sandblast and paint.
After tomorrow, I will be ready to "blow" it apart and start sandblasting and painting everything on the chassis. I'm a total nut case, so I decided to redo my exhaust system. I never really liked the rush job on did on the exhaust, and those horrible hangers I had on the DynoMax mufflers. I decided to cut everything off and start fresh, with a set of 3" Summit glasspacks that I had on my brother's 47 Ford Truck. I cut out the Dynomax ones, and welded in those. I also bought a set of ball and socket connectors for the pipe from the header, to the muffler/tailpipe piece. I added a nice pipe hanger midway for support, and kept the tailpipe mount in the back. This system comes out 1-2-3 and is so simple. I also have a ton of room now for a driveshaft loop, which I still have to weld in. I also finished running the braided line for the fuel line. The regulator mount was another project, because it wasn't made for my MagnaFuel regulator like it said it was, so I had to modify that and stick it on the driver's side, which I really didn't want to do. All in all, I'm happy how it all turned out. Here's some pictures.
Old exhaust cut out, new tank to pump line run. I will be replacing that brass nipple with a steel close nipple

I will finish drilling and tapping for the screws that hold all the braided lines to the frame when I pull everything out. All my braided line will have those rubber insulated clamps. Home Depot had them on the shelf.

Here's the new exhaust system in place, tack welded, ready to come out and final weld. I can't wait to hear this big Ford cam through those glasspacks.
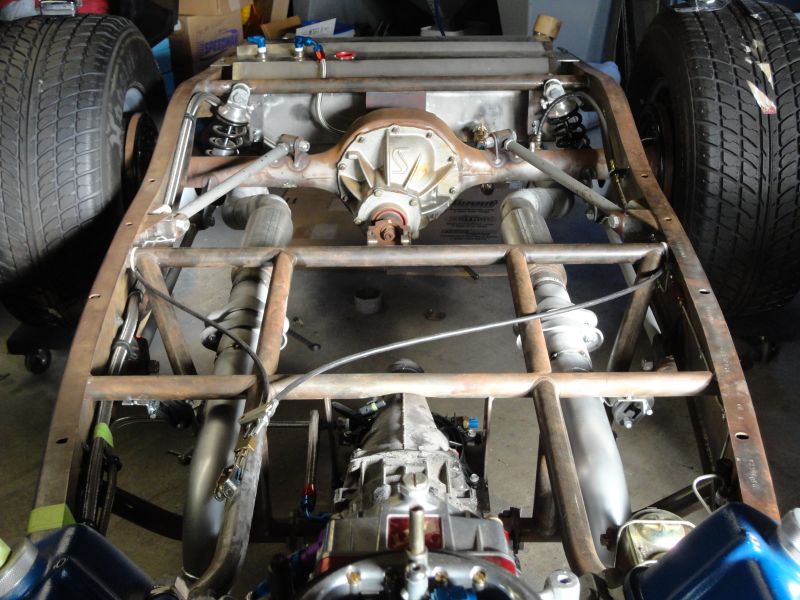
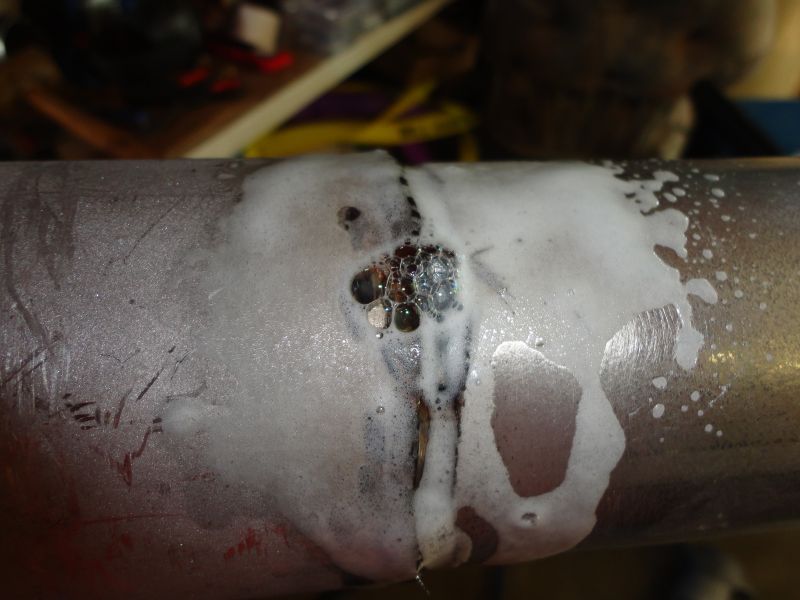
I did a leak test on each of the four exhaust pieces, before I painted them with High Temp Header paint. I found these pipe plugs in Lowes, that fit my 3" exhaust perfect. On one of the ends, I drilled a small 1/8" hole to blow air through to charge it up and spray with soapy water. Don't add too much air if it's tight, or you'll blow one of the plugs into something, like a house. LOL Don't ask me how I know that. I had a couple small leaks which I rewelded. I'm just an amatuer welder and don't get much practice time, but my exhaust will be leak free.
  No more bubbles after firing up the welder again.
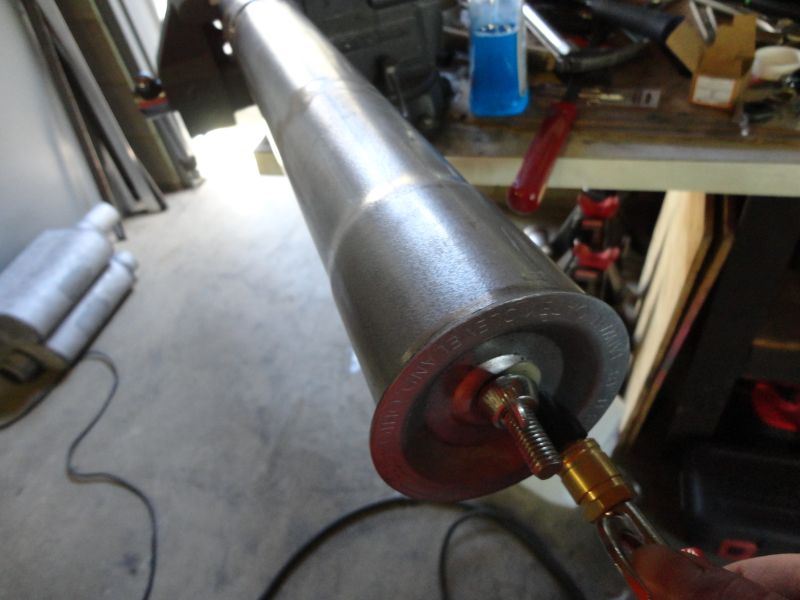
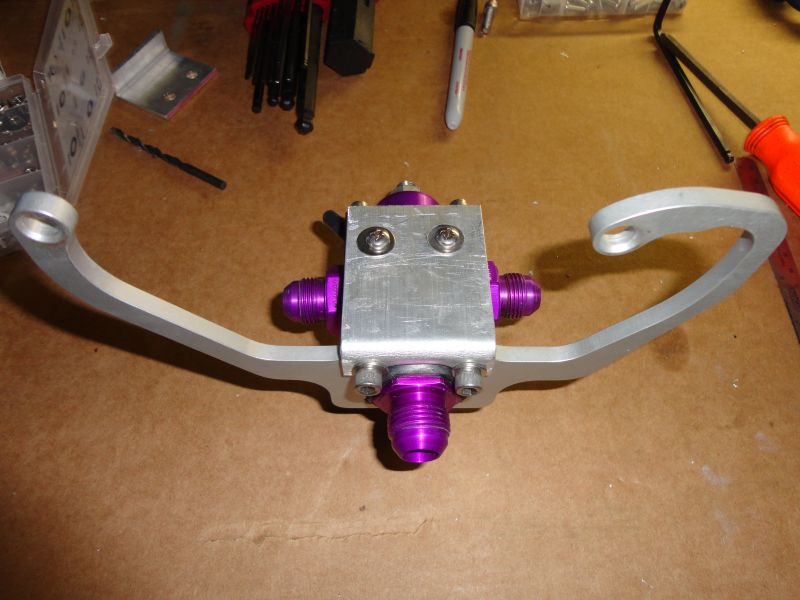
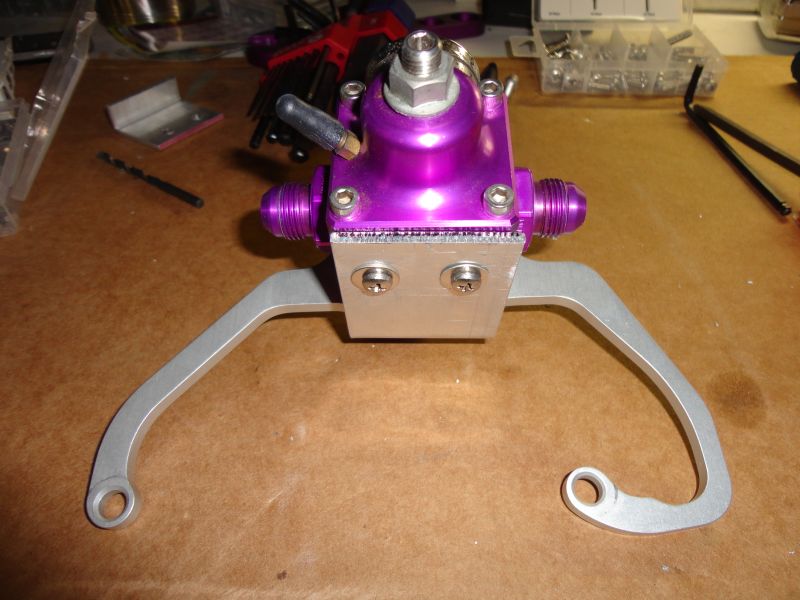
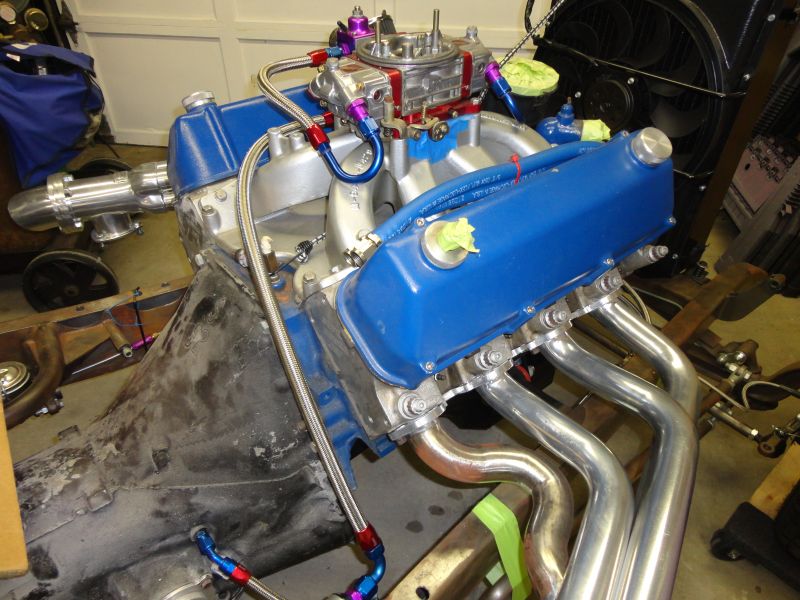
Here's where I had to modify my cool regulator bracket I bought. On the passenger side, the bracket was in the way of the AN fitting to the fuel bowl, and I couldn't screw the hose in. I had to move it to the drivers side, and use 180* fittings to keep everything tight. I think with the heater hoses, it would have been in the way of that too. I didn't want to mount it to the firewall, so that's why I went this route.


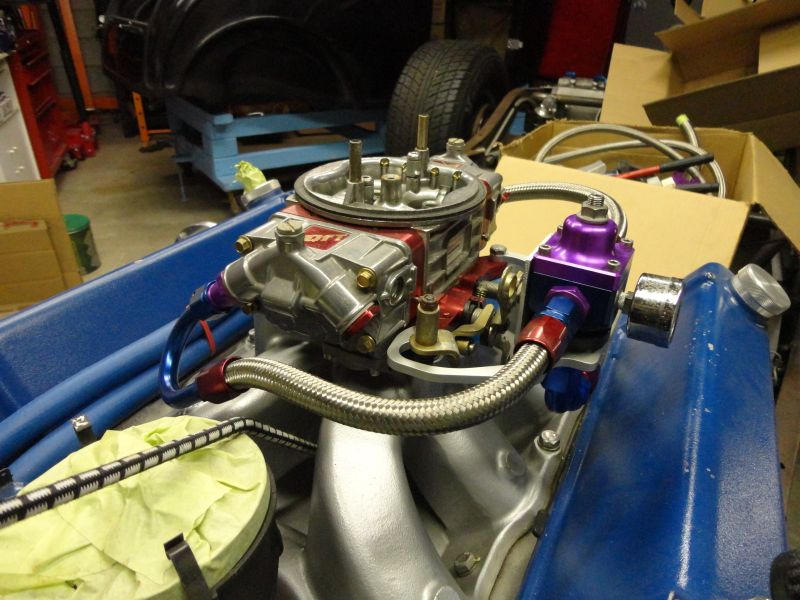
Here's some pics of the fuel line routing. I love braided line. It kind of goes with the theme of my project; overkill.



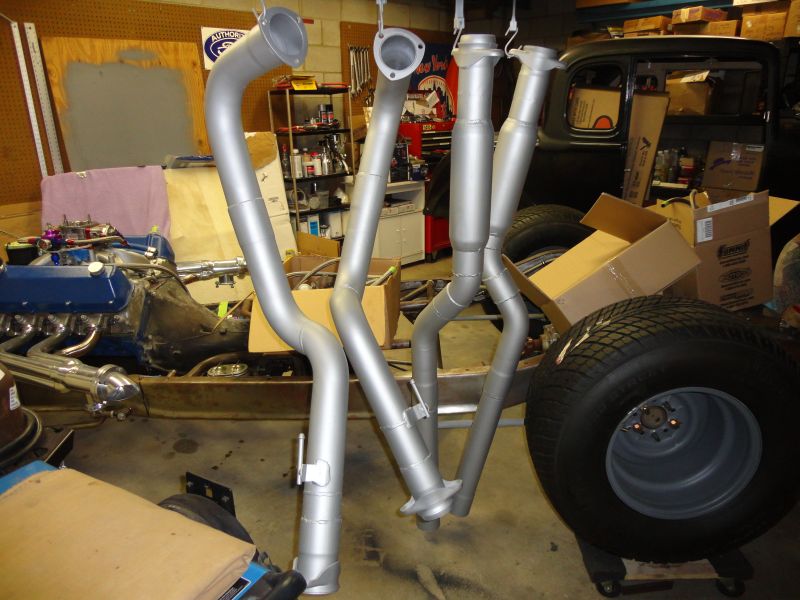
Here's my four exhaust pieces hanging and drying. I was going to Jet Hot Coat all of this, but my welds aren't pretty enough for that expense. :LOL: I can take it off and touch everything up when I want. I did spend alot of time on the 90* drop under the frame, so that will look good from the outside. The other welds are under the body, so they won't be seen. I will just send the Jayster Headers back to Sanderson for a recoat, since I had cylinders 4 and 8 reworked. Also, I must have had a bad ground at one time with the Mig Welder, and I had the stainless fuel line drapped across the engine and headers. I had two burn marks from the line to the header pipe that needs to be retouched. LOL I chopped out those sections of braided line.
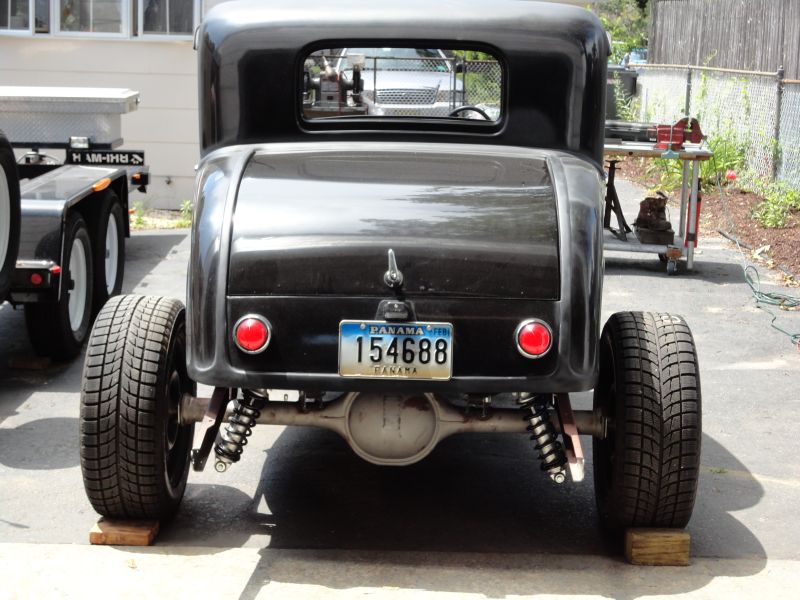
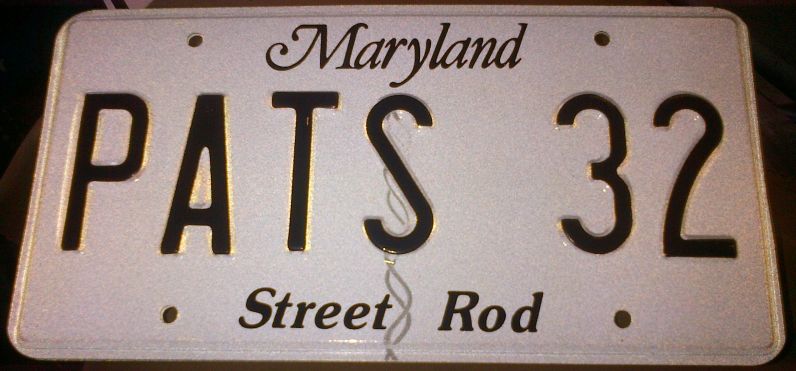
Lastly, how cool are my Maryland plates? My Dad and I are both Pat, so I thought this was fitting. I'm so glad my first choice wasn't taken.
I installed the heater hoses to the heater/water pump, and I have some pictures of the seat I put in before that. I had to weld up some mounts to overcome the rise in the floorboard. I also made steel plates on the top and bottoms of where the mounts bolted, so I spread the load of the seat mount. I really didn't want the bulkhead fittings for the hoses to be vertical, but it was the only way to go with what I had. I wanted them horizontal, but the inside connections would have be tough. Overall, I like how it turned out, because it's so easy to take everything out again. I also mounted the spoon gas pedal, and that was the only spot it could be. I wish I had more time over Dad's at the time.


Due to a busy August at work before I left NJ, and packing up and moving to Maryland for my job, I've barely spent time at Dad's garage. Dad did the brake lines since I was gone, and I came back to test fit the fuel tank, fuel pump, and install the 3" exhaust. The mufflers were off my old Fairlane, so I'll clean them up and paint with the exhaust or I may hot coat the whole system.


I finally shrunk all the pics I took while working on the Coupe at my Dad's when I was back again. We did alot of work on it, and it's looking nice! I think after my next trip back to NJ, I can tow the rolling chassis back to my house in Maryland and start taking it apart to sandblast and paint. Here's some pics of the progress.
I posted pics of my exhaust, but here's how I indexed each piece to take off and weld while on the garage floor. I only had a day home to do the whole exhaust, so I wish I could have spent more time during daylight hours welding this. It was dark in the garage and sitting on the floor with this wrapped around my legs stooped over. LOL I will clean everything up when before I send it to get hot coated.


I finished up the fuel tank and fittings. My cousin Dan TIG welded the stainless steel bungs, and then I installed the fittings. I had a huge boo boo. I thought I had 4 inches of clearance between the body and tank, but it was only 2 inches. If I only had Dan weld those bungs in flush, I would have had plenty of room. Luckily it will work with the short one piece 90's, but I will put the Dremel round sandpaper fitting on these spots to add a little more clearance once the webbing for the body is on, and I put an insulator for the tank to to chassis.


I installed my old B&M Quick Silver Shifter from my 66 Fairlane in the Coupe too. I have a new black plastic housing to form for the Coupe, but the old one from the Fairlane is pictured. I used tape to help mark out where I need to trim the new one. I have it mounted so the seat doesn't hit it when we pull it all the way up, but it's set at the half way point for my Dad and I to shift comfortable.


I also installed the Lokar parking brake. This works great as well, and on the second "click" it locks up the rear wheels. Note to self, make sure you adjust the drums brakes before adjusting the parking brake. LOL The fiberglass body floor was a 1/2 inch thick, and I could only put it in one spot on our Coupe, due to the roll bar chassis underneath. With our 521/C6 combo, the trans tunnel had some different curves that we had to work around. This was the only spot we could mount the parking brake, and I had to make a "dog bone" cut out to even get it to fit right. The carpet and sound deadner will make it look flush. I had to shim the right side of the handle to make it look even. I will use spacers on the final build instead of the hex nuts.


I have a transmission cooler on the radiator, but with a 521/C6 3500 stall converter, I wanted to add an additional trans cooler with a fan. Room is tight on the 32 as you know, so I found a little cubby hole under the tailshaft of the transmission. This is a B & M deal with a fan that pulls air through the cooler and it has a sending unit to turn the relay on/off for the fan at 170 degrees. I made a mount that I welded to the tubular chassis support above the trans, and made a round cutout to weld to that and welded it to two pieces of 1/4" steel that I bolted to the cooler mounts with rubber insulating bushings from old shocks. I think this will work okay. I put the driveshaft in there (which will only be 23 inches long), and it had 3" of clearance. I will come out of the trans to the trans cooler in the radiator, into this auxilary cooler, back into the trans. I will let you know how cool things are.


Here's some final pics of my Coupe outside, and my cousin Dan came with his original steel body 32 Coupe.


This is the first time we had the body on with the wheel/tire combo and we just love it!!! I can't wait until it's all done.
I trailered the Coupe to my garage in Maryland, so I can finally finish this thing each night when I come home from work. She sure looks great sitting in my workshop! Here's some pics from Dad's house before I trailered it down.


Moving dollies make great tools for spinning cars around.

Just use them in this orientation to prevent the dollies from shooting out from under the tires. LOL

That blue piece is where I will place the body when I need to finish the chassis welding and painting.

The Crown Vic towed this thing like it wasn't even there.

Here she is in my garage, safe and sound. I took a week's vacation next week to spend some time getting it done.

I have the body off the chassis!!! The Coupe spins around nice on those moving dollies!


A quick hello from me with the timer function on the camera.


If anyone has a New Age Motorsports Coupe, here's the locations I put my straps.


I had to remove the rear wheels and set the drums and rear shock bottom mounts on moving dollies to clear the body. I had to strap it down because it started to move when I pushed it forward.


After all that, I finally cooked a rib eye steak that I've been marinating for 4 days. It was so tender and delicious!

I'm taking everything off now.

Garage looks great with everything back inside now. The neighbors loved this thing and kept coming over asking about it.


I can't wait until I start taking everything off the chassis to sandblast and paint.
After tomorrow, I will be ready to "blow" it apart and start sandblasting and painting everything on the chassis. I'm a total nut case, so I decided to redo my exhaust system. I never really liked the rush job on did on the exhaust, and those horrible hangers I had on the DynoMax mufflers. I decided to cut everything off and start fresh, with a set of 3" Summit glasspacks that I had on my brother's 47 Ford Truck. I cut out the Dynomax ones, and welded in those. I also bought a set of ball and socket connectors for the pipe from the header, to the muffler/tailpipe piece. I added a nice pipe hanger midway for support, and kept the tailpipe mount in the back. This system comes out 1-2-3 and is so simple. I also have a ton of room now for a driveshaft loop, which I still have to weld in. I also finished running the braided line for the fuel line. The regulator mount was another project, because it wasn't made for my MagnaFuel regulator like it said it was, so I had to modify that and stick it on the driver's side, which I really didn't want to do. All in all, I'm happy how it all turned out. Here's some pictures.
Old exhaust cut out, new tank to pump line run. I will be replacing that brass nipple with a steel close nipple

I will finish drilling and tapping for the screws that hold all the braided lines to the frame when I pull everything out. All my braided line will have those rubber insulated clamps. Home Depot had them on the shelf.

Here's the new exhaust system in place, tack welded, ready to come out and final weld. I can't wait to hear this big Ford cam through those glasspacks.

I did a leak test on each of the four exhaust pieces, before I painted them with High Temp Header paint. I found these pipe plugs in Lowes, that fit my 3" exhaust perfect. On one of the ends, I drilled a small 1/8" hole to blow air through to charge it up and spray with soapy water. Don't add too much air if it's tight, or you'll blow one of the plugs into something, like a house. LOL


Here's where I had to modify my cool regulator bracket I bought. On the passenger side, the bracket was in the way of the AN fitting to the fuel bowl, and I couldn't screw the hose in. I had to move it to the drivers side, and use 180* fittings to keep everything tight. I think with the heater hoses, it would have been in the way of that too. I didn't want to mount it to the firewall, so that's why I went this route.


Here's some pics of the fuel line routing. I love braided line. It kind of goes with the theme of my project; overkill.


Here's my four exhaust pieces hanging and drying. I was going to Jet Hot Coat all of this, but my welds aren't pretty enough for that expense. :LOL: I can take it off and touch everything up when I want. I did spend alot of time on the 90* drop under the frame, so that will look good from the outside. The other welds are under the body, so they won't be seen. I will just send the Jayster Headers back to Sanderson for a recoat, since I had cylinders 4 and 8 reworked. Also, I must have had a bad ground at one time with the Mig Welder, and I had the stainless fuel line drapped across the engine and headers. I had two burn marks from the line to the header pipe that needs to be retouched. LOL I chopped out those sections of braided line.

Lastly, how cool are my Maryland plates? My Dad and I are both Pat, so I thought this was fitting. I'm so glad my first choice wasn't taken.


patfromjersey- BBF CONTRIBUTOR

- Posts : 408
Join date : 2009-08-11
Age : 58
Location : Glen Burnie, MD
 Re: 1932 Ford Coupe Project
Good to see ya back at it pat! Even better to hear from ya! The '32 is looking awesome man!

61coon- Posts : 1824
Join date : 2009-08-07
Age : 47
Location : Hillsboro,TN
 Re: 1932 Ford Coupe Project
Thank you my friend! Good to hear from you. 

patfromjersey- BBF CONTRIBUTOR

- Posts : 408
Join date : 2009-08-11
Age : 58
Location : Glen Burnie, MD
 32
32
What an awsome project.Only thing I can think of that could make it better would be to have a set of Boss 9 heads hanging outside those frame rails.But that will be awsome. Have fun
 Re: 1932 Ford Coupe Project
wow! you been hard at work! 

cool40- BBF CONTRIBUTOR

- Posts : 7313
Join date : 2009-08-31
Age : 53
Location : on the 1/8 mile dyno
 Re: 1932 Ford Coupe Project
Glad you're back Pat. Car looks great, and what makes it even better is you are doing with your dad. Time spent like this make memories that will last forever.
Mike R- Posts : 1381
Join date : 2009-08-05
Age : 63
Location : St Paul Mn
 Re: 1932 Ford Coupe Project
Great job Pat,You should be proud brother. Awesome work,and realy good to hear from you.
bbf-falcon- Posts : 8995
Join date : 2008-12-03
Location : Jackson, Ohio
 Re: 1932 Ford Coupe Project
Good to see you back Pat! Awesome work!! 


56Tbird- BBF CONTRIBUTOR

- Posts : 5260
Join date : 2008-12-02
Age : 65
Location : Hawesville,Ky.
Page 3 of 5 •  1, 2, 3, 4, 5
 Similar topics
» Cool 1932 Ford Video
» 1989 Ford Mustang 521 BBF Coupe
» bad azz XA Coupe
» 1962 Ford Fairlane 25.5 Project
» New 57 Ford Project Should we go big block or small block? Pics added
» 1989 Ford Mustang 521 BBF Coupe
» bad azz XA Coupe
» 1962 Ford Fairlane 25.5 Project
» New 57 Ford Project Should we go big block or small block? Pics added
Page 3 of 5
Permissions in this forum:
You cannot reply to topics in this forum