1932 Ford Coupe Project
+27
DFI429
Dark Horse of Apocalypse
Dave C.
jbozzelle
Mike R
whatbumper
STHAZLET
61coon
darren
cletus66
Tommyj466
John Myrick
goinpostal
Bigshank
KY JELLY
665 falcon
512Fairlane
dfree383
bbf-falcon
Barney
342g
bruno
cool40
billandlori
GT300TD
56Tbird
patfromjersey
31 posters
Page 4 of 5
Page 4 of 5 •  1, 2, 3, 4, 5
 Re: 1932 Ford Coupe Project
Glad to hear from you Pat, did you really need that saws-all to cut your steak?  The 32 looks great, tell dad the other old guy says hi.

342g- BBF CONTRIBUTOR

- Posts : 3237
Join date : 2009-08-06
Age : 81
Location : Lawrenceburg, In.
 Re: 1932 Ford Coupe Project
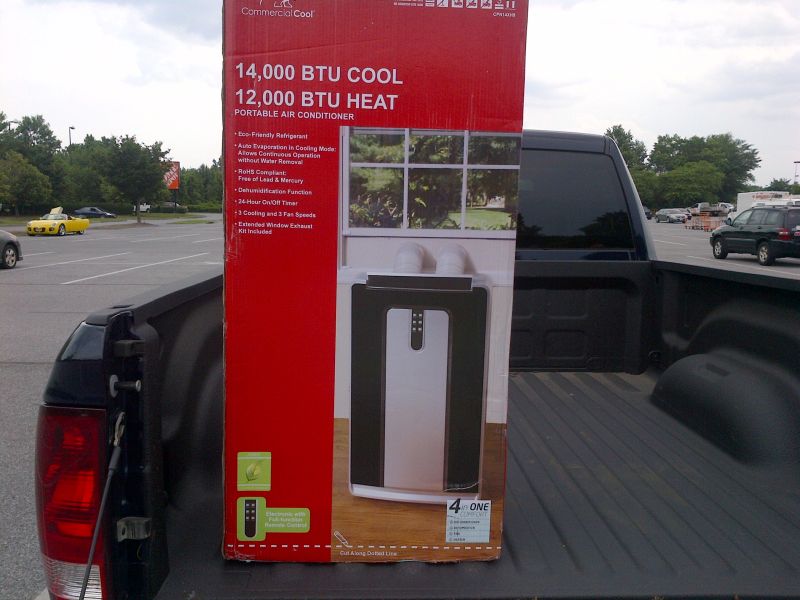
Thank you so much guys. It's so good to be posting updates here again. I have to catch up on the other topics and forums as well. I hope everyone has as great a summer as I am.  My project for the day is hooking up my portable A/C-Heating Unit in the garage I picked up on Wednesday. No more 100* days for me in there.
LOL Harold! hahaha I could have used a fork on that steak. I will tell Dad you said hello. I talked to him for almost an hour this morning on what I did to the Coupe the past few days. I'm going to see him next weekend.
LOL Harold! hahaha I could have used a fork on that steak. I will tell Dad you said hello. I talked to him for almost an hour this morning on what I did to the Coupe the past few days. I'm going to see him next weekend.

patfromjersey- BBF CONTRIBUTOR

- Posts : 408
Join date : 2009-08-11
Age : 58
Location : Glen Burnie, MD
 Re: 1932 Ford Coupe Project
Hey Pat,gotta change your Username now to PatfromDC.
bbf-falcon- Posts : 8995
Join date : 2008-12-03
Location : Jackson, Ohio
 Re: 1932 Ford Coupe Project
Everybody needs an overhead winch like that in their shop...!
jbozzelle- Posts : 3705
Join date : 2009-08-10
Age : 50
Location : New Orleans
 Re: 1932 Ford Coupe Project
The car is looking great pat. im glad see you are back,your almost in the home stretch:cheers:

Bigshank- Posts : 150
Join date : 2009-08-22
 Re: 1932 Ford Coupe Project
Rick - No way brother! I will always be Jersey at heart. 
Jon - That beam/trolley was in the garage when I bought my house in October. I installed the electric Chinese Warehouse winch, after finding out the manual block and tackle up there was only rated for 1/4 ton. With the double pulley setup now, I'm good for 1,348lbs. It works great, but not much headroom in there. I just made it taking the body off. It will be handy when I pull the engine/trans soon. I do have to remake the mount I made from the winch to the trolley. I centered the bracket to the trolley, instead of putting the center of the trolley over the hook end of the winch. It does "wheelies" when I lift. I had to wedge blocks of wood to keep it level when I lifted the body.
Mark - Great to see you too! I'll be a regular again. It took me awhile to get settled in, but I'm good now. I love it down here in Maryland. Things are alot slower and laid back. I also don't have that brutal commute like up the Garden State Parkway (Raceway) everyday. My ride is 15 minutes and I never go over 40MPH; new company truck too with no gas payments.
Jon - That beam/trolley was in the garage when I bought my house in October. I installed the electric Chinese Warehouse winch, after finding out the manual block and tackle up there was only rated for 1/4 ton. With the double pulley setup now, I'm good for 1,348lbs. It works great, but not much headroom in there. I just made it taking the body off. It will be handy when I pull the engine/trans soon. I do have to remake the mount I made from the winch to the trolley. I centered the bracket to the trolley, instead of putting the center of the trolley over the hook end of the winch. It does "wheelies" when I lift.
Mark - Great to see you too! I'll be a regular again. It took me awhile to get settled in, but I'm good now.

patfromjersey- BBF CONTRIBUTOR

- Posts : 408
Join date : 2009-08-11
Age : 58
Location : Glen Burnie, MD
 Re: 1932 Ford Coupe Project
welcome back Pat , the project is coming along .... keep it up ans we will see some vids soon  ..... by the way i hope you saved me some steak
_________________
coming soon x275 build .........
thanks to all my sponsors :
www.OakleyMotorsports.com
www.Induction-Solutions.com
www.bfevansraceparts.com
www.ultimateconverter.com
www.keithfulpmotorsports.com
 Re: 1932 Ford Coupe Project
I will cook some new ones when we meet again.  I have another week of vacation starting July 15th, so I will post more pictures then. My Dad and brother Joe are picking me up Thursday morning (Jul 11th) to go to the Air Force Museum in Dayton, OH. After that deal, I will be non stop on the Coupe. I can't wait to paint this thing and start putting it all together.

patfromjersey- BBF CONTRIBUTOR

- Posts : 408
Join date : 2009-08-11
Age : 58
Location : Glen Burnie, MD
 goodguys
Hey good guys is in columbus friday saturday sunday. They always put on a great show. Ill be there all weekend
https://www.good-guys.com/ggn
https://www.good-guys.com/ggn

Bigshank- Posts : 150
Join date : 2009-08-22
 Re: 1932 Ford Coupe Project
Pat , how dang TALL are you ?!!!!! You'll never be able to fit inside that beautiful car you're creating.!
 You'll never be able to fit inside that beautiful car you're creating.!
Dave C.- Posts : 1268
Join date : 2013-03-23
 Re: 1932 Ford Coupe Project
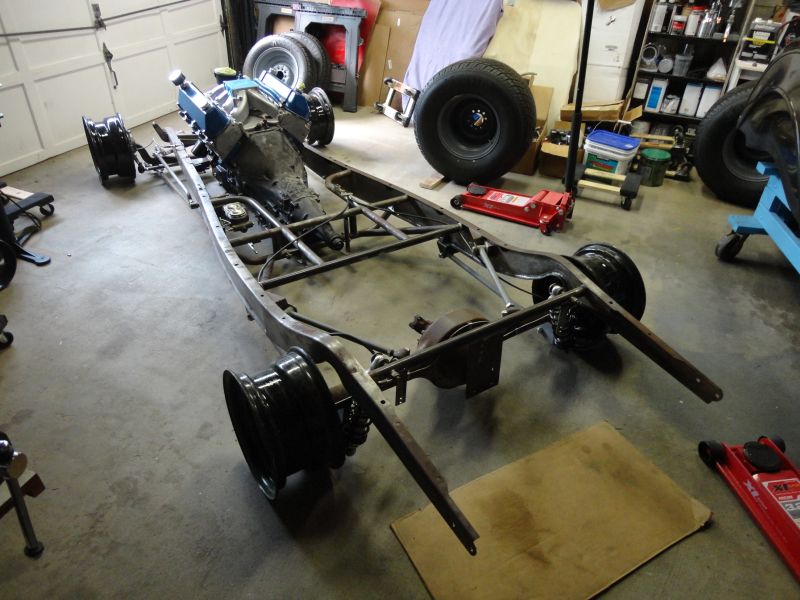
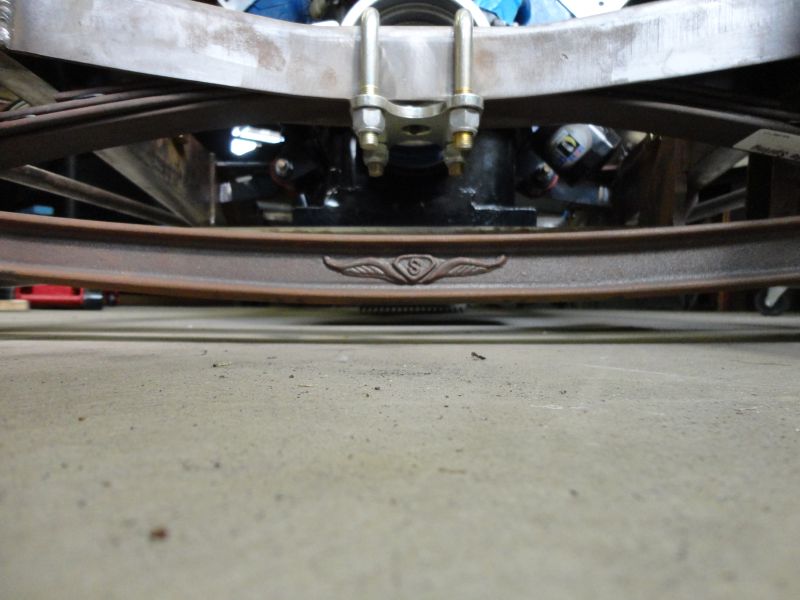
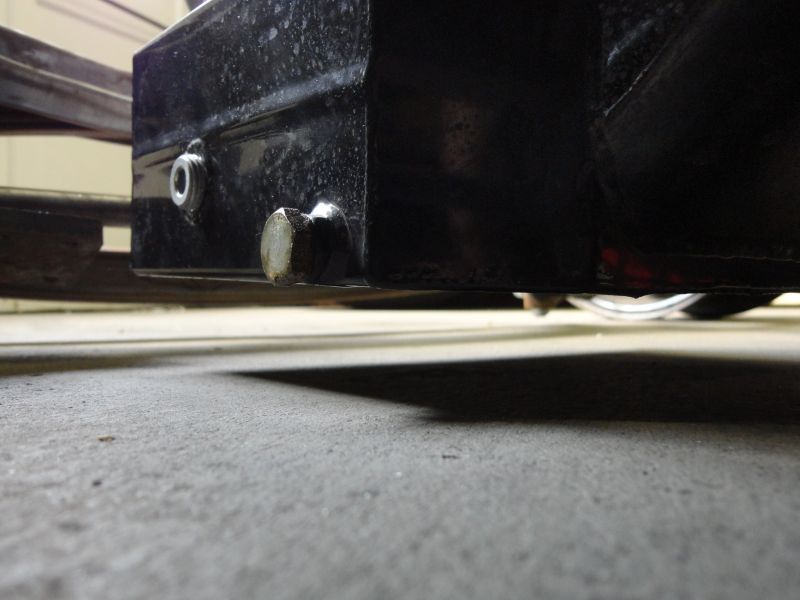
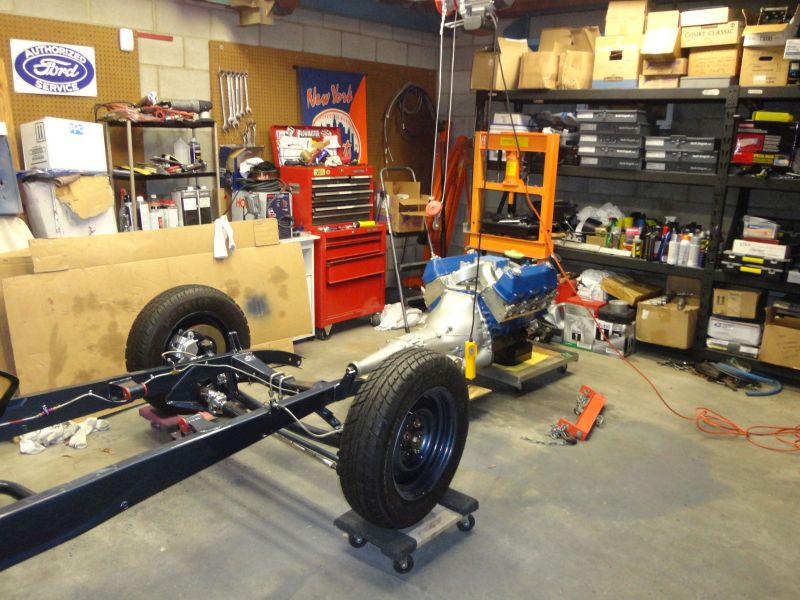
I've been a busy beaver since April, but I finally was able to put up my pictures to my webspace. Before I took everything off the frame, I put on a set of bare 15" rims to check my clearance if all the tires went flat.  The closest thing was the transmission pan, but I was still able to slide a piece of paper under it. A flat tire would give me more clearance, so this is worst case scenario.


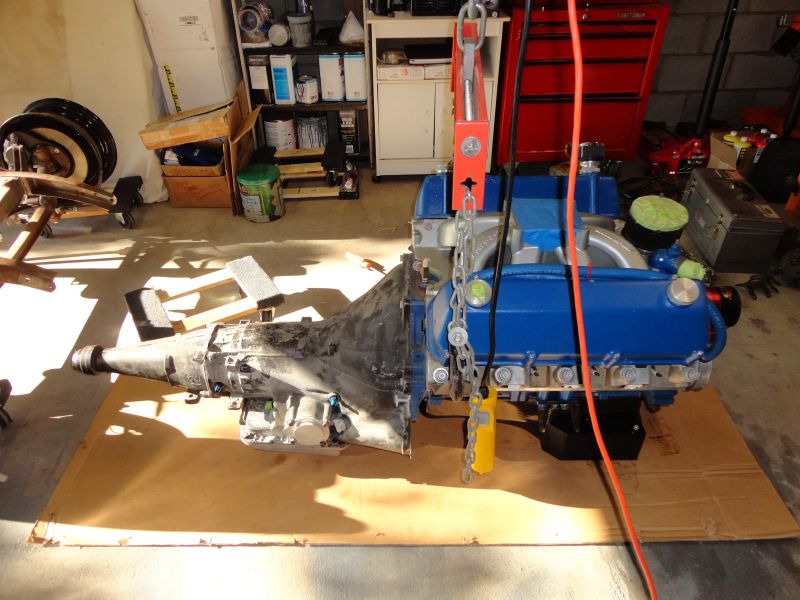
Then I pulled the engine and trans....

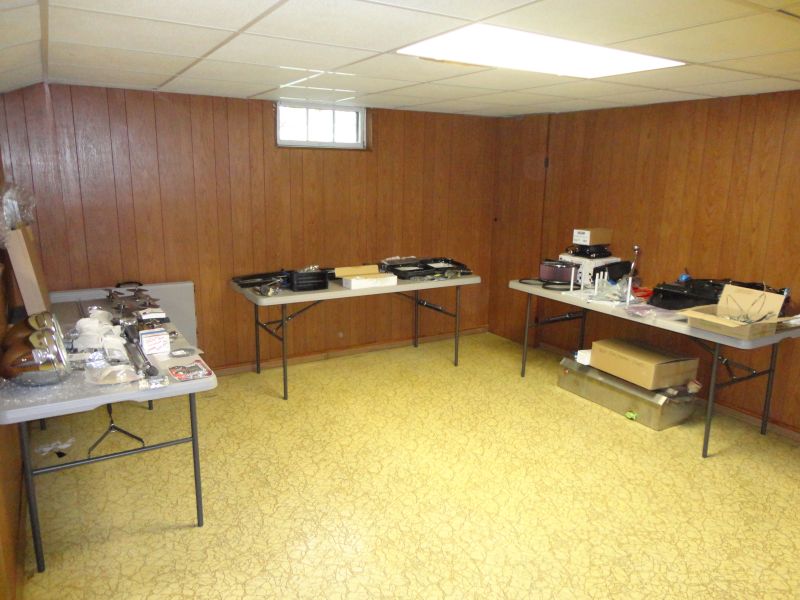
Lots of space in the basement for parts...
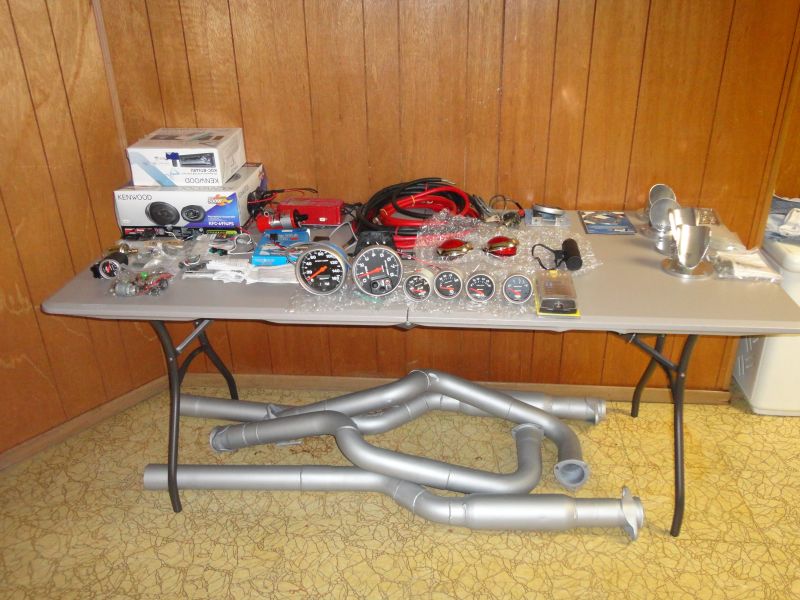
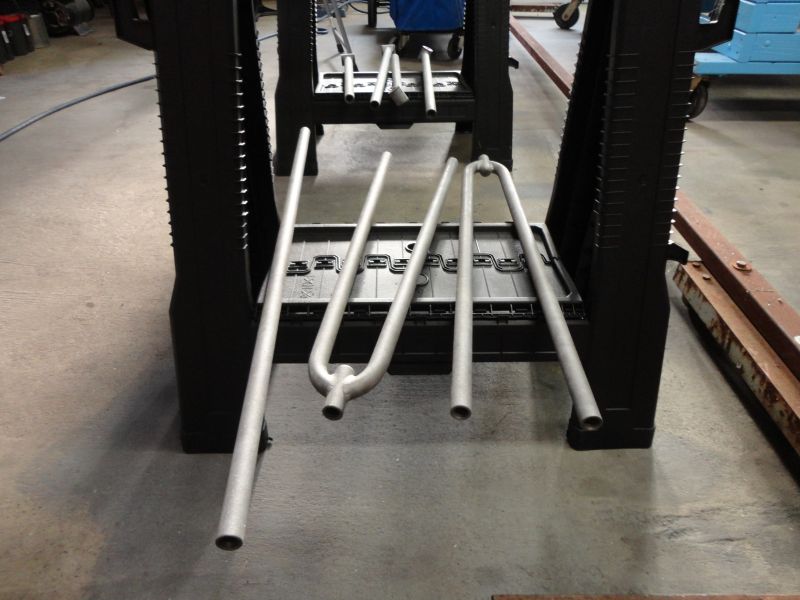
The sandblasting was next after everything else was taken off...
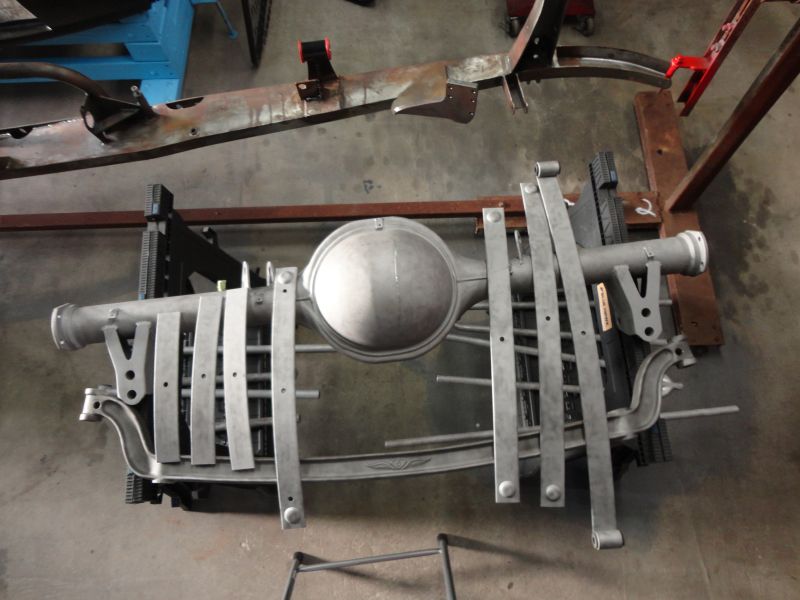
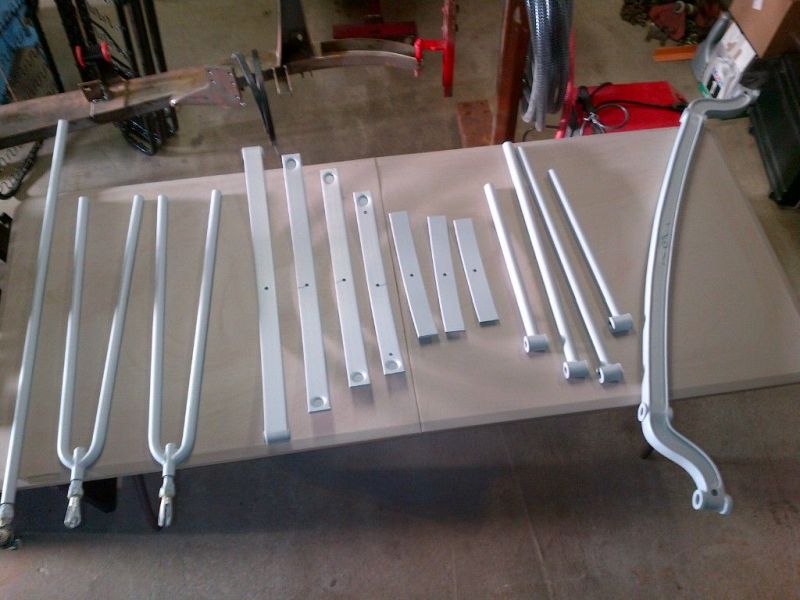
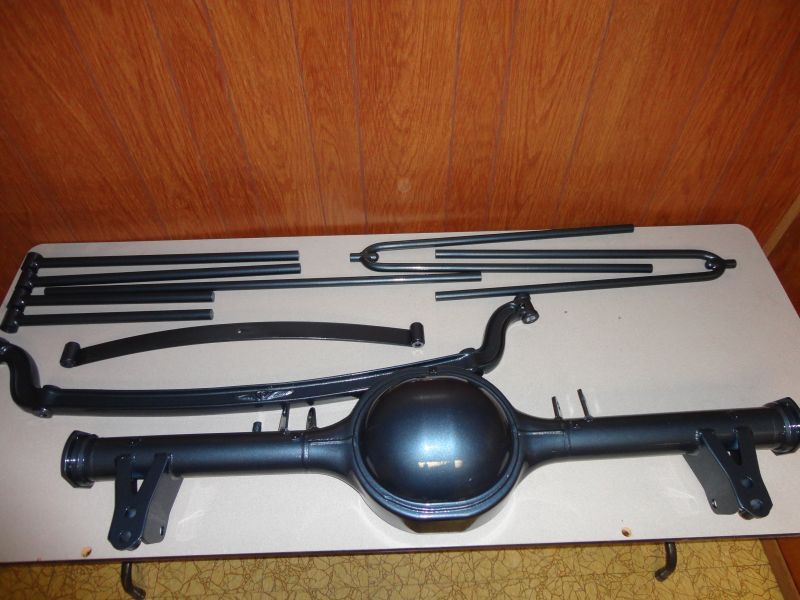
Here's some of those parts painted. The color is Ford's Norsea Blue This is the color of my Crown Victoria and it has so much metal flake in it. This was my first time painting anything and it came out pretty good.
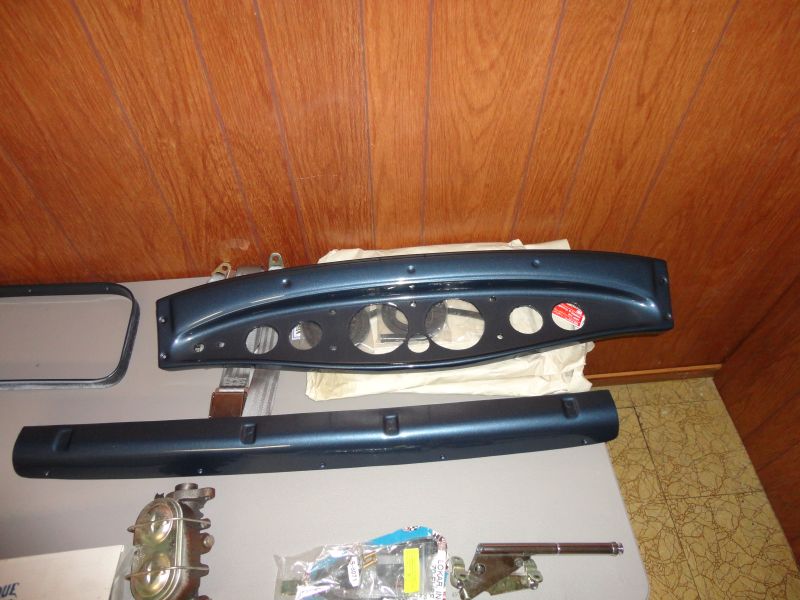
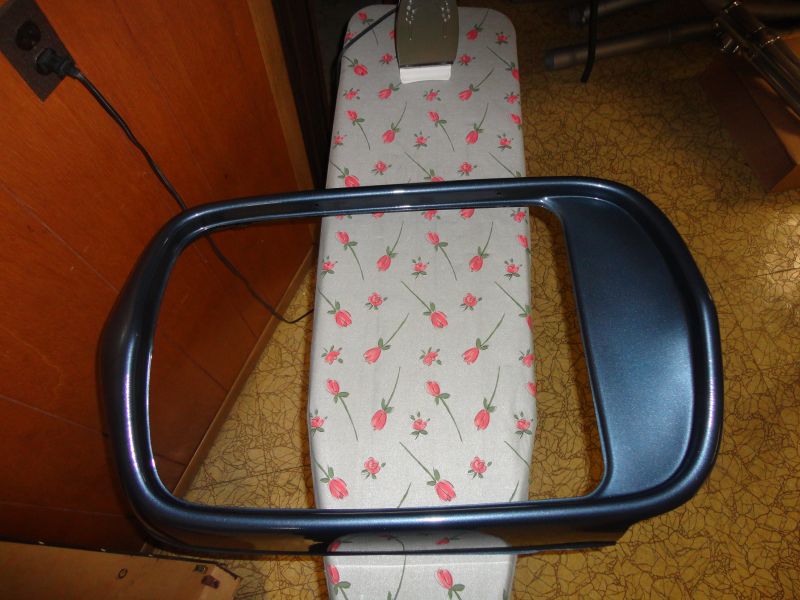
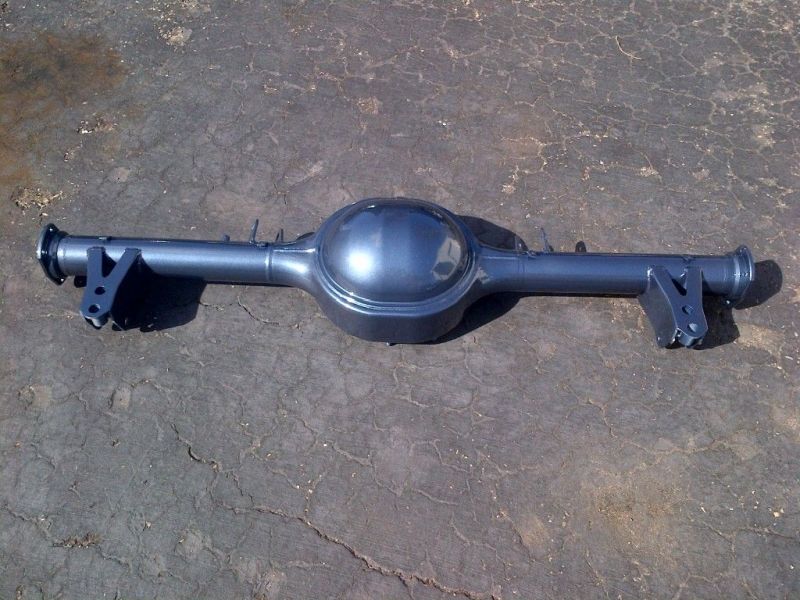
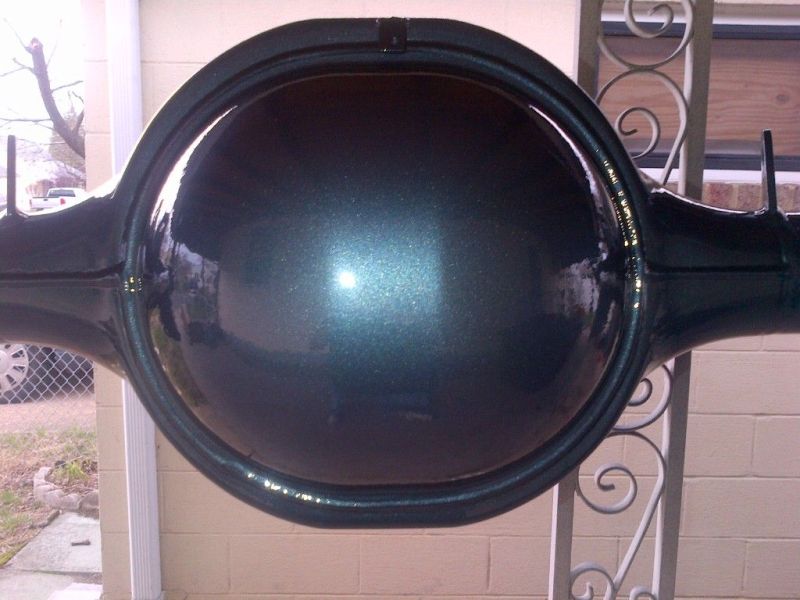
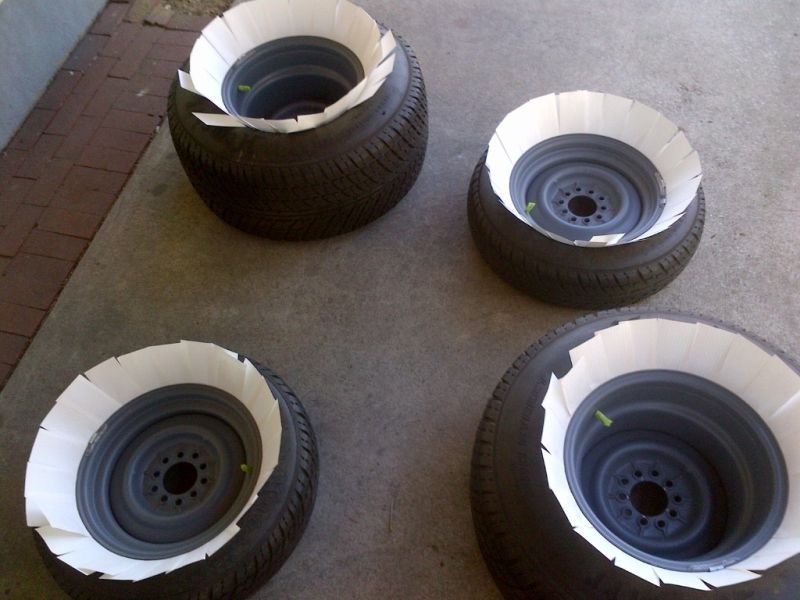
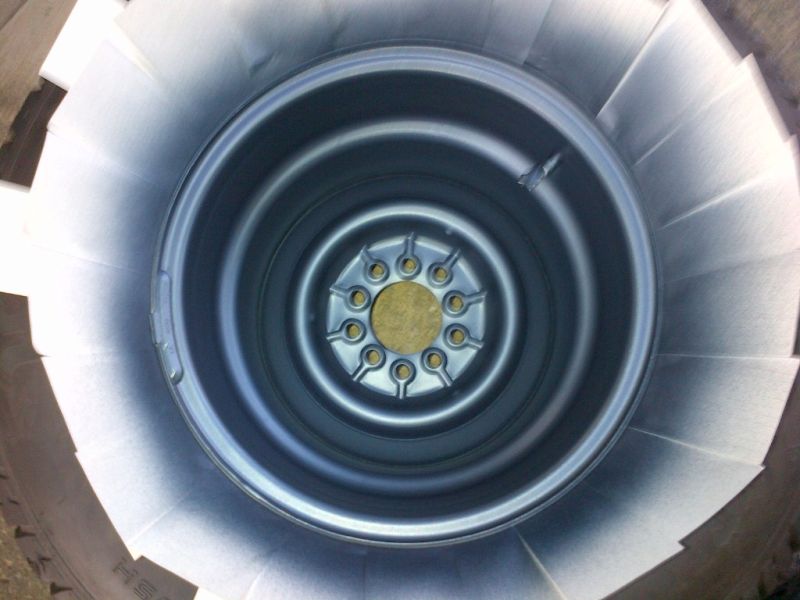
Here's a neat trick to paint the rims if you have the tires mounted already. I took out the needle valve and let the air out of the tire. Then I stepped on the sidewalls and inserted index cards between the tire and rim. I found it online.
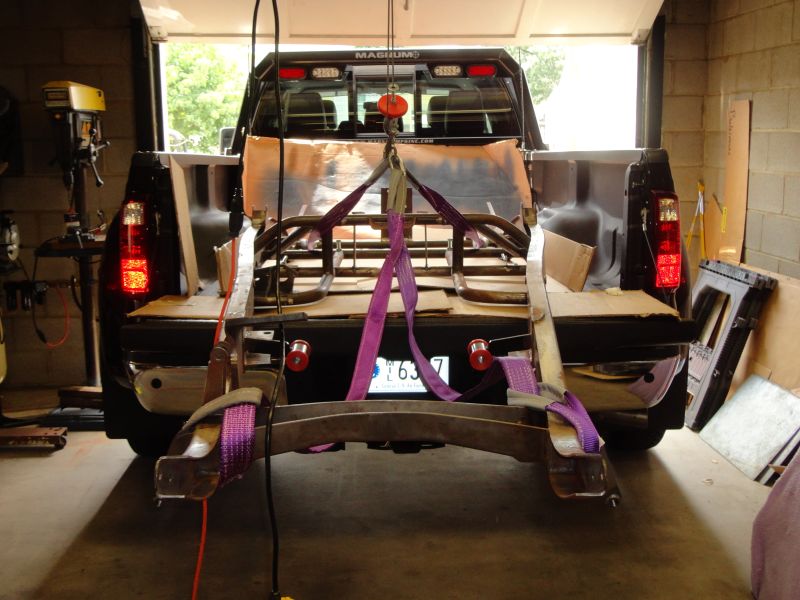
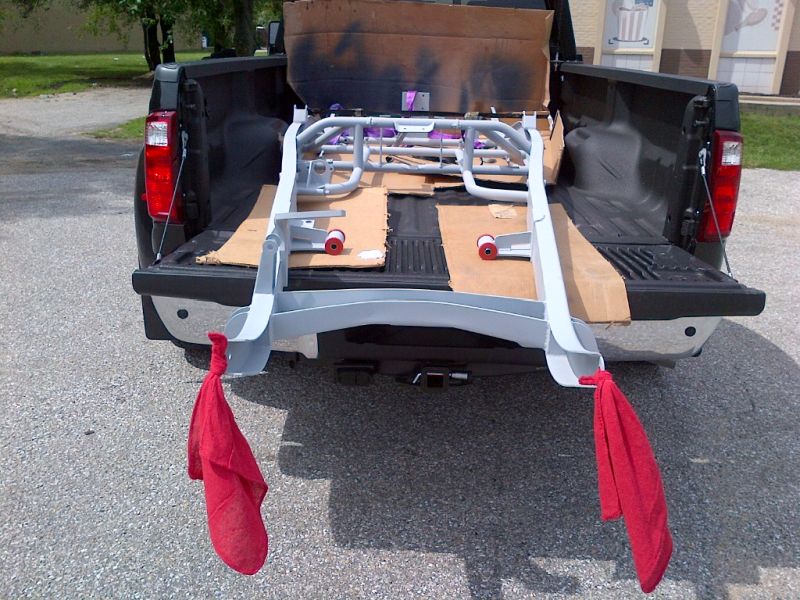
Lastly, here's some pics of me getting my frame to the sandblasters and getting it back. I'm so glad I had them spray the primer after, because I wouldn't have been able to get to it for the past two weeks. I hoping to get it painted next weekend.


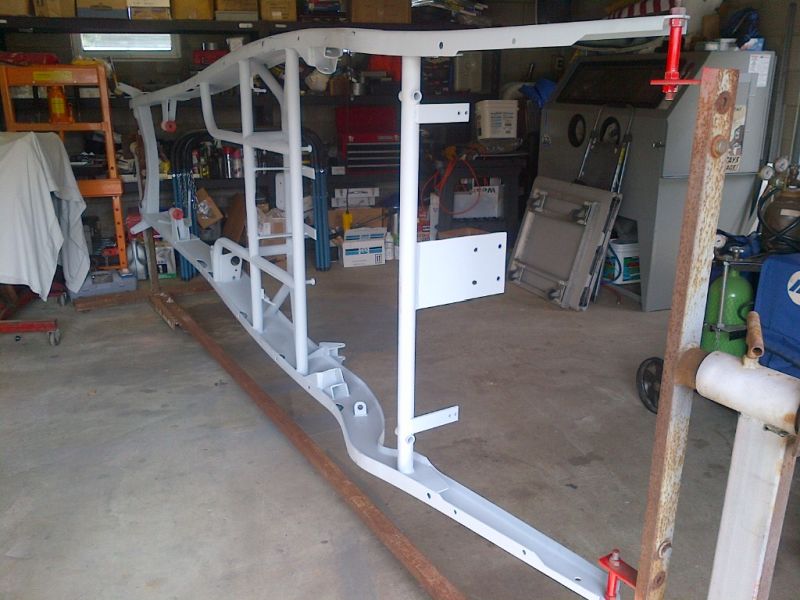
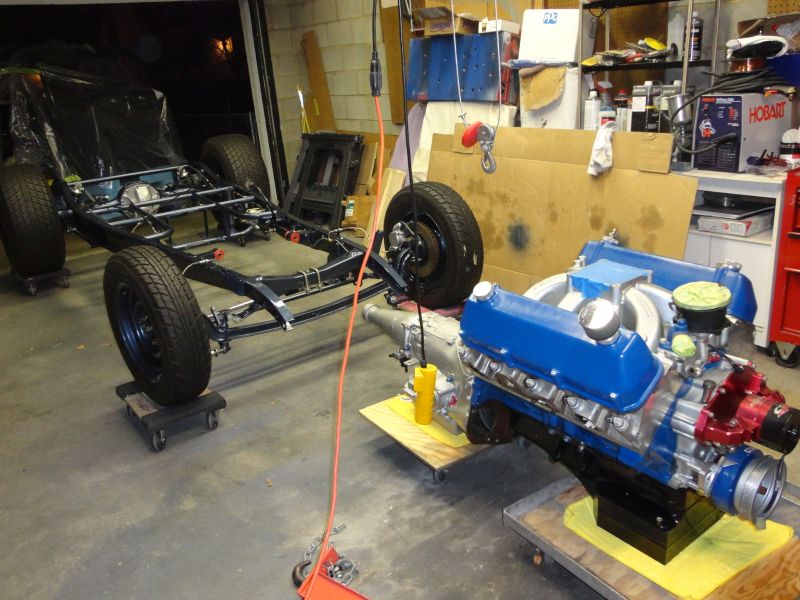
This is where I'm at as of today. My mission today is getting the engine off the engine stand and installing the converter into the freshly painted transmission. I'm also going to install the 3.50 gears in the differential too. I will post some pics of those when I'm all done. Next will be painting the body and then I can start putting it together. My Dad is going to come down to Baltimore from Jersey to give me a hand. He can't wait!!! Great to be back in the swing of things.
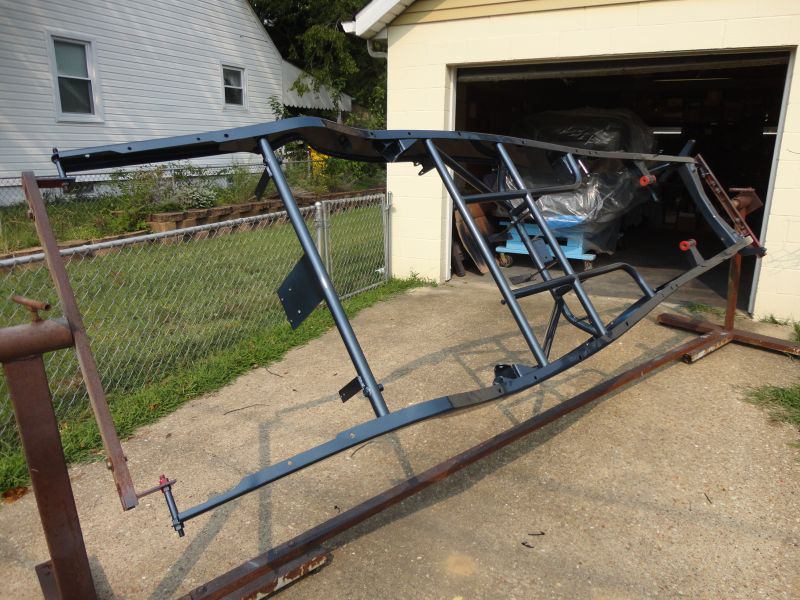
The frame is done.
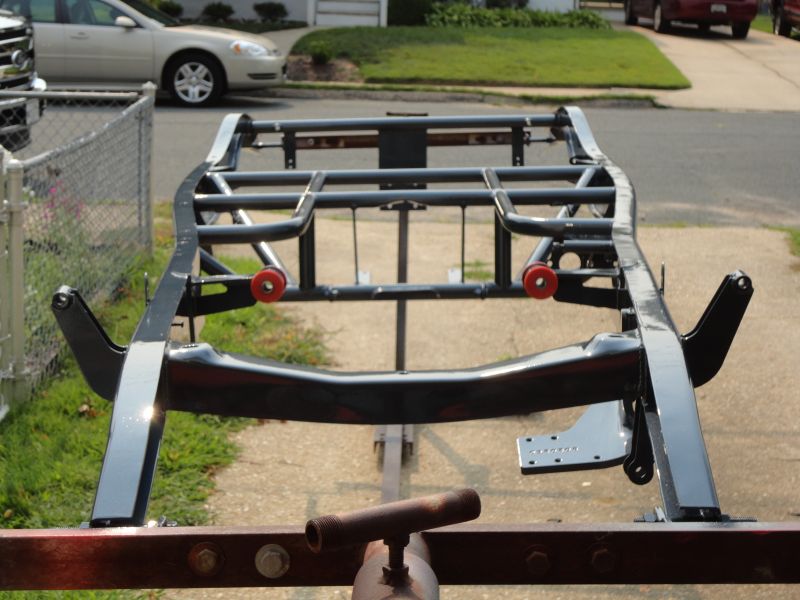
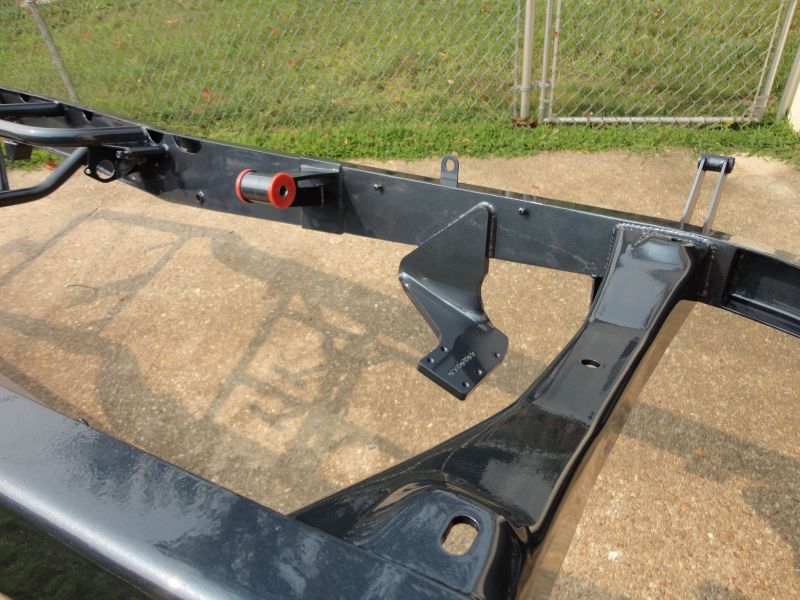
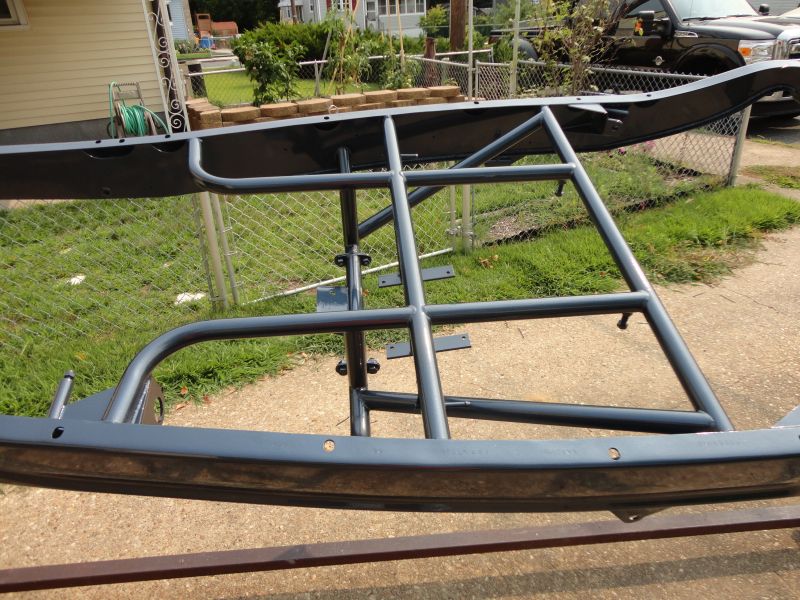
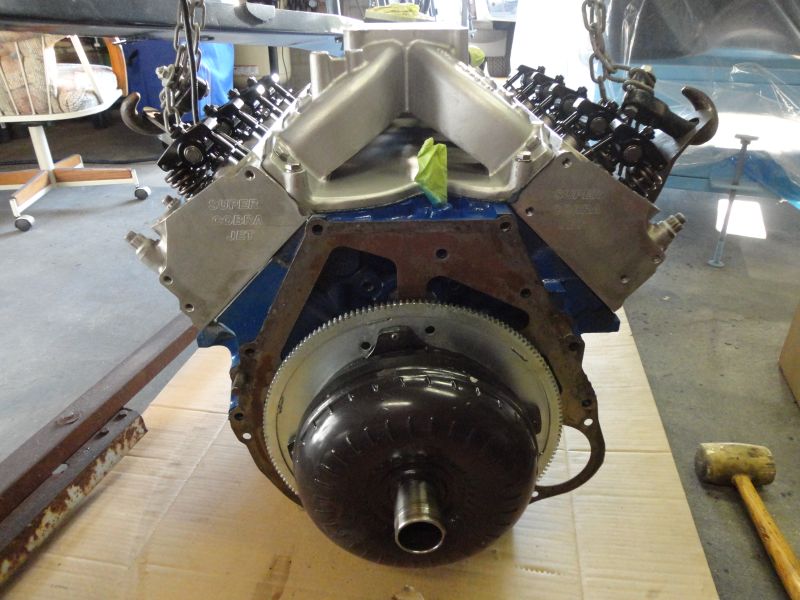
I finally attached the converter to the trans and the trans to the engine. I had an unusual circumstance, since Ford made 3 different crank pilots. There's a 1.250", 1.375", and 1.850". My crank has the 1.375" pilot hole, but the nice TCI Street Fighter 10" 3000 stall converter has a 1.250" snout. I had a 472 cubic inch engine in my brother's 47 Ford Truck, which had the 1.250" crank pilot hole that had this converter in it. I made a little bushing from scrap 3" exhaust pipe, since the walls are .0625", it filled the .125" gap I needed. It worked like a champ after filing it smooth. I did a trial fit before I put the converter in the transmission. She's all bolted up and ready to go. Here's a few pictures.
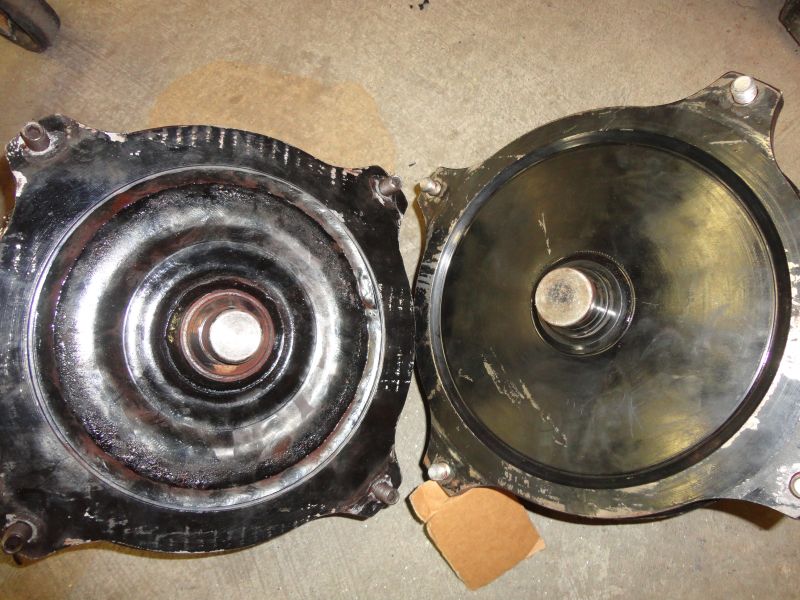
The 1.250" snout is on the left and a 1.375" is on the right. The one on the right is a PTC 4500 stall converter that I got in a transmission deal a few years ago. That's too much for me. :eek:
This is the small bushing I made for the snout of the converter from 3" exhaust pipe. It worked out pretty good. I didn't want to leave that .125" void in the crank pilot and rely on the 4 bolts to hold the converter "centered". Maybe it doesn't make a difference and maybe it does. I'd rather be good with the snug fit and center support on the crank as if I had the 1.375" snout on the converter.


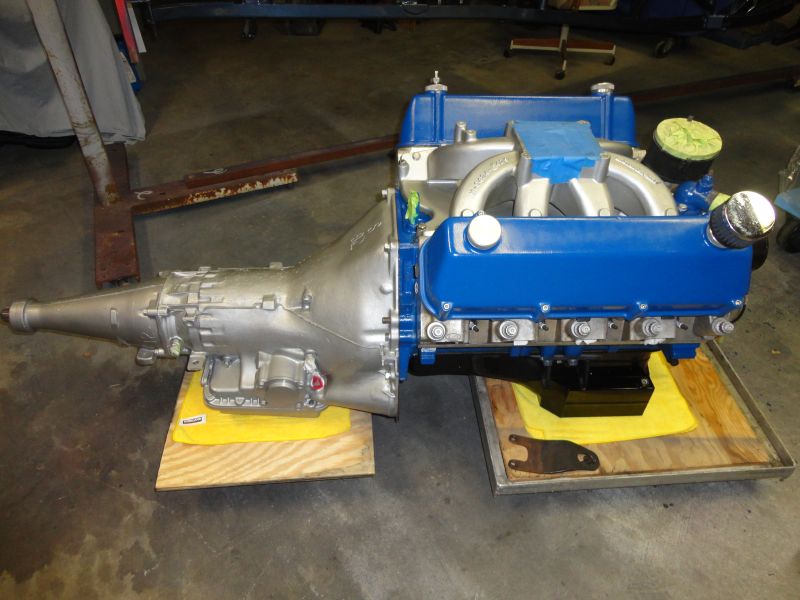
Valve covers touched up again with Old Ford Blue. All I have left is to paint the body and I can start putting this thing back together again.



Then I pulled the engine and trans....


Lots of space in the basement for parts...


The sandblasting was next after everything else was taken off...


Here's some of those parts painted. The color is Ford's Norsea Blue This is the color of my Crown Victoria and it has so much metal flake in it. This was my first time painting anything and it came out pretty good.


Here's a neat trick to paint the rims if you have the tires mounted already. I took out the needle valve and let the air out of the tire. Then I stepped on the sidewalls and inserted index cards between the tire and rim. I found it online.


Lastly, here's some pics of me getting my frame to the sandblasters and getting it back. I'm so glad I had them spray the primer after, because I wouldn't have been able to get to it for the past two weeks. I hoping to get it painted next weekend.


This is where I'm at as of today. My mission today is getting the engine off the engine stand and installing the converter into the freshly painted transmission. I'm also going to install the 3.50 gears in the differential too. I will post some pics of those when I'm all done. Next will be painting the body and then I can start putting it together. My Dad is going to come down to Baltimore from Jersey to give me a hand. He can't wait!!! Great to be back in the swing of things.
The frame is done.


I finally attached the converter to the trans and the trans to the engine. I had an unusual circumstance, since Ford made 3 different crank pilots. There's a 1.250", 1.375", and 1.850". My crank has the 1.375" pilot hole, but the nice TCI Street Fighter 10" 3000 stall converter has a 1.250" snout. I had a 472 cubic inch engine in my brother's 47 Ford Truck, which had the 1.250" crank pilot hole that had this converter in it. I made a little bushing from scrap 3" exhaust pipe, since the walls are .0625", it filled the .125" gap I needed. It worked like a champ after filing it smooth. I did a trial fit before I put the converter in the transmission. She's all bolted up and ready to go. Here's a few pictures.
The 1.250" snout is on the left and a 1.375" is on the right. The one on the right is a PTC 4500 stall converter that I got in a transmission deal a few years ago. That's too much for me. :eek:

This is the small bushing I made for the snout of the converter from 3" exhaust pipe. It worked out pretty good. I didn't want to leave that .125" void in the crank pilot and rely on the 4 bolts to hold the converter "centered". Maybe it doesn't make a difference and maybe it does. I'd rather be good with the snug fit and center support on the crank as if I had the 1.375" snout on the converter.


Valve covers touched up again with Old Ford Blue. All I have left is to paint the body and I can start putting this thing back together again.


patfromjersey- BBF CONTRIBUTOR

- Posts : 408
Join date : 2009-08-11
Age : 58
Location : Glen Burnie, MD
 Re: 1932 Ford Coupe Project
Looking good Pat. Glad to see you back, was wondering what happened to you. can't wait to see the finished car 
Mike R- Posts : 1381
Join date : 2009-08-05
Age : 63
Location : St Paul Mn
 Re: 1932 Ford Coupe Project
Nice to have you back Pat,missed ya brother. You did a great job on the parts ,keep up the good work and thx for the update.
bbf-falcon- Posts : 8995
Join date : 2008-12-03
Location : Jackson, Ohio
 Re: 1932 Ford Coupe Project
I missed you too Rick, Mike, and the site. So sad to hear about Harold. I will be here more often with the build. My new house here outside Baltimore has an office for my computer which I'm not on the internet so much anymore like in Jersey. That's why I'm like a stranger to family and friends. I'm back to the old school phone calls which I love!!! I will get more on the internet now. I'm just glad I'm able to get the pictures on my 1and1.com site again. I had a problem with that for months, but now I can post my pictures. I'm going to be sanding the body, doors, and trunk this weekend, to get ready for paint next weekend. It's coming together now. My Dad and I still think about you guys all the time. We will be at the some get together next year when she's all done. I can't wait to see the Kentucky people and Dan, Jon, James, Lem, Charlie, and the crew. 

patfromjersey- BBF CONTRIBUTOR

- Posts : 408
Join date : 2009-08-11
Age : 58
Location : Glen Burnie, MD
dfree383- BBF CONTRIBUTOR

- Posts : 14851
Join date : 2009-07-09
Location : Home Wif Da Wife.....
 Re: 1932 Ford Coupe Project
Looks like the coupe is coming together nicely. Stick with it.

Dark Horse of Apocalypse- Posts : 171
Join date : 2014-07-08
Location : North Central Ohio
 Re: 1932 Ford Coupe Project
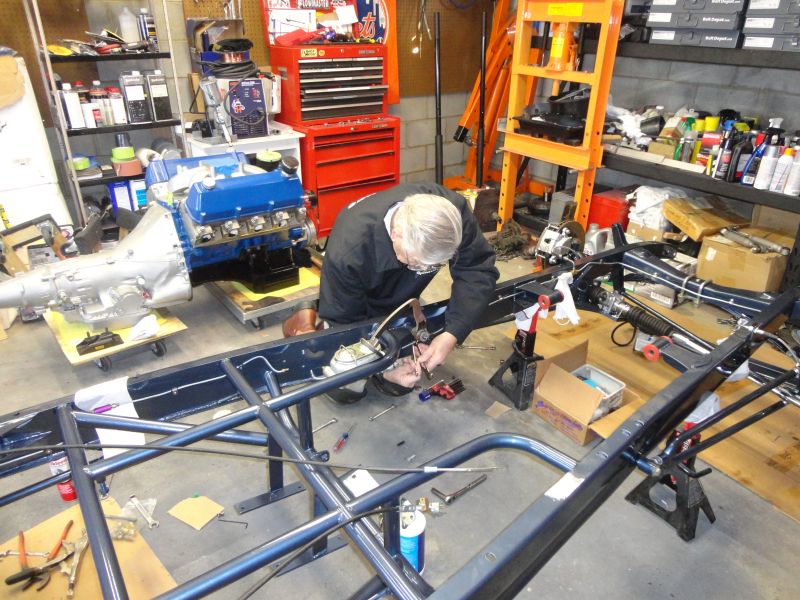
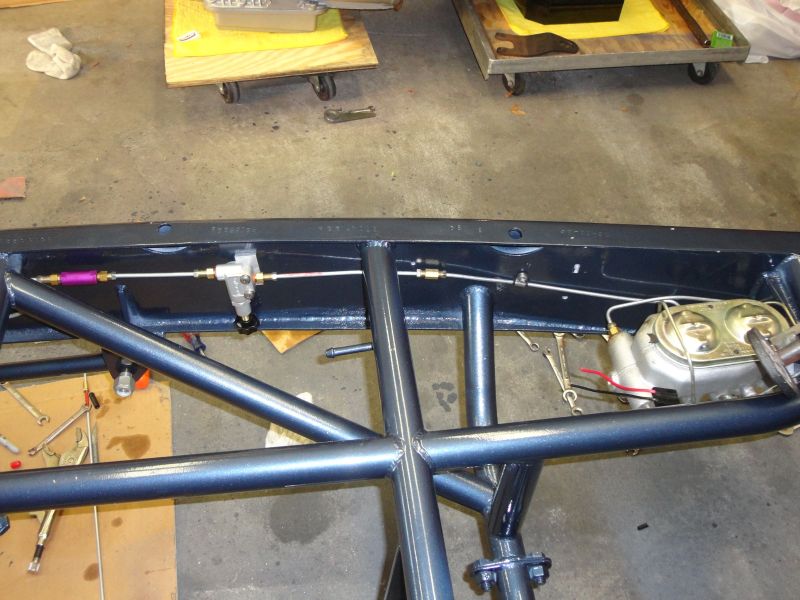
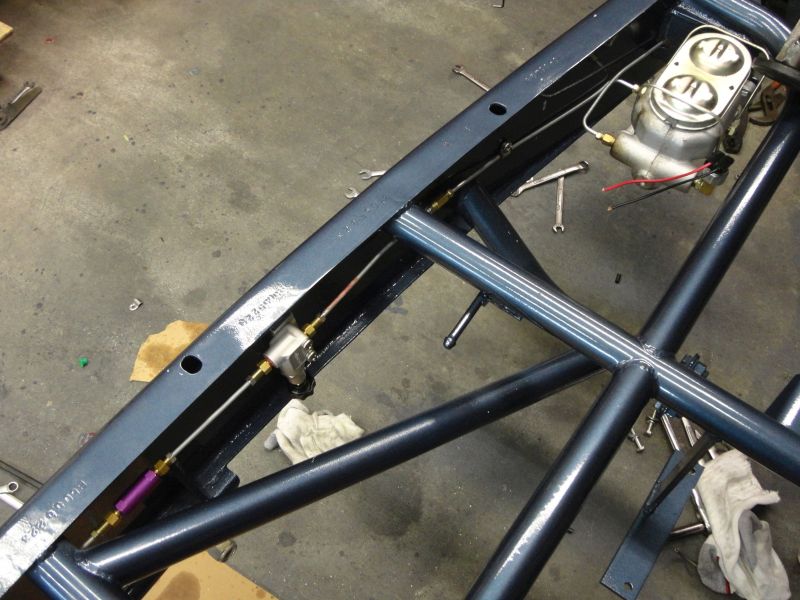
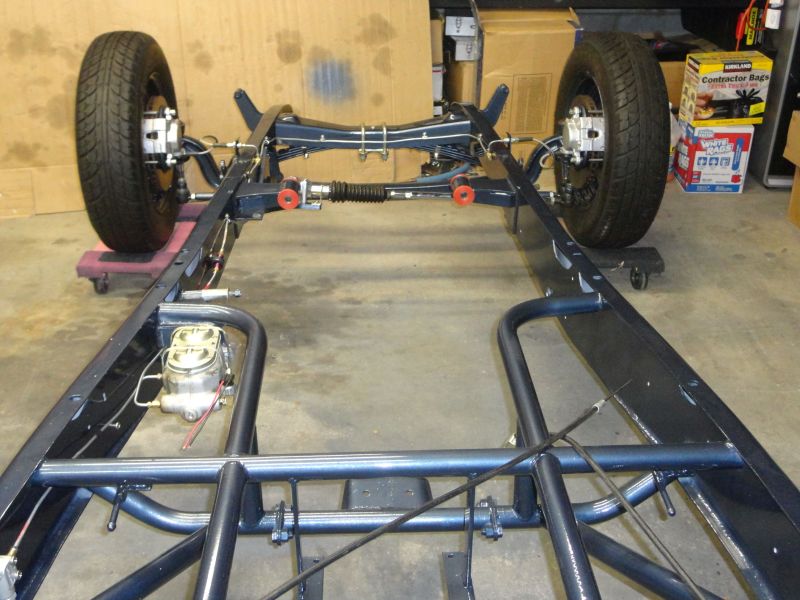
Here are some new pics of the 32 Build.....
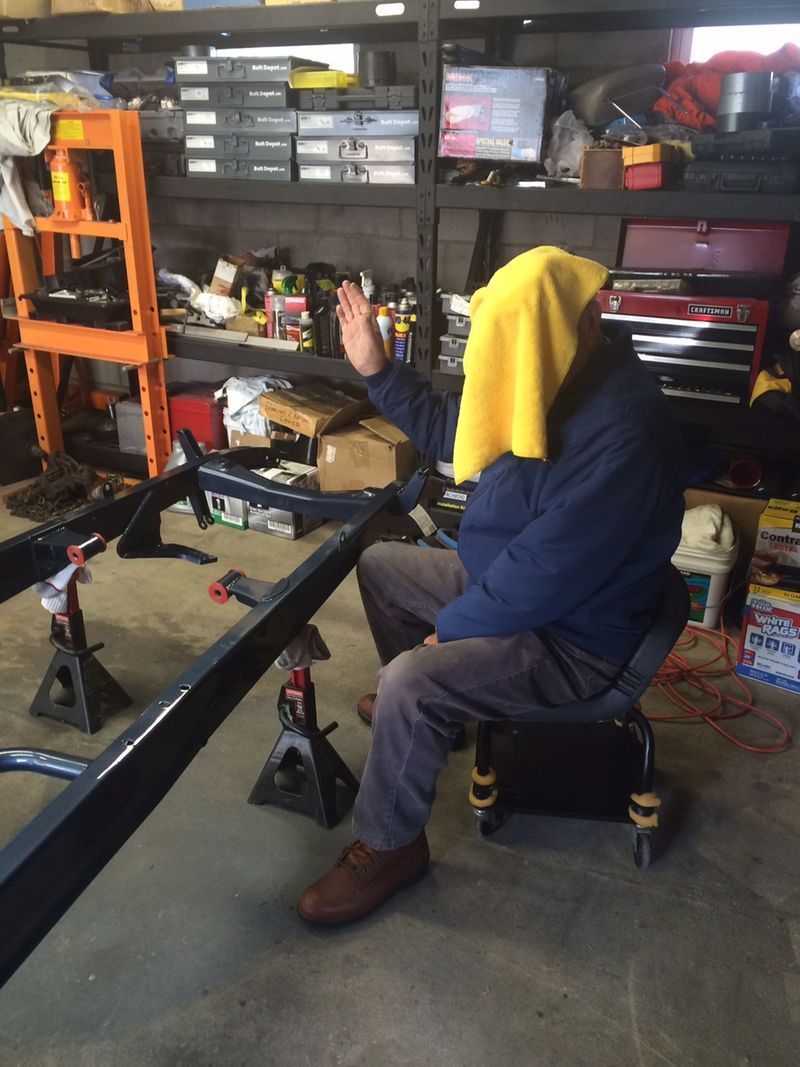
My Dad is so good he can put this car together blindfolded. hahahaha
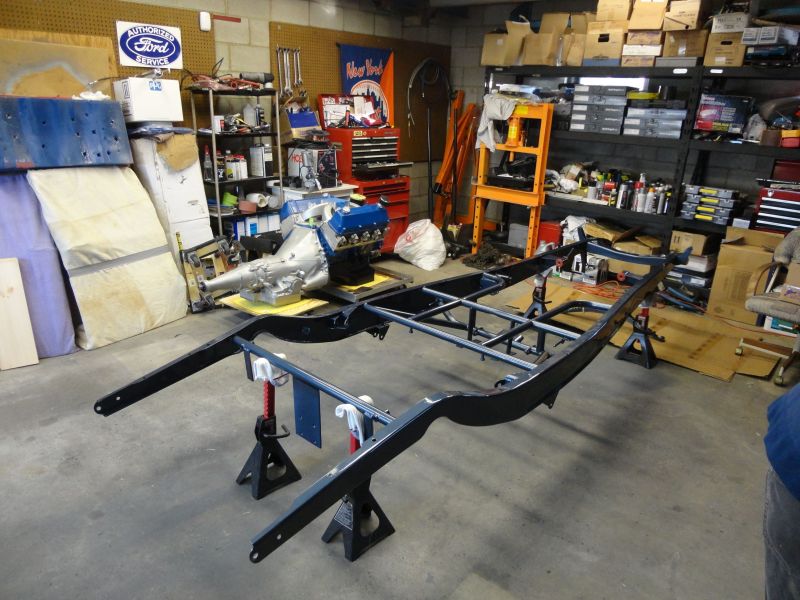
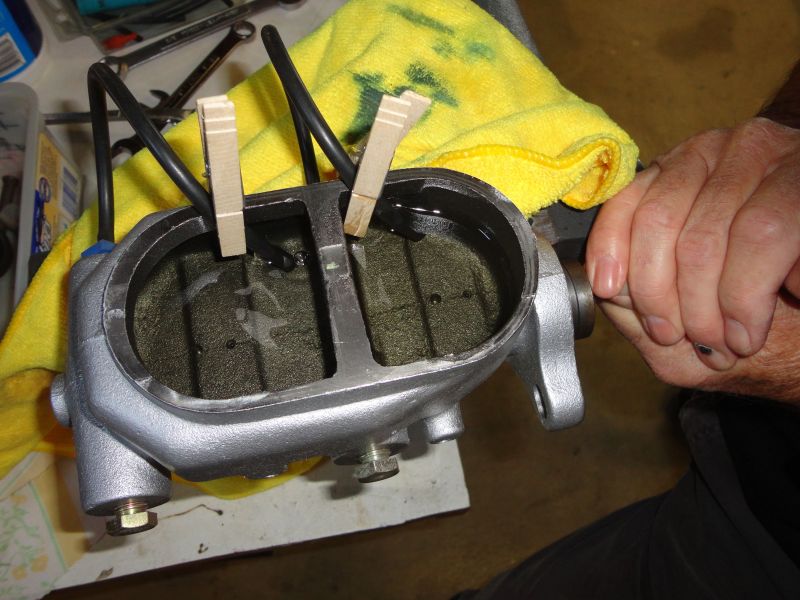
Dad bench bled the master cylinder.
While Dad was up front with the brake lines, I put in the rear suspension, housing, differential, axle seals/axles, and rear drum backing plates/drums.


My Dad at 75 years old still loves to turn the wrenches. I’m so blessed to have him helping me.


We were hoping to have the engine and trans in, but we were getting a constant leak from the brake proportioning valve. After we took it back off, we saw the flare for the rear brakes flattened out. The flare fitting looked good, so we’re not sure what happened. I have to order a new valve . Even though we only spent two days on the car, we put more together than we anticipated. I miss my Dad here already and he’s back in Jersey. Mom cooked some great meals here too and took care of the house. I'm one Blessed guy here. I bought a propane heater for the garage, so I'll be busy all winter. We used it this week and it was like summer in there.
Dad came back after Christmas and left today. I miss him already, but here are some pics from the past week.....


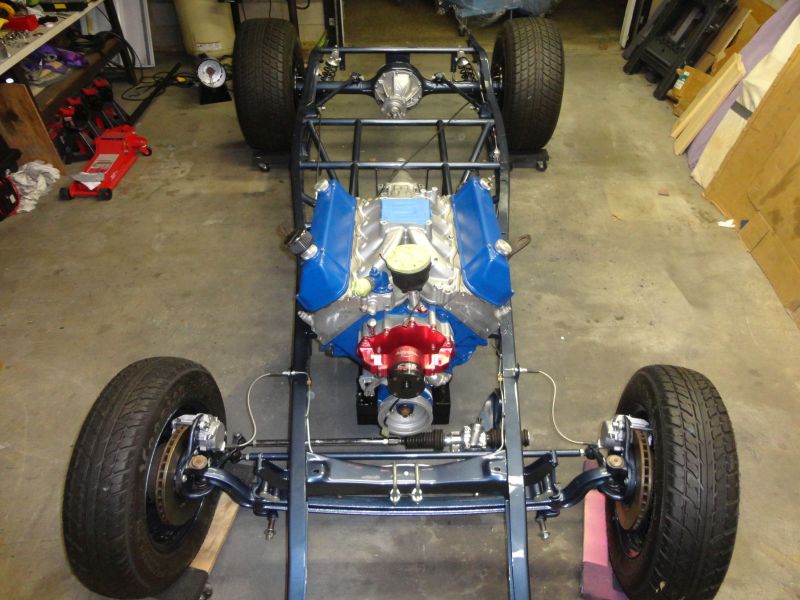

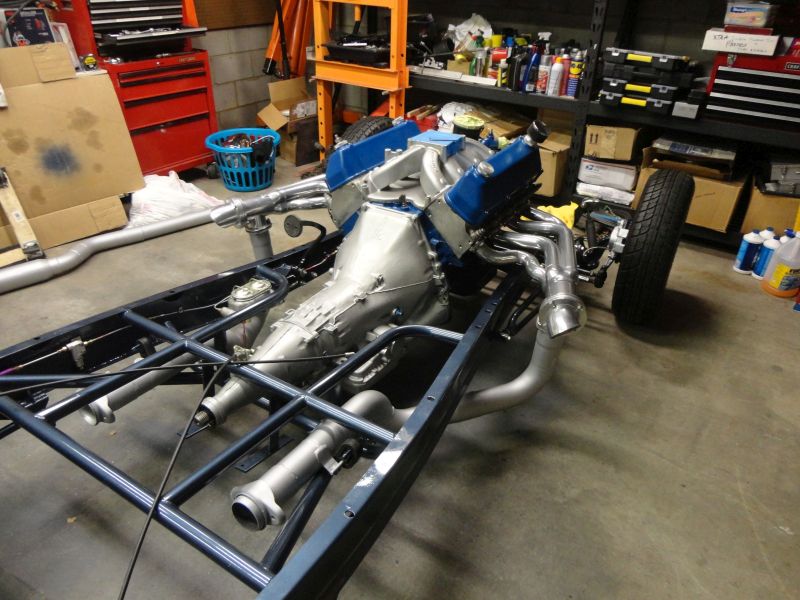
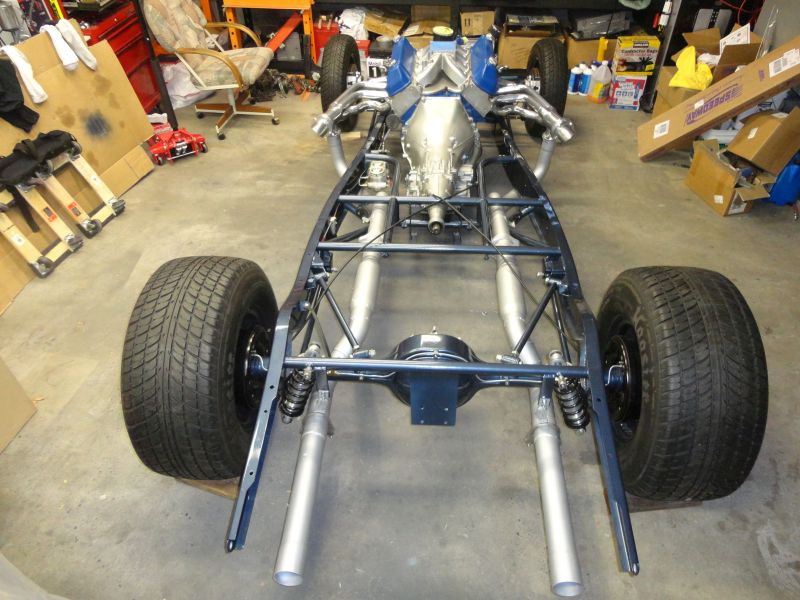


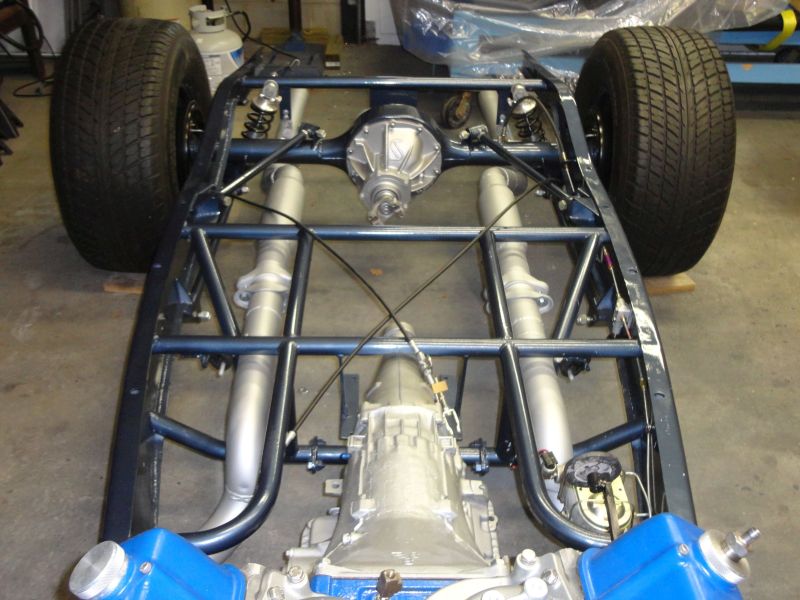
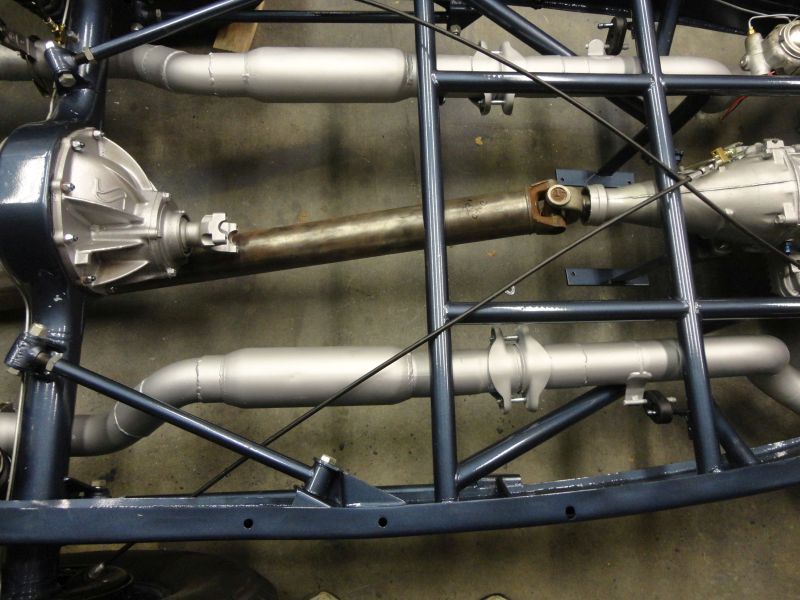
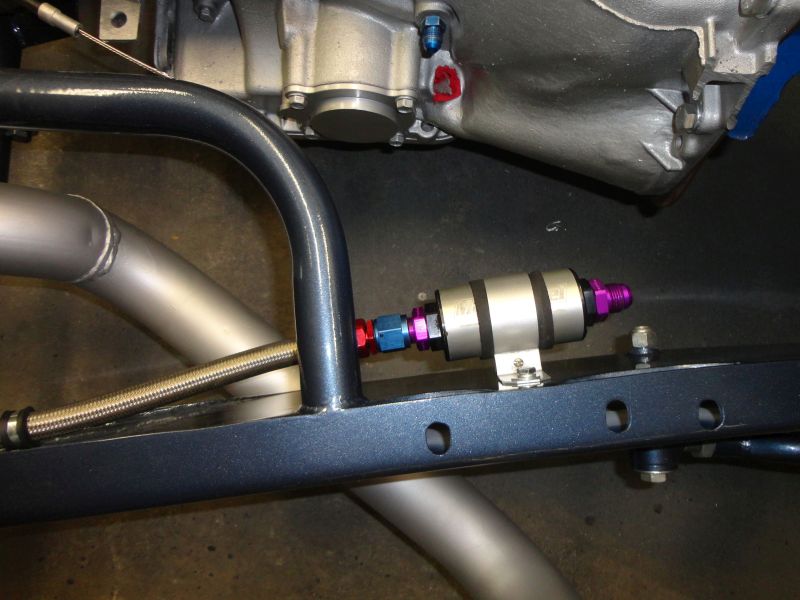

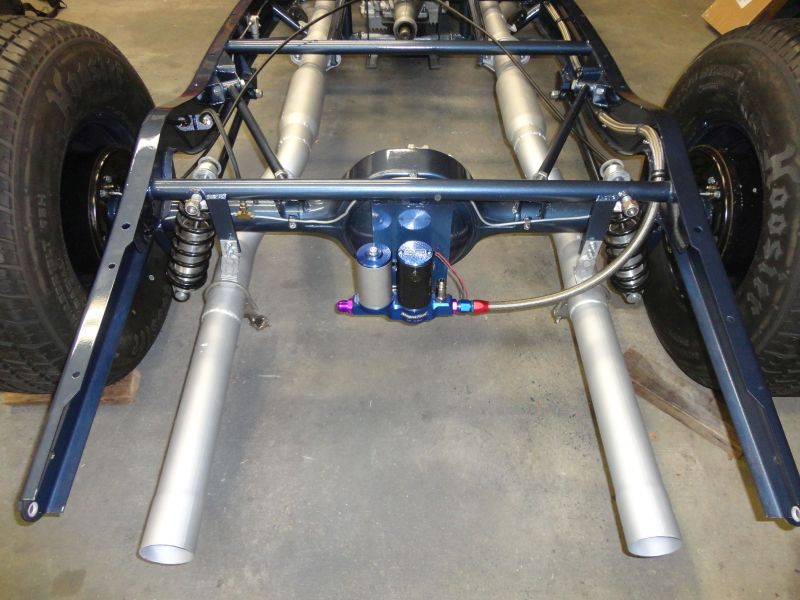
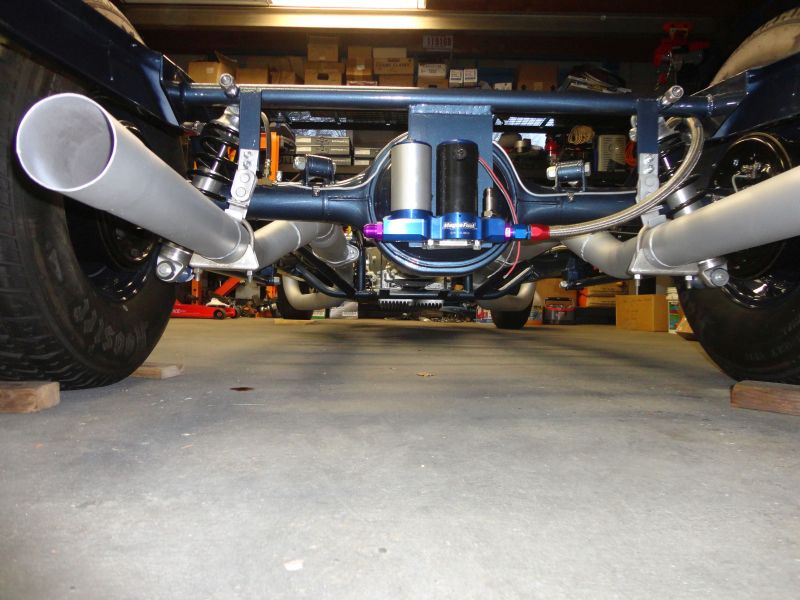
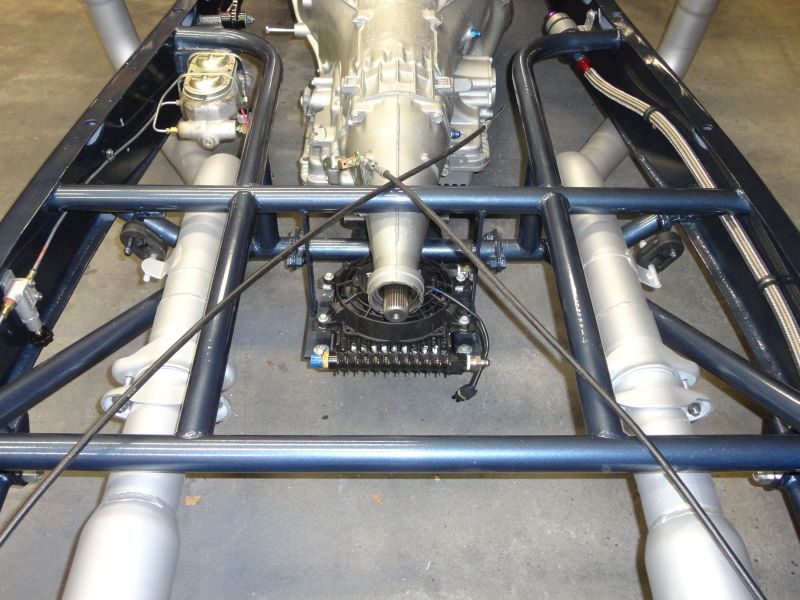
My Dad is so good he can put this car together blindfolded. hahahaha


Dad bench bled the master cylinder.

While Dad was up front with the brake lines, I put in the rear suspension, housing, differential, axle seals/axles, and rear drum backing plates/drums.


My Dad at 75 years old still loves to turn the wrenches. I’m so blessed to have him helping me.


We were hoping to have the engine and trans in, but we were getting a constant leak from the brake proportioning valve. After we took it back off, we saw the flare for the rear brakes flattened out. The flare fitting looked good, so we’re not sure what happened. I have to order a new valve . Even though we only spent two days on the car, we put more together than we anticipated. I miss my Dad here already and he’s back in Jersey. Mom cooked some great meals here too and took care of the house. I'm one Blessed guy here.
Dad came back after Christmas and left today. I miss him already, but here are some pics from the past week.....


Last edited by patfromjersey on January 5th 2015, 7:15 pm; edited 1 time in total

patfromjersey- BBF CONTRIBUTOR

- Posts : 408
Join date : 2009-08-11
Age : 58
Location : Glen Burnie, MD
 Re: 1932 Ford Coupe Project
Lookin great Pat as always.Good hearing from you and sounds like all are doing great.Take care of dad,because they are precious,i wish mine were still here w/me. Be careful w/the propane heater and get some fresh air now and then.Thanks for the pic's and keeping us posted. take care my friend. 
bbf-falcon- Posts : 8995
Join date : 2008-12-03
Location : Jackson, Ohio
 Re: 1932 Ford Coupe Project
I hope to get to see it make 50 passes some weekend at our Ford get together someday Pat. That's one off the chart cool builds!! I love it brother. Best of luck to you and your dad!! 


56Tbird- BBF CONTRIBUTOR

- Posts : 5260
Join date : 2008-12-02
Age : 65
Location : Hawesville,Ky.
 Re: 1932 Ford Coupe Project
Looking good Pat. Treasure these times with your dad, you're a lucky man. I waited all my life to be able to have memories like this with my dad, unfortunately his health deteriorated and we had to put him in a nursing home. Now my memories are of feeding him soft food and having the same conversation over and over. 


Mike R- Posts : 1381
Join date : 2009-08-05
Age : 63
Location : St Paul Mn
 Re: 1932 Ford Coupe Project
This project makes me proud to be a member of this forum.. well done and good luck with the rest!
 Re: 1932 Ford Coupe Project
Thank you Rick, Dan, Luke, and Mike. I can't wait until we can drive this baby to the next Bash you have. 

patfromjersey- BBF CONTRIBUTOR

- Posts : 408
Join date : 2009-08-11
Age : 58
Location : Glen Burnie, MD
 Re: 1932 Ford Coupe Project
It's been awhile since I last updated the project, but it's finally coming along nice. I had a rough year last year almost losing my Mother and it just took the drive out of me. It was my worst year ever. Dad and I bounced back and everything is much better now, so here's some updates that started last Fall, and up until last Saturday when he came back down to Maryland again. I can't wait to turn the key on this beast!

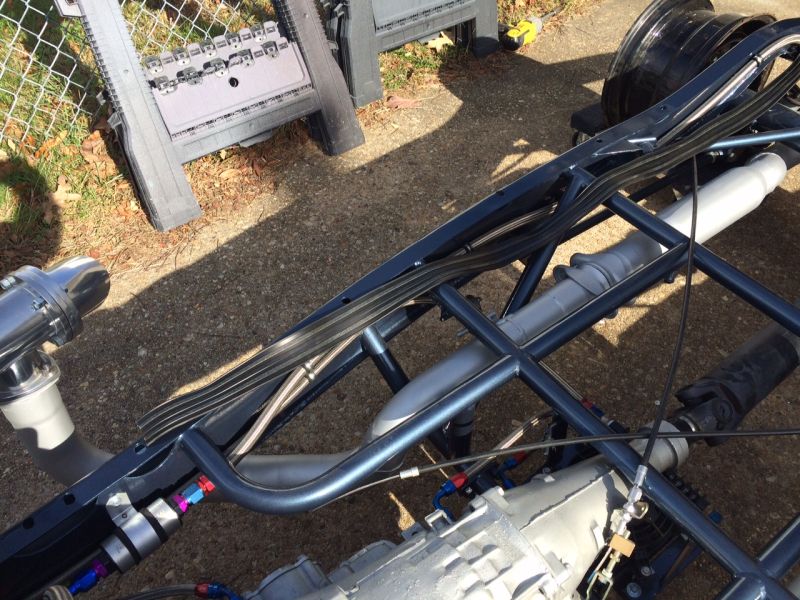
Here's the Bob Drake rubber insulator between the body and frame we used. Nice stuff! I used a strip of painters tape on each hole along the frame rail to know where I had to make a hole for the bolts.
I took off the rear wheels and bolted old steel rims I had on and put them on moving dollies to lower the rear as low as I could to mount the body.

I found the perfect center of gravity on the Coupe and used straps with my electric hoist to bring it up as high as I could. We only had two Irishman on this job. :HMMM:

Bringing both together....
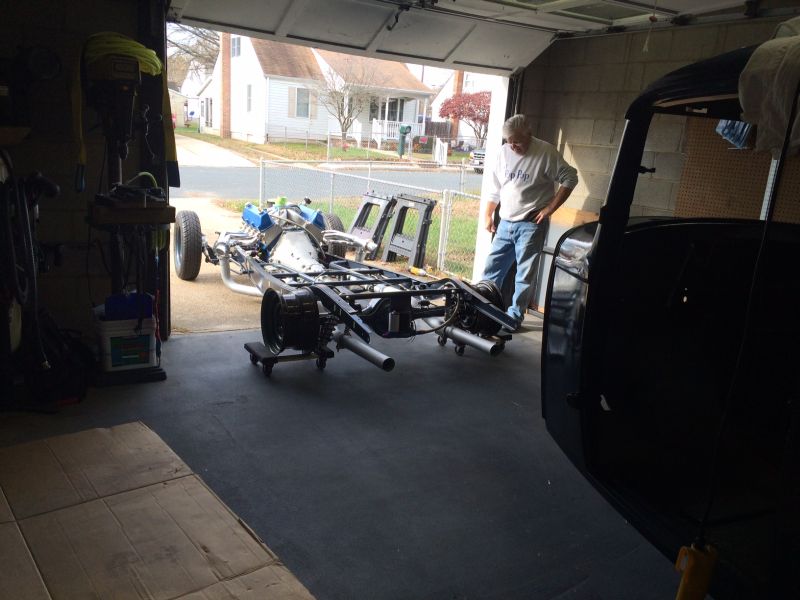

A match made in Heaven....


My Dad with his prize...


Up on jacks to continue.....

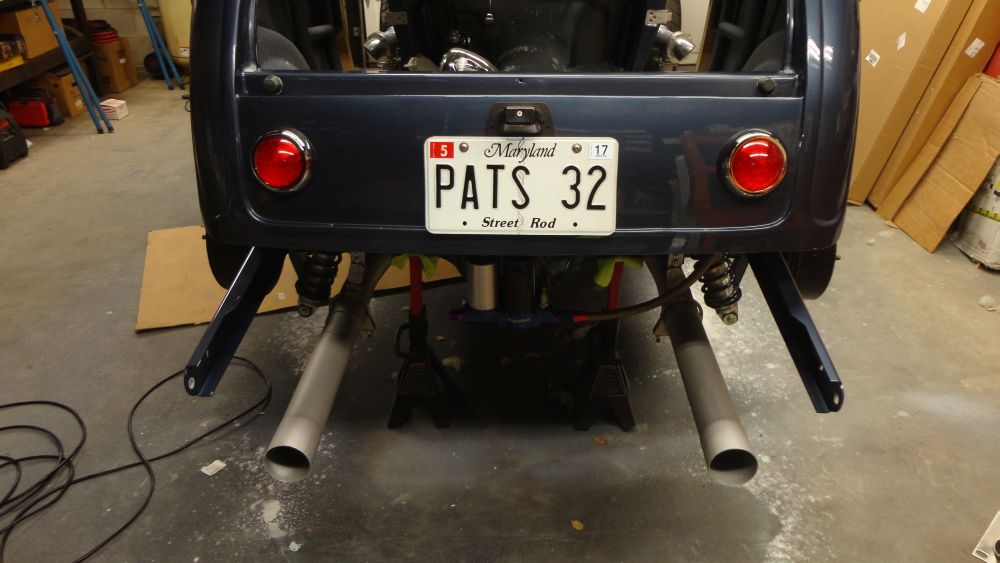
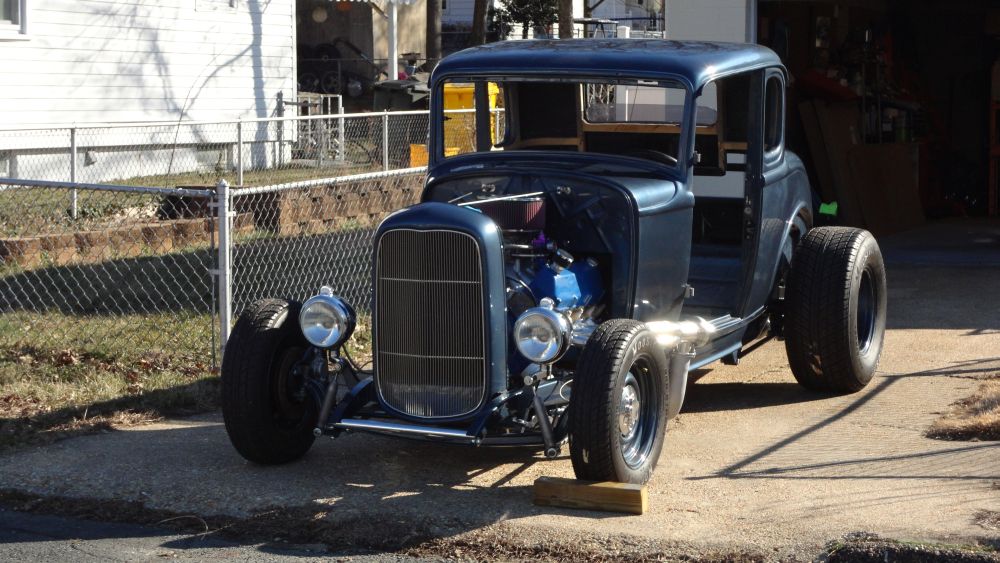
Painting my first car was the hardest thing I ever had to do, but I think it will look half way decent when I'm done. I wish I didn't try on this car, but the memories will last a lifetime. I'm glad Dad was there every step of the way, because it's no fun on your own. This is his car, not mine. I'll tell you what, wet sanding erases a multitude of clearcoat sins. LOL We wet sanded and buffed for the first 3 days Dad was here last week and the paint is looking much better than I expected. I still have a few more areas to work on after I pushed it out of the garage and into the sun last Saturday, before Dad left. I was able to take a few days off work too, to take advantage of him being here. We were both a nervous wreck wet sanding and not going into the blue. I hit a couple edges, but I can fix that with touch up paint I saved. We both never did anything like this before. I'm going to be putting in the Dynamat this weekend and start wiring her up. I also have the upper and lower radiator hoses and the single serpentine belt, so hopefully I have the lengths right. The alternator just fit inside the frame rails and I had to cut down the turnbuckle from my old 66 Fairlane deal to make it fit for belt replacement and tightening. We both couldn't stop staring at it until he left. I still have to wet sand and buff the doors and trunk. They are down in my basement, so I will get to them by next weekend. I have to go to Tampa FL for work meetings next week. Our goal is to start it up after Easter then run it over to the interior guy who did my bench seat already. This is our year for sure!!! Here's the pics! The color is Ford Norsea Blue, the same on my Crown Vic in the photos. I love this color and it's Ford!!

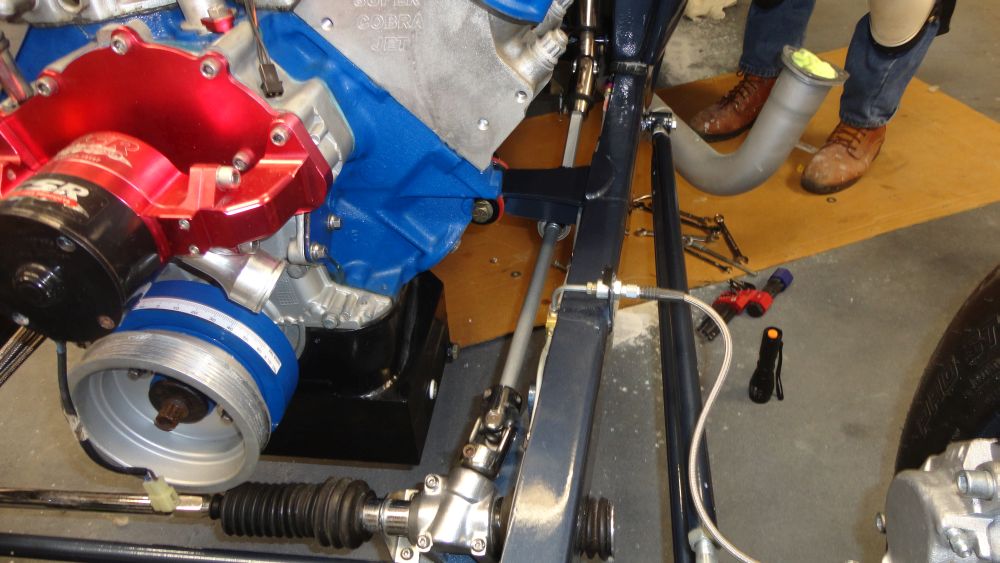
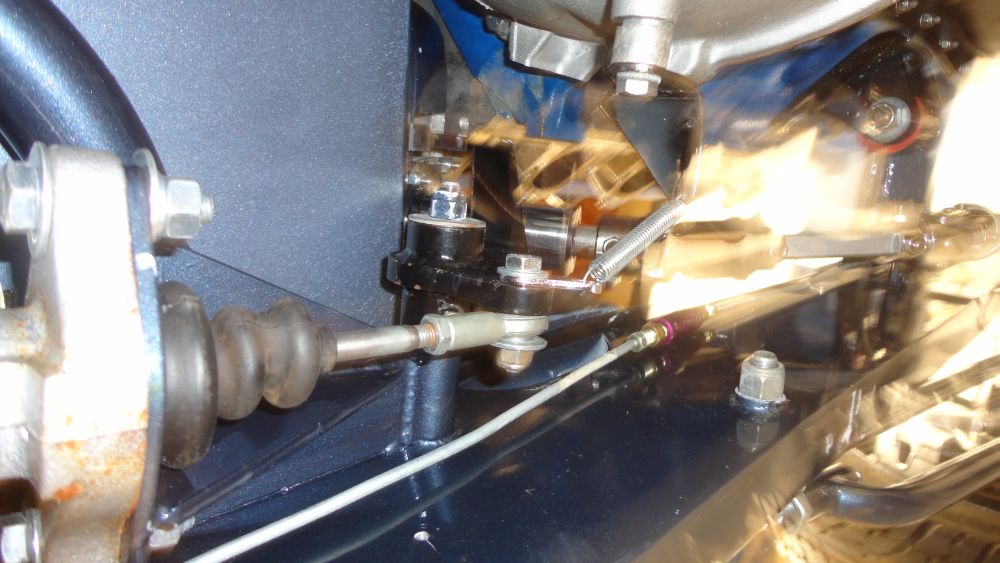
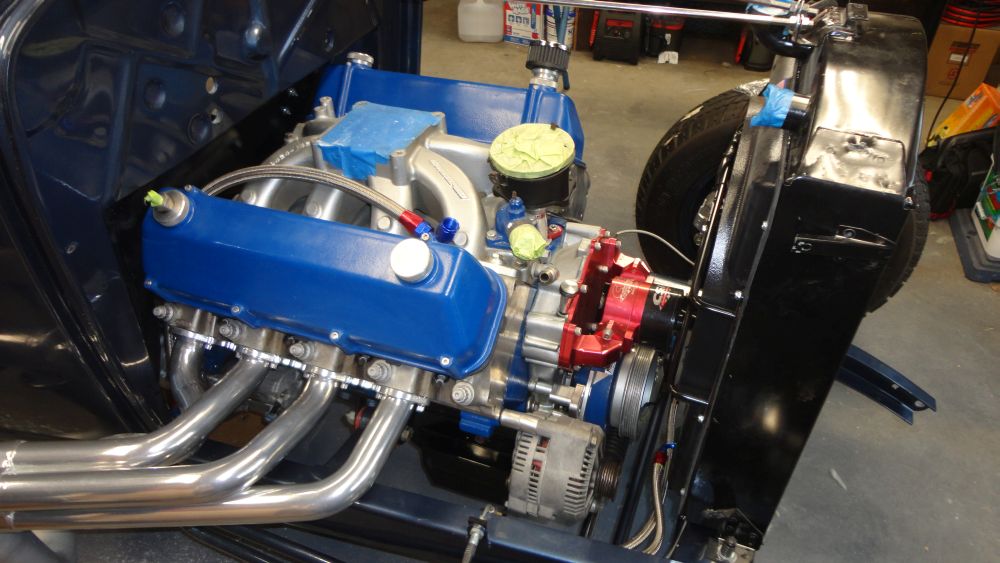




Here's the Bob Drake rubber insulator between the body and frame we used. Nice stuff! I used a strip of painters tape on each hole along the frame rail to know where I had to make a hole for the bolts.

I took off the rear wheels and bolted old steel rims I had on and put them on moving dollies to lower the rear as low as I could to mount the body.

I found the perfect center of gravity on the Coupe and used straps with my electric hoist to bring it up as high as I could. We only had two Irishman on this job. :HMMM:

Bringing both together....


A match made in Heaven....


My Dad with his prize...


Up on jacks to continue.....

Painting my first car was the hardest thing I ever had to do, but I think it will look half way decent when I'm done. I wish I didn't try on this car, but the memories will last a lifetime. I'm glad Dad was there every step of the way, because it's no fun on your own. This is his car, not mine. I'll tell you what, wet sanding erases a multitude of clearcoat sins. LOL We wet sanded and buffed for the first 3 days Dad was here last week and the paint is looking much better than I expected. I still have a few more areas to work on after I pushed it out of the garage and into the sun last Saturday, before Dad left. I was able to take a few days off work too, to take advantage of him being here. We were both a nervous wreck wet sanding and not going into the blue. I hit a couple edges, but I can fix that with touch up paint I saved. We both never did anything like this before. I'm going to be putting in the Dynamat this weekend and start wiring her up. I also have the upper and lower radiator hoses and the single serpentine belt, so hopefully I have the lengths right. The alternator just fit inside the frame rails and I had to cut down the turnbuckle from my old 66 Fairlane deal to make it fit for belt replacement and tightening. We both couldn't stop staring at it until he left. I still have to wet sand and buff the doors and trunk. They are down in my basement, so I will get to them by next weekend. I have to go to Tampa FL for work meetings next week. Our goal is to start it up after Easter then run it over to the interior guy who did my bench seat already. This is our year for sure!!! Here's the pics! The color is Ford Norsea Blue, the same on my Crown Vic in the photos. I love this color and it's Ford!!


patfromjersey- BBF CONTRIBUTOR

- Posts : 408
Join date : 2009-08-11
Age : 58
Location : Glen Burnie, MD
 Re: 1932 Ford Coupe Project
I like it. It has just the right amount of bling and is flashy but low key at the same time.
supervel45- Posts : 4499
Join date : 2013-09-04
Page 4 of 5 •  1, 2, 3, 4, 5
 Similar topics
» Cool 1932 Ford Video
» 1989 Ford Mustang 521 BBF Coupe
» bad azz XA Coupe
» 1962 Ford Fairlane 25.5 Project
» New 57 Ford Project Should we go big block or small block? Pics added
» 1989 Ford Mustang 521 BBF Coupe
» bad azz XA Coupe
» 1962 Ford Fairlane 25.5 Project
» New 57 Ford Project Should we go big block or small block? Pics added
Page 4 of 5
Permissions in this forum:
You cannot reply to topics in this forum